
Summary
I built an inexpensive shelf in my garage to hold all of the lumber and scrap wood I have accumulated over the years. The shelf holds all of my lumber in a condensed space and was quick to build.
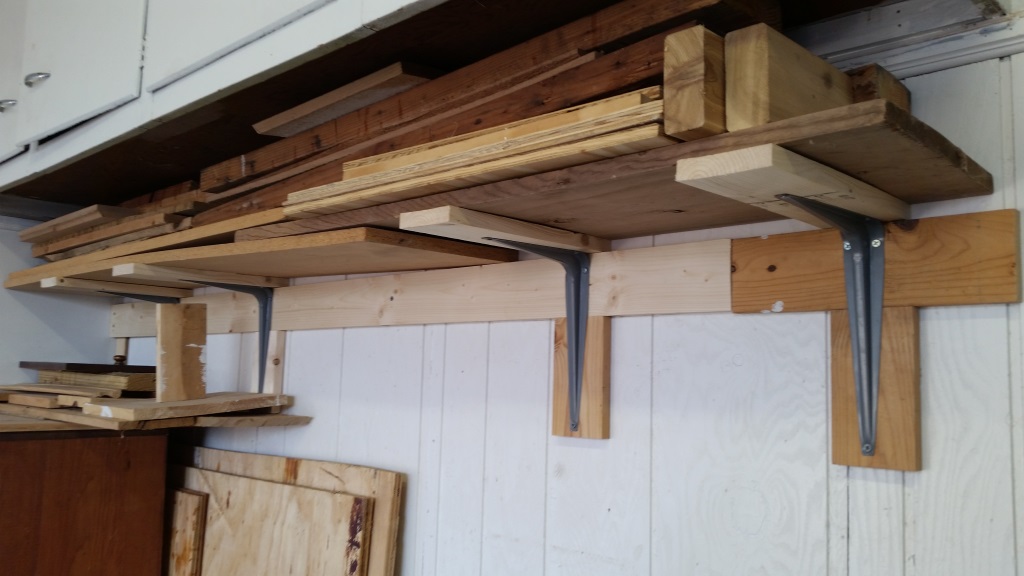
Garage Wood Storage Shelf Finished
Background
As a a very amateur carpenter I have built up a decent accumulation of lumber and scrap wood over the years. The saying goes that one man’s scrap is another man’s treasure. Of course in this case my own scrap is my own treasure and I needed to take back control over the garage so I could park in it again.
Design of the Shelf
I wish I could say that this design was engineered to stand the test of time, but it was more driven by expediency and cheapness. First, I bought the shelf brackets. Then, because I was concerned about my ability to get all three screws from the bracket into a stud I decided to build a backing structure to mount the brackets to. (My research is inconclusive but it might be appropriate to call that piece a ledger.) However, I was feeling a bit too cheap to buy 2x4s so I bought a cheap 1×4 and crossed my fingers that it would work. I mostly used leftovers screws from other projects, but did buy some screws to mount the 1×4 to the shelf which turned out to be a bit too long to mount the top shelf.
The shelf is designed to hold up to an 8 foot board, but the shelf itself is only about 6 feet long and fits underneath existing cabinets in the garage. I have considered building storage near the roof of the garage to hold longer boards, but at the moment I just have a large number of shorter boards that need to go somewhere. One issue constraining how deep I could build the shelf was that I didn’t want to interrupt the limited walking space in our small garage.
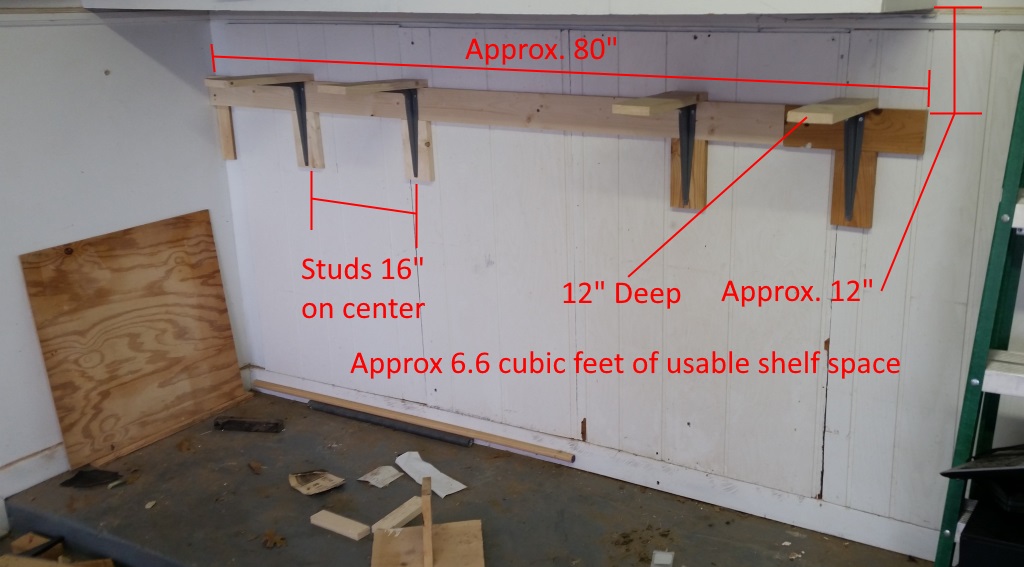
Garage Shelf Finished Annotated
Tools and Materials
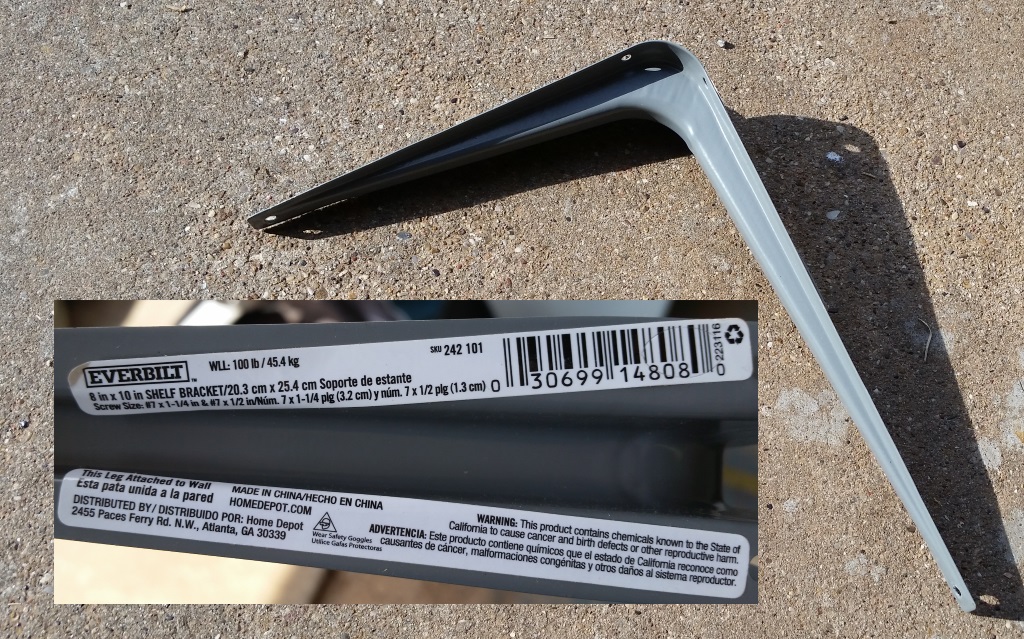
Garage Shelf Bracket Detail
| line | Description | Supplier | Unit Cost | Units | Ext. Cost |
|---|---|---|---|---|---|
| 1 | Everbilt 8 in. x 10 in. Gray Shelf Bracket | Home Depot | $1.78 | 4 | $7.12 |
| 2 | 1"x4"x6' Whitewood Board | Lowes | $4.73 | 2 | $9.46 |
| 3 | #8×2" Wood Screws | ||||
| 4 | #6×1" Wood Screws | ||||
| 5 | #6×3/4" Wood Screws | ||||
| Total | $16.58 |
You’ll notice that I also used some 1″x4″ scrap when building the ledger. I think there was actually enough 1″4″ without me needing to do that, but it was already the right length so I went with it. I also didn’t include the cost of screws because you don’t need that many, and if you are anything like me you may have some lying around. If you do buy them cheaply, I wouldn’t expect to need more than $5 worth.
| line | Description | New? | Link (If applicable) |
|---|---|---|---|
| 1 | Black and Decker Drill with Phillips Driver | ||
| 2 | Harbor Freight Flush Cut Saw | Harbor Freight | |
| 3 | Pencil |
Not listed in the above table are a spare set of hands to hold things in place while you screw them down. I required a little bit of assistance to hold the ledger in place as well as the shelf brackets in place while screwing them in.
Constructing the Shelf
I started by measuring a height for the shelf and marking out all of the stud locations for the ledger. I already knew where one stud was from some repair I did on the paneling. From there I measured 16″ increments to mark all of the stud centers on the wall which I would be screwing the ledger into. I was able to hit six studs with the ledger. I used a level to make sure it was level before going to town with the screws.
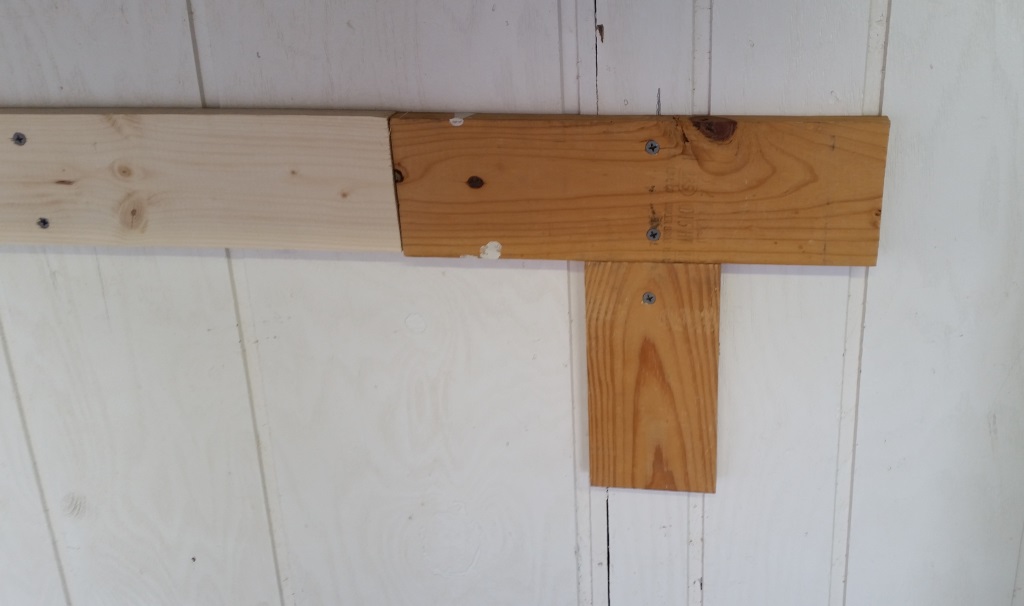
Garage Shelf Ledger Closeup
In the above closeup you can see that I screwed the ledger down with two #8×2″ wood screws to each stud. I also added a piece below where the bracket would be screwing to and held it in with one #8×2″ wood screw. A second screw goes all the way through the shelf bracket. The almost complete ledger is shown below. You can see in the corner I added a 1/2″ plywood spacer to match the paneling.
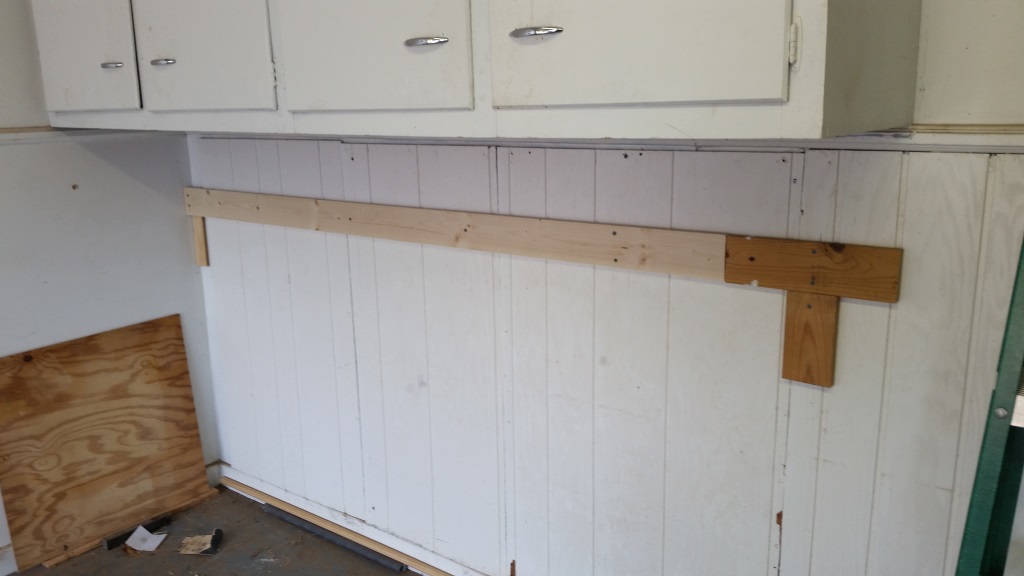
Garage Shelf Ledger Almost Complete
I then cut out the pieces of 1″x4″ for the top of the shelf which would be screwed into the shelf bracket. These were cut at 12″ apiece with my flush cut saw because I hate getting out power tools when the kids are around.
Next, I held up the bracket and shelf top by hand to the ledger in order to mark screw holes to screw the top of the shelf to the bracket. I then attached the shelf top to the bracket with #6×3/4″ wood screws. Finally I screwed the bracket (with the shelf top already attached) to the ledger. I don’t have a picture of this step, but the final product can be seen following.
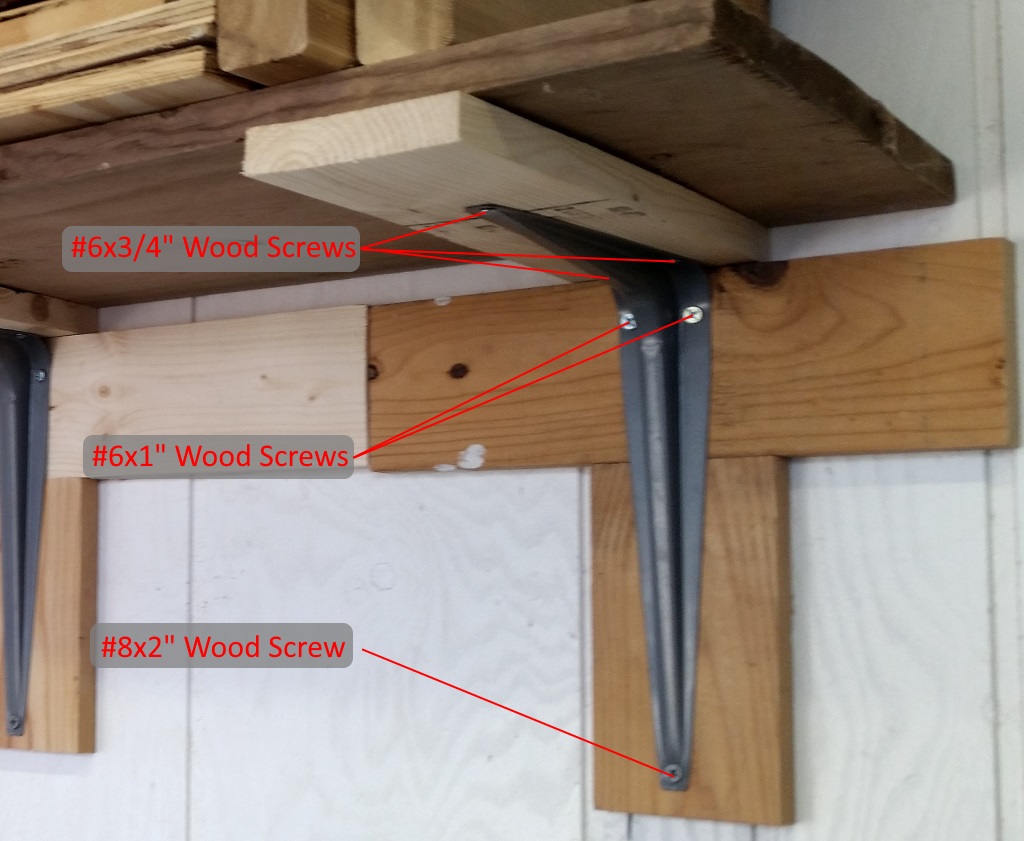
Garage Shelf Bracket Screws Annotated
At that point the shelf was completed.
Garage Shelf Finished Annotated
Conclusion
Garage Wood Storage Shelf Finished
The good news is that the scrap lumber and plywood has now been consolidated onto the shelf and tucked into a nice contained corner of the garage. The shelf seems strong and doesn’t show any sign of warping with the full load over the last week. The overall build time for the shelf was under two hours which was great.
The bad news is that its full! I am currently weighing my options as to whether to add a second row of shelving or just throw some scrap away already. I know which way my wife is leaning…
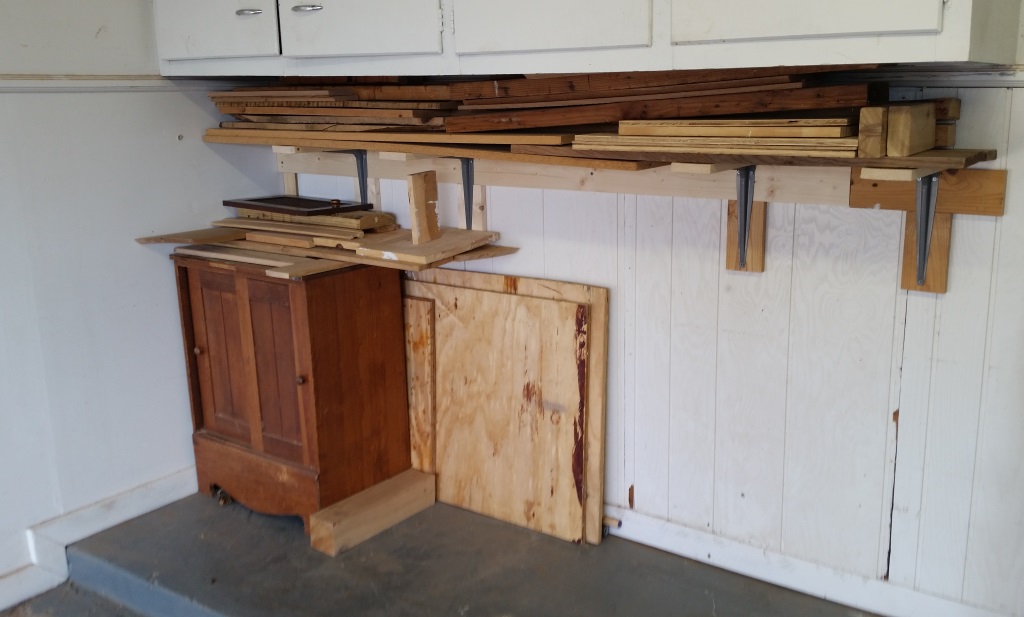
Garage Shelf Finished Loaded