
Summary
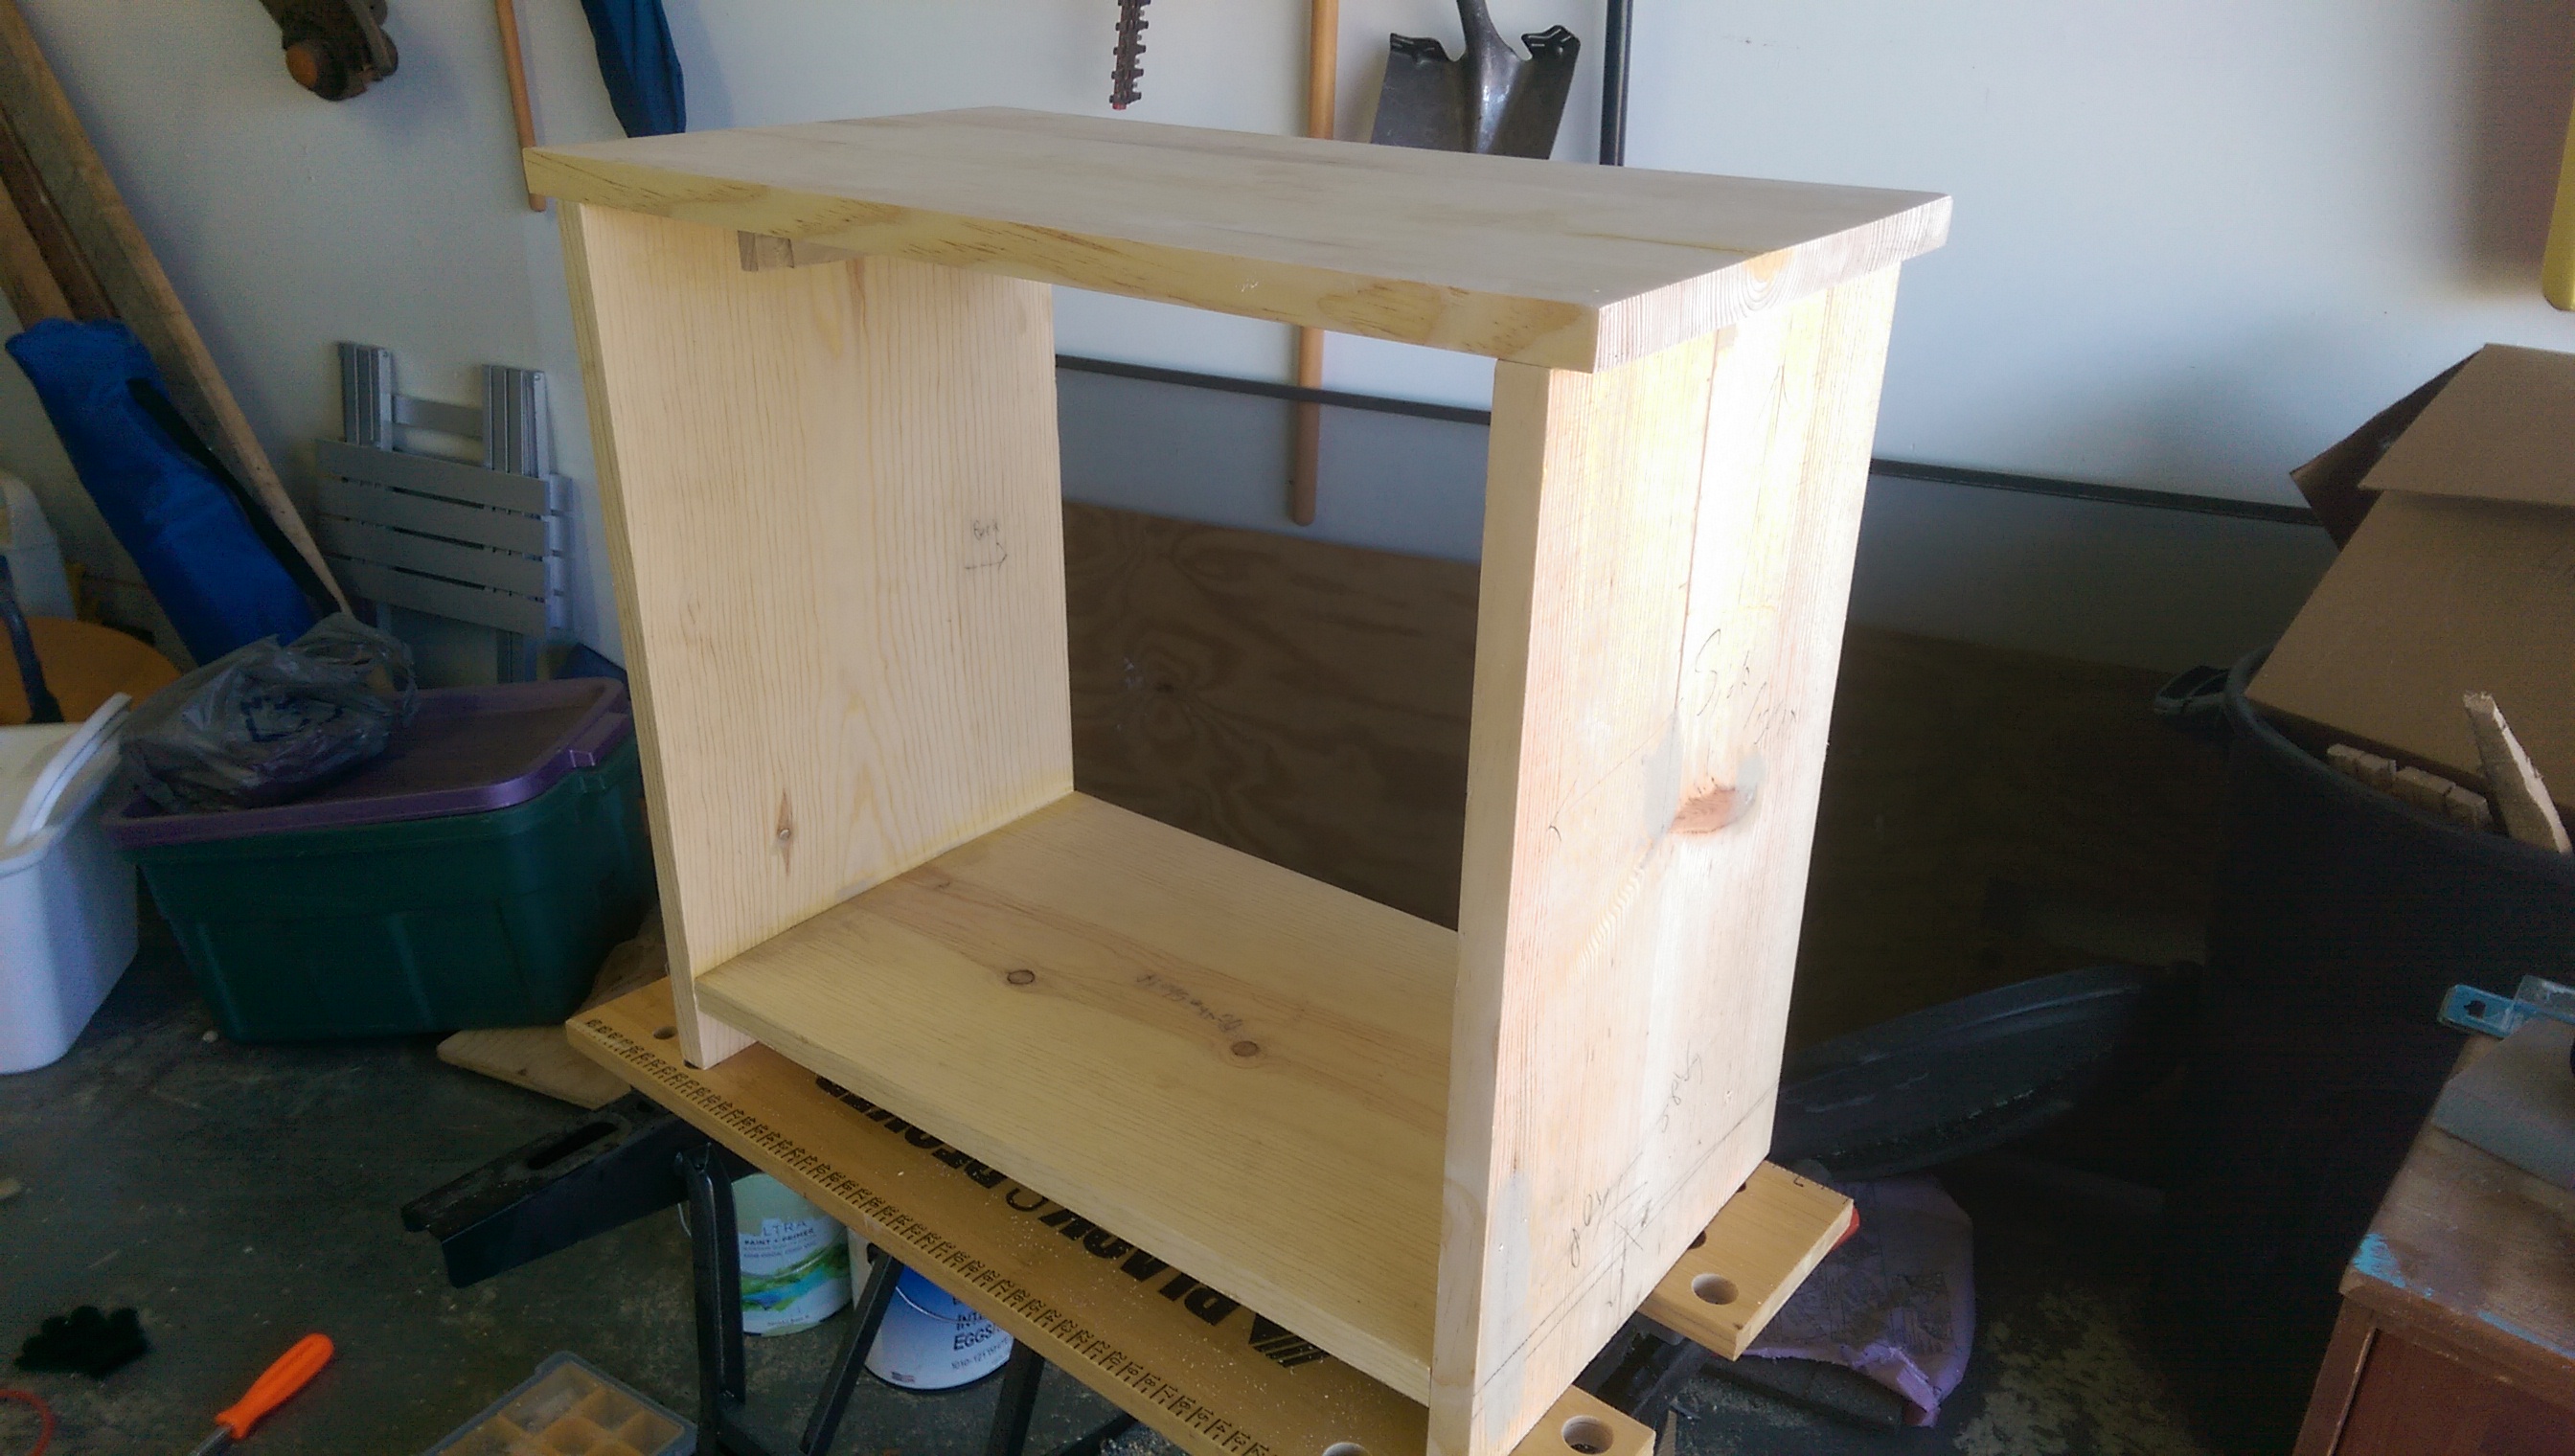
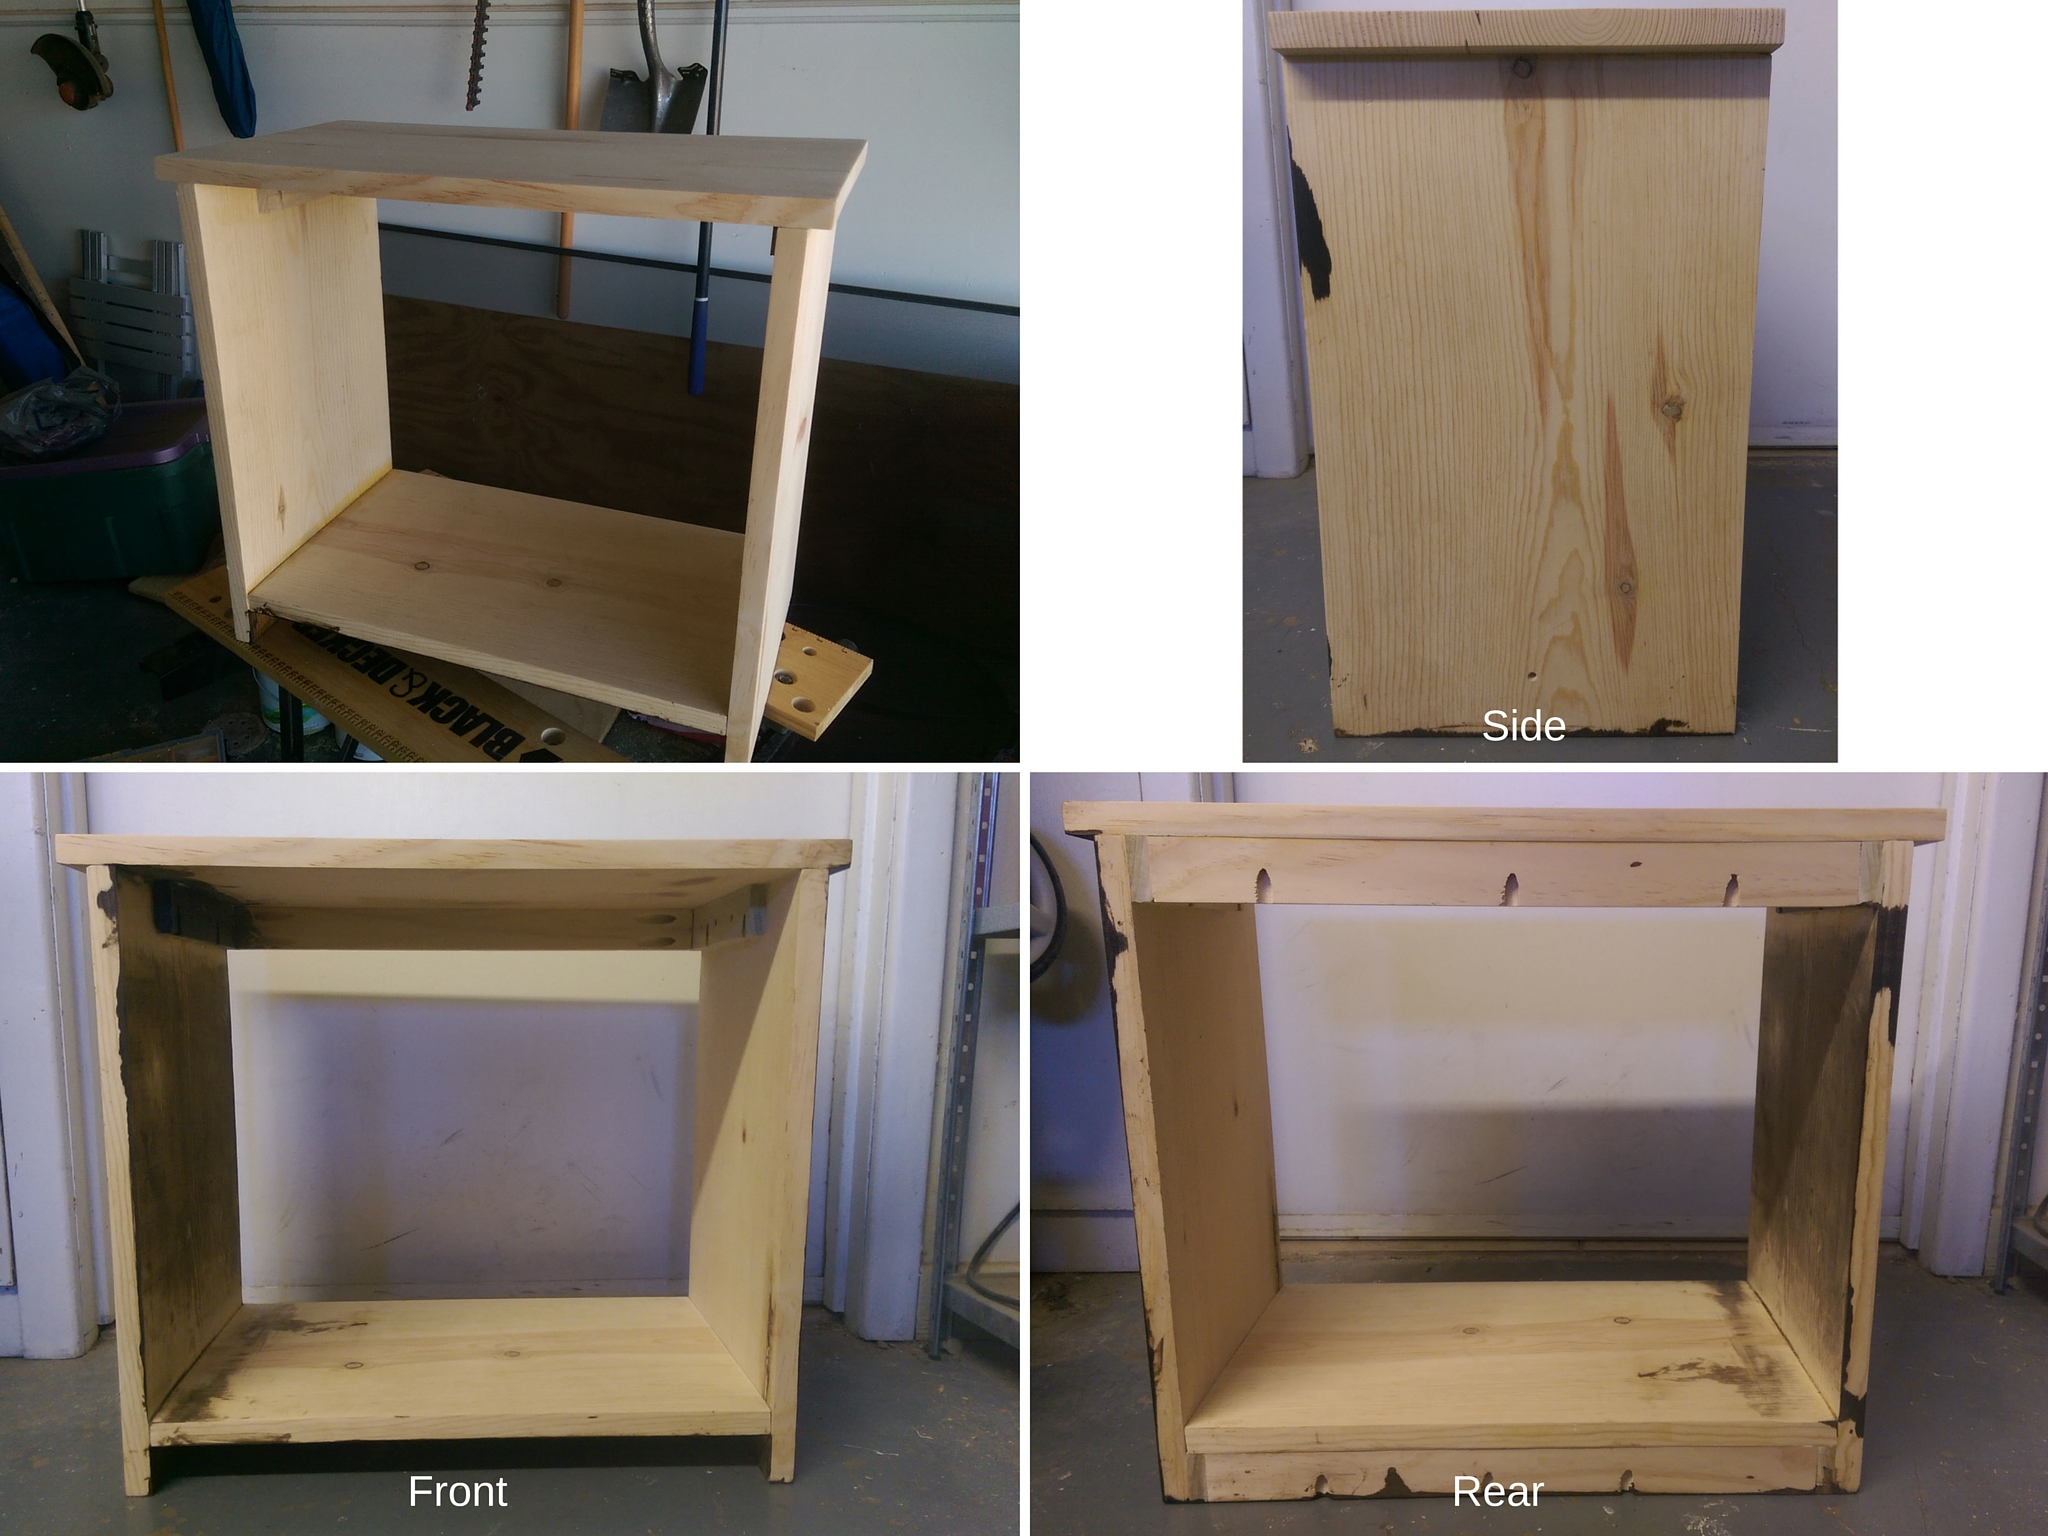
I wanted a night stand to put by my son’s toddler bed. I did see a couple of night stands I could buy and assemble. However, I thought this would be a perfect foray into furniture building. After all, it should be very small, doesn’t need to be perfect, and should have very low material costs. I will cover the design and construction of the night stand in this post. A second post will discuss the staining and finishing of the night stand. Here is a picture of the assembled night stand prior to staining and finishing.

Assembled Toddler Night Stand
Requirements
The night stand needs to be no taller than the rail on my son’s toddler bed. We also wanted it to be large enough to hold a small lamp and give my son a place to put his favorite books by his bed. Here is a picture of the space, with the rough dimensions we wanted to fill.
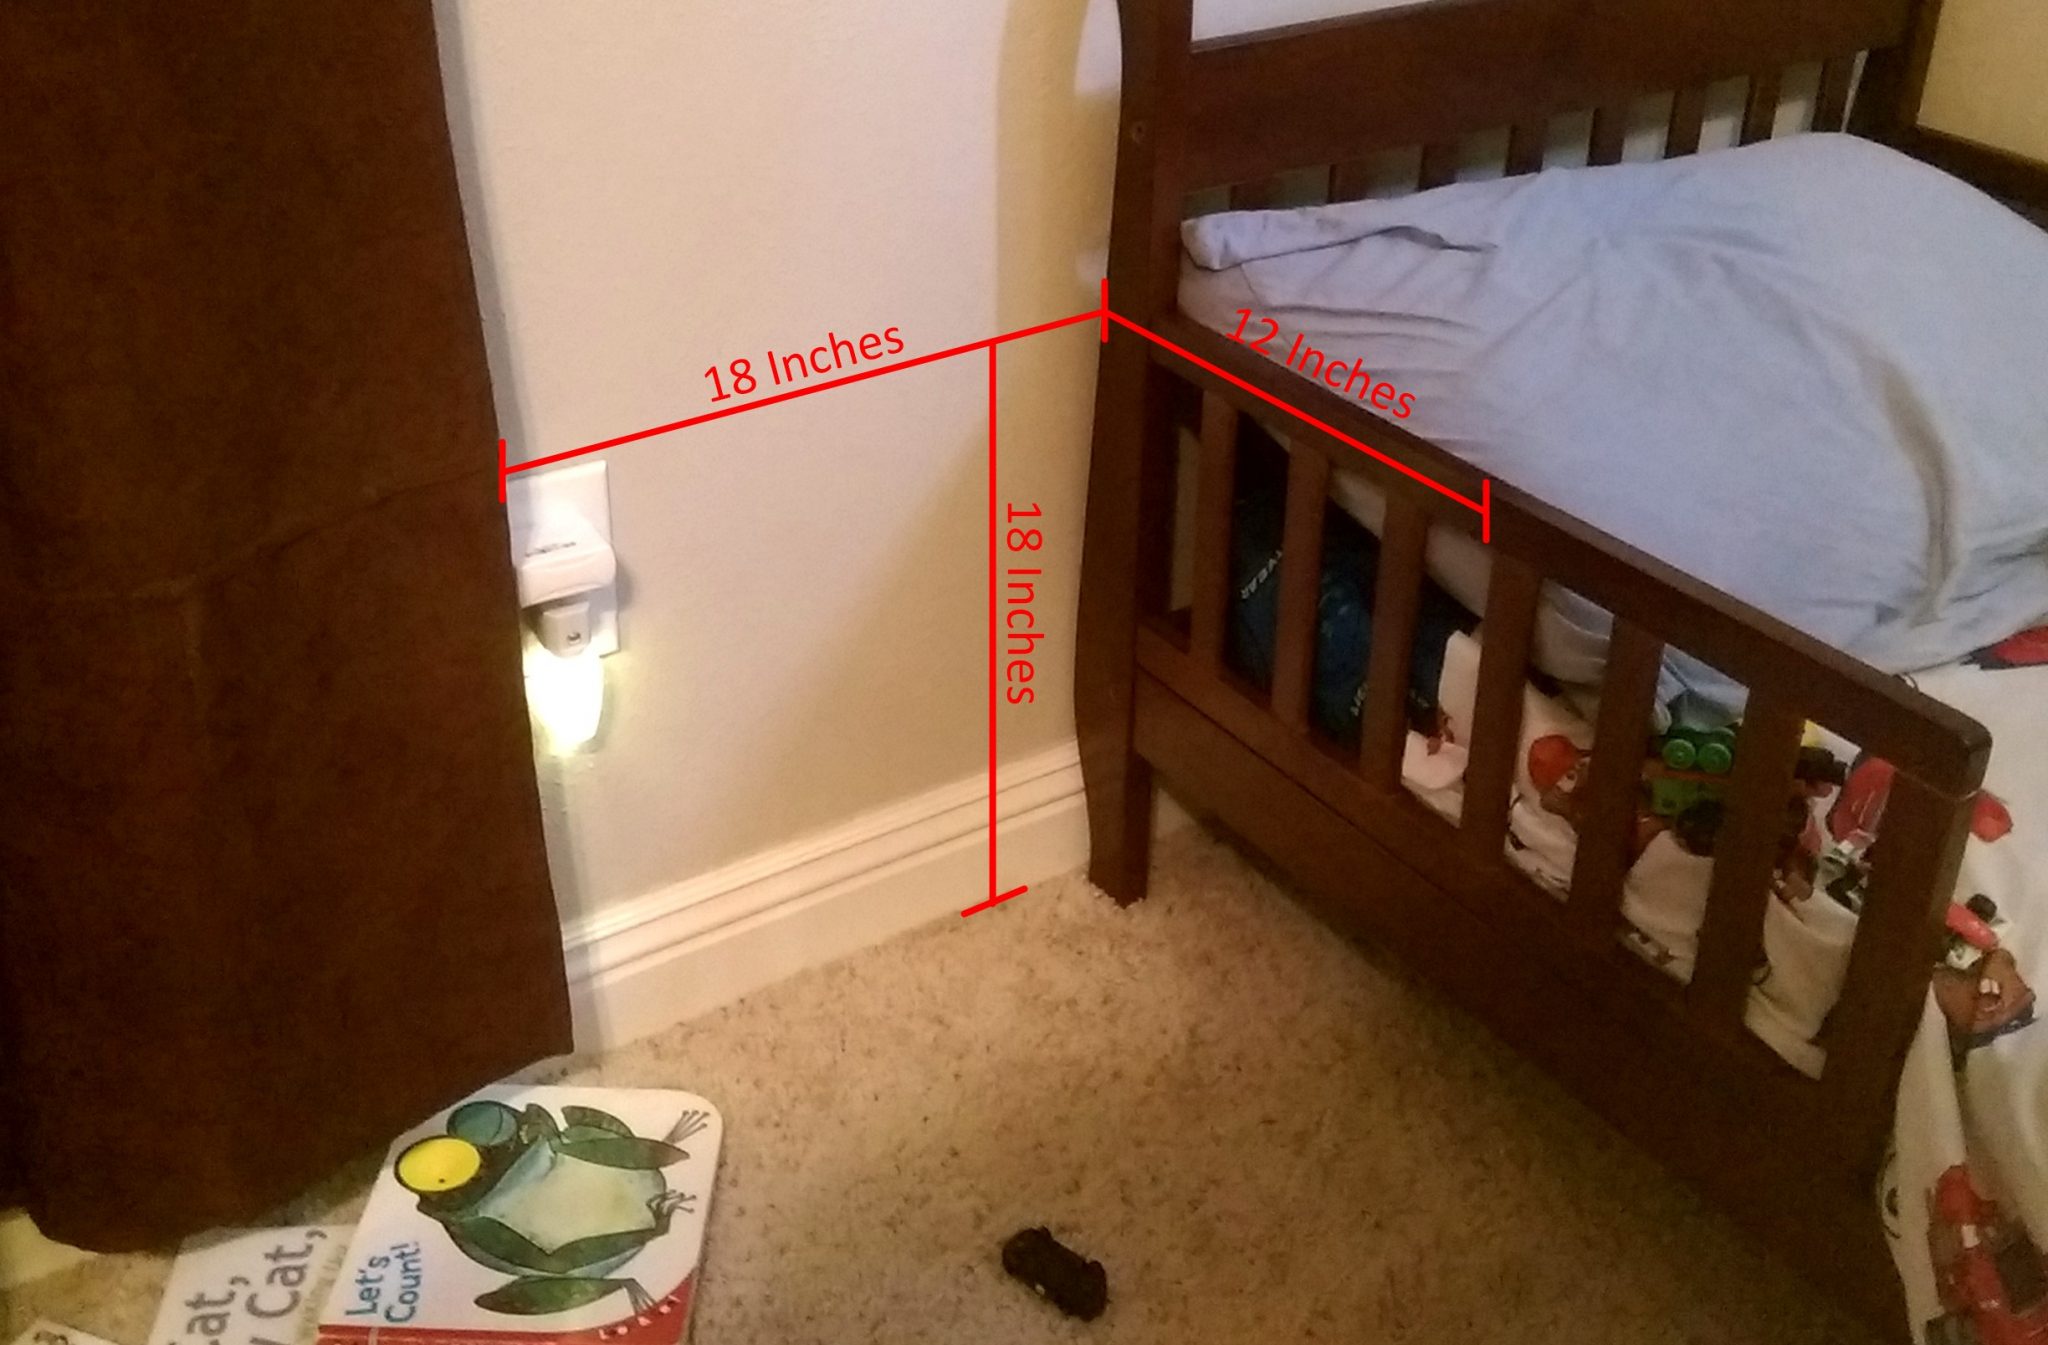
Toddler Bed Night Stand Desired Location
The Plan
I went through several designs while building the night stand. I really wanted it to be 12″ deep, but the widest lumber I could easily buy was 11″. I had to alter the design a bit as I went to account for the materials I had, the tools I own, and my skill level. The first design, which is shown in the following diagram, was not feasible with my tools and the lumber I had purchased.
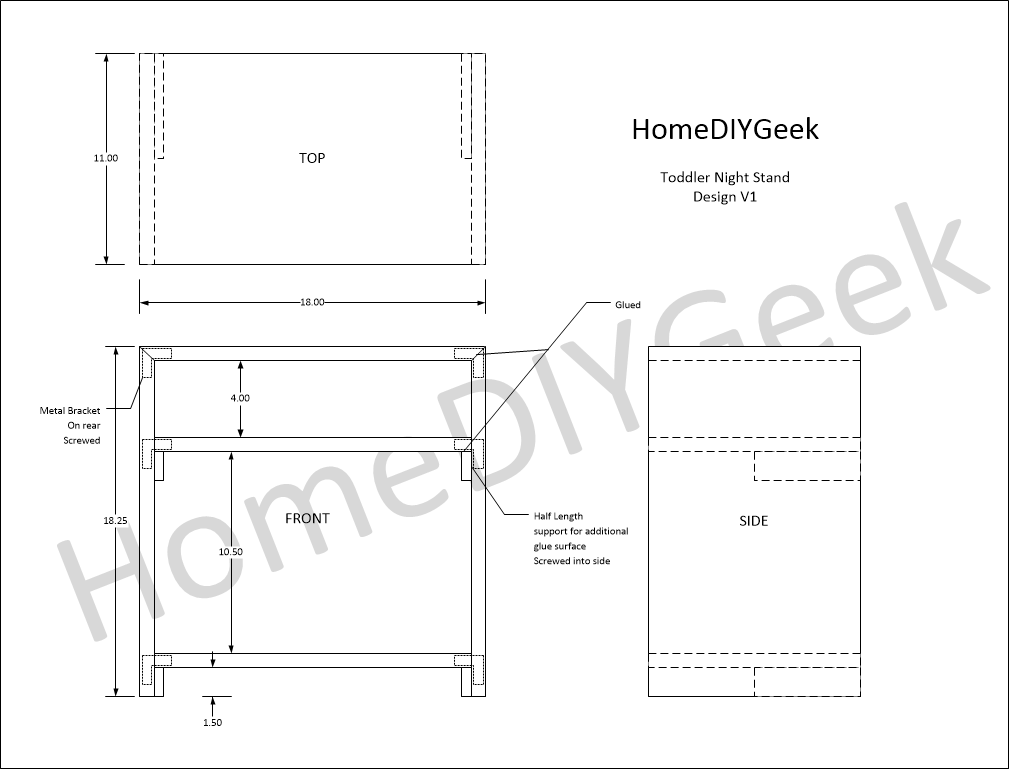
Toddler Bed Night Stand Design V1
The issue with my first design was that the lumber I bought was not straight enough to work with a design that required perfectly mitered joints. Also, lack of a miter saw would make getting perfect joints pretty tough even if it was straight. I did a test cut just to be sure it wouldn’t work, then revised it to the following.
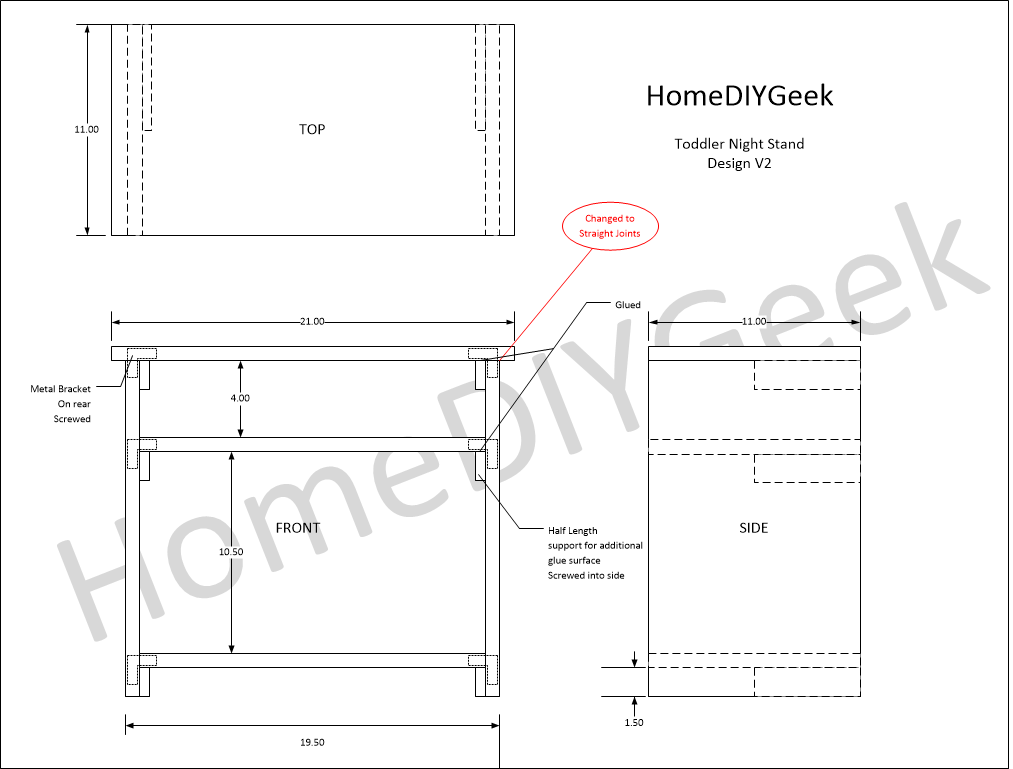
Toddler Bed Night Stand Design V2
The new design would utilize straight cut joints and hopefully be easier to cut. This design was not perfect and you’ll see how I changed it a bit later.
Tools and Materials
line
Description
Supplier
Unit Cost
Units
Ext. Cost
1
1x12x6 Whitewood Board
Home Depot
$13.25
1
$13.25
2
1X12x4 Whitewood Board
Home Depot
$8.81
1
$8.81
3
1/2x2x4 Poplar
Home Depot
$2.62
1
$2.62
4
1x2x6 Pine Board
Home Depot
$3.95
1
$3.95
5
Kreg #8 1-1/4" Square Coarse Self Tapping Screws
Home Depot
$3.97
1
$3.97
6
#6 3/4" Zinc Plated Wood Screws
Walmart
$.97
1
$.97
7
3M Wood Filler
Total
$33.57
line
Description
New?
Link (If applicable)
1
Porter Cable Circular Saw
2
Black and Decker Workmate Table
Black And Decker Website
3
Trigger Clamps
4
Black And Decker 12V Cordless Drill
5
Black and Decker Orbital Sander
6
Kreg 8.25" Mini Jig Pocket Hole Kit
X
Home Depot Website
7
Kreg #2 Square 6 in. Driver 2 Pack
X
Home Depot Website
8
5/64" drill bit
9
1/4" drill bit
10
Titebond II Wood Glue
X
Home Depot Website
11
Pencil
12
Tape Measure
13
6" Carpenters Square
14
Safety Glasses
15
Ear Plugs
You’ll notice my tools list includes a pair of safety glasses and earplugs. I’m always a fan of safety glasses, partially to protect my actual glasses and partially to protect my eye. Both we very expense to replace.
The earplugs are a recent addition but I am ashamed I wasn’t using them sooner. Power tools, especially those cool oscillating saws, are very loud. These were only about 2 dollars and are comfortable and reduce the noise to a non-damaging level.

Safety Glasses and Ear Plugs for Sawing
My Shop Setup
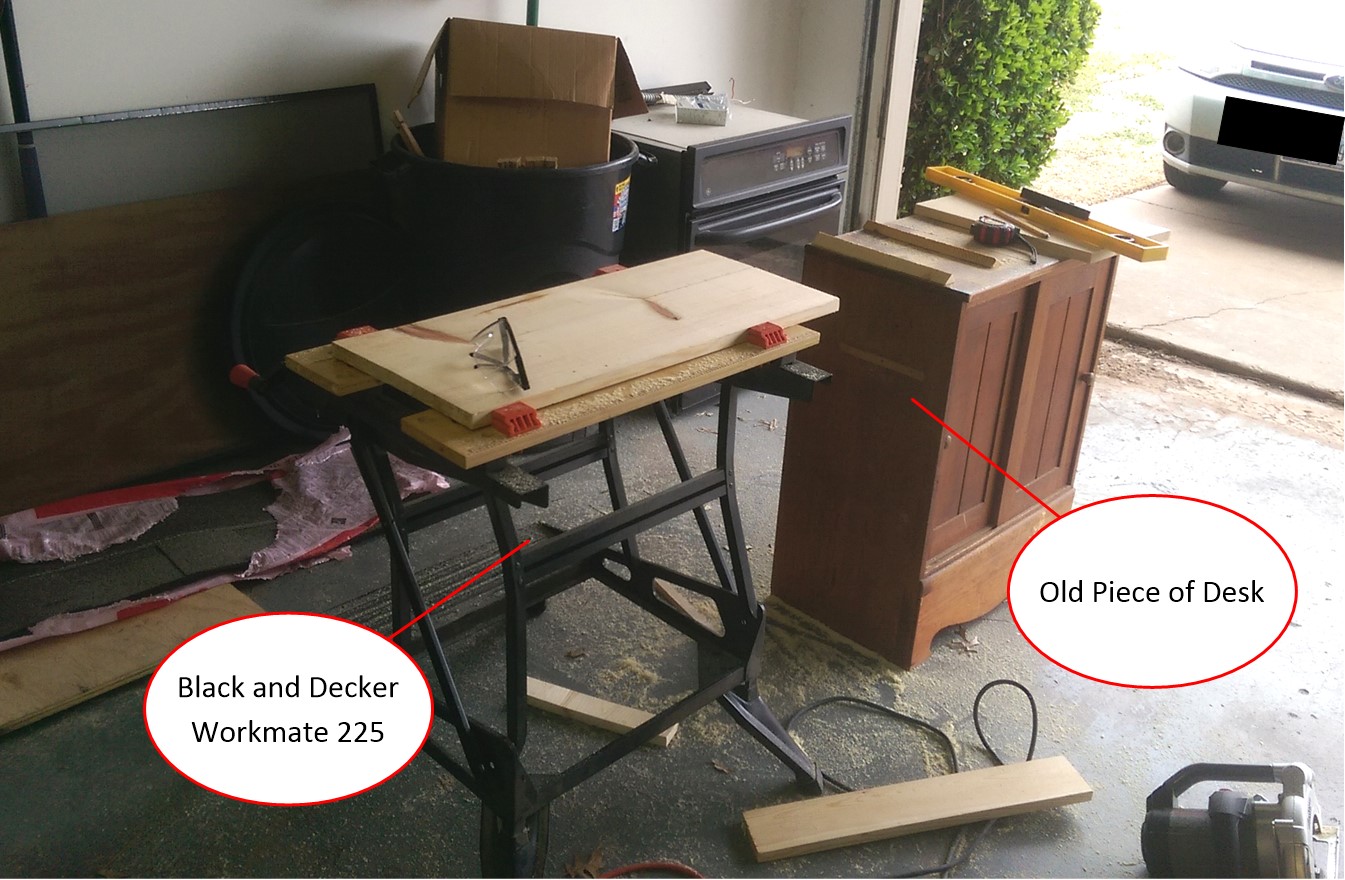
I don’t have a dedicated wood shop because my wife and I like parking in the garage during the winter. Instead I pull out a Black and Decker Workmate 225 and an old piece of a desk I keep for a work surface. Sometimes, I also clamp down some plywood if I need a larger table surface.
My Temporary Shop Setup
The Workmate has the ability to act as a vice for wood that is being cut. I then use the little hutch to catch the piece after its cut. I can shim up the height to be even with some scraps to minimize tear out, but keep it loose enough to prevent the saw blade from binding.
Cutting the Top and Sides
My circular saw skills are pretty amateur at this point so this was a good opportunity for me to practice. My major problem with the circular saw is how heavy it is. Even if I try and clamp down a makeshift guide, the saw is so heavy it tends to push it off course. I would love a miter saw for this kind of work, but it has not been practical to buy one yet. Unfortunately, I didn’t think to take many pictures while cutting. Fortunately that process is pretty boring and you aren’t going to learn how to be good at it from watching me, that’s for sure.

Side Piece out of square
I was able to get a few good cuts in, but did run into an issue with cutting one of the sides. My mistake meant I didn’t have enough wood for a center shelf as originally planned. This is reflected in the V3 design diagram following. I think the side I botched up pretty bad can be seen here, way out of square, and a little too short.
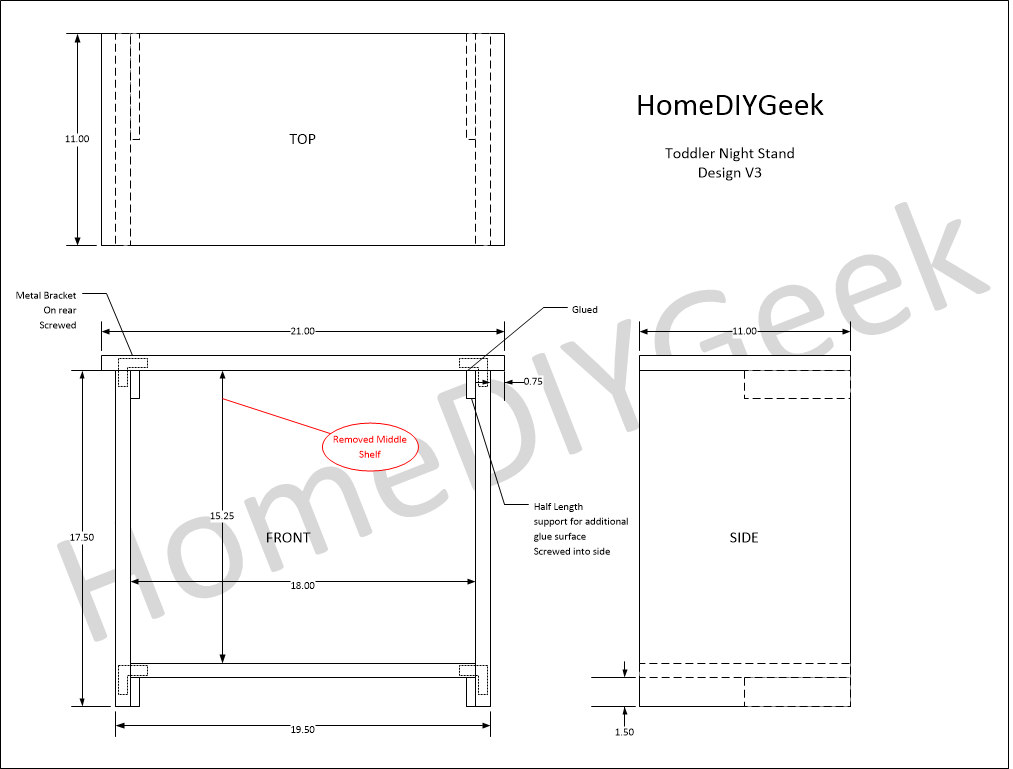
Toddler Bed Night Stand Design V3
I went back and cut a new side, as well as straightened up the out of square side and wound up with the final 4 pieces shown following.
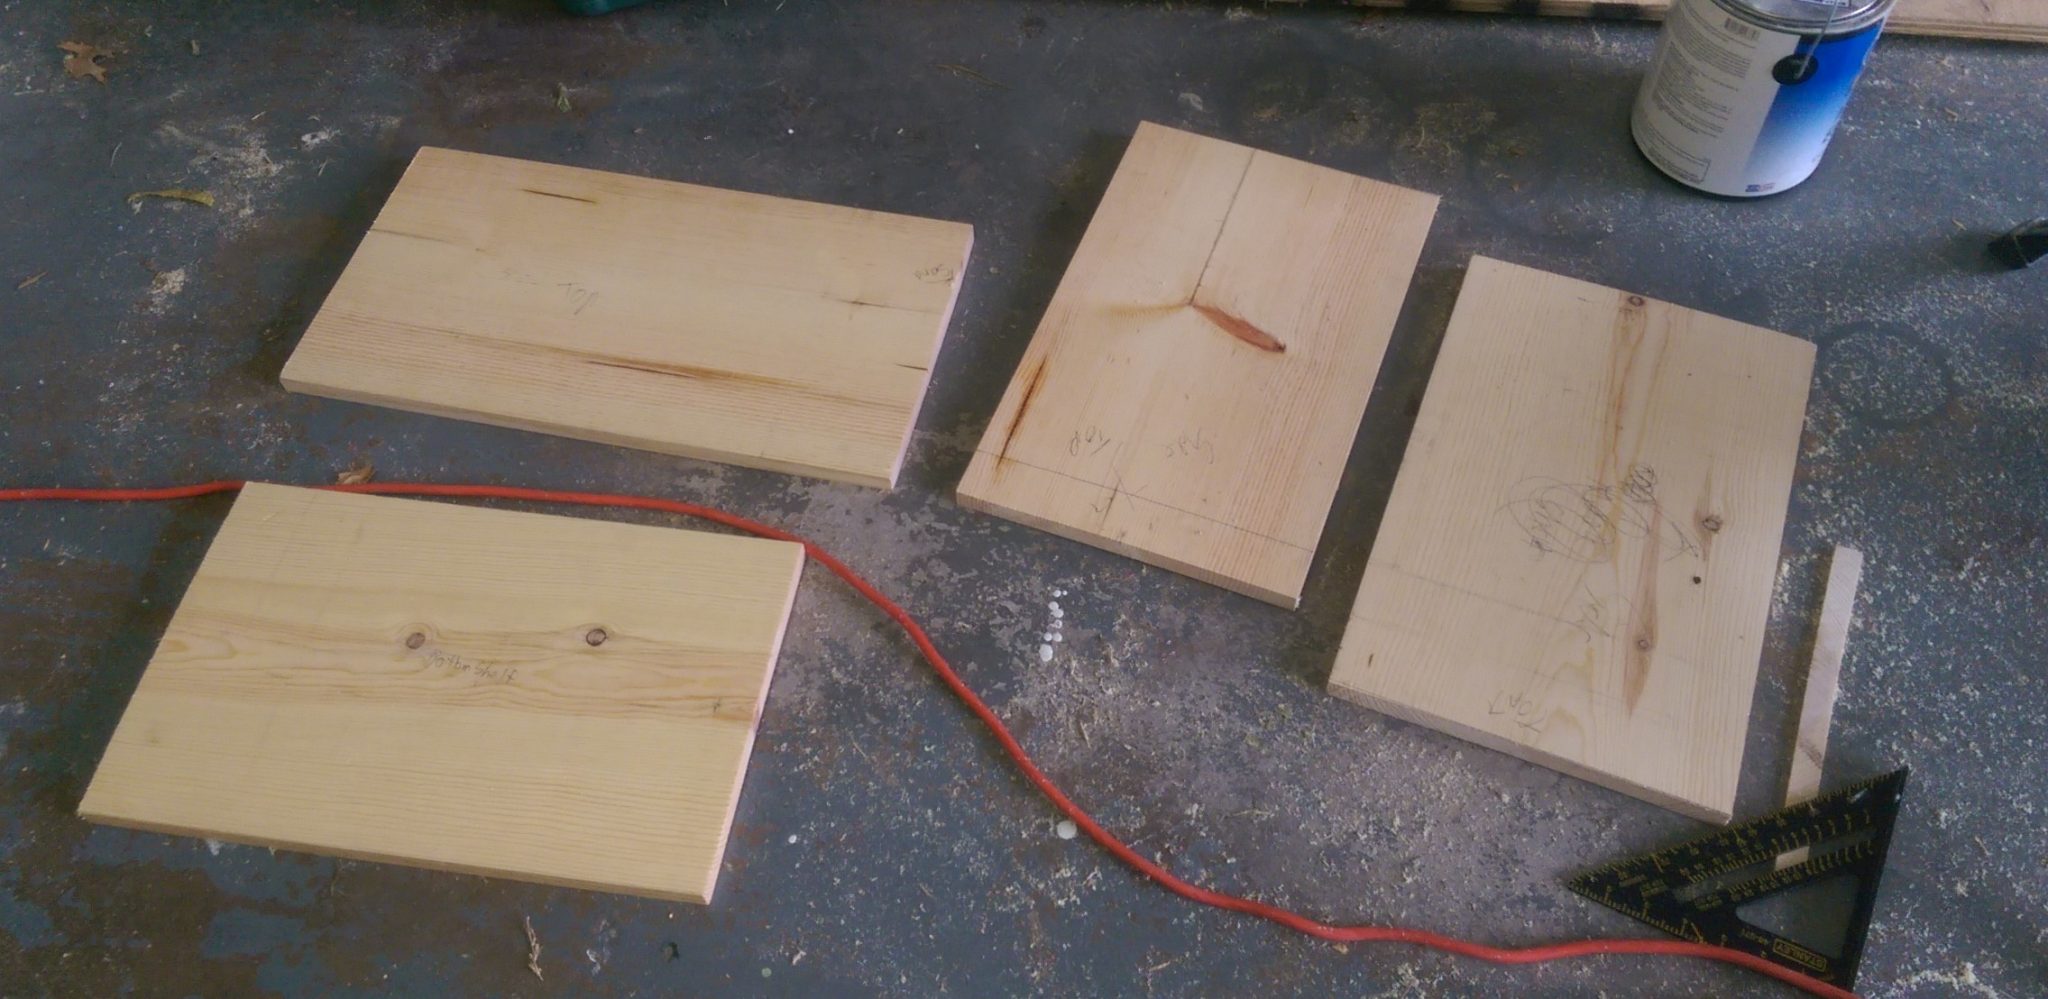
Finished Cut Top and Sides
Cutting and Installing the Shelf Supports
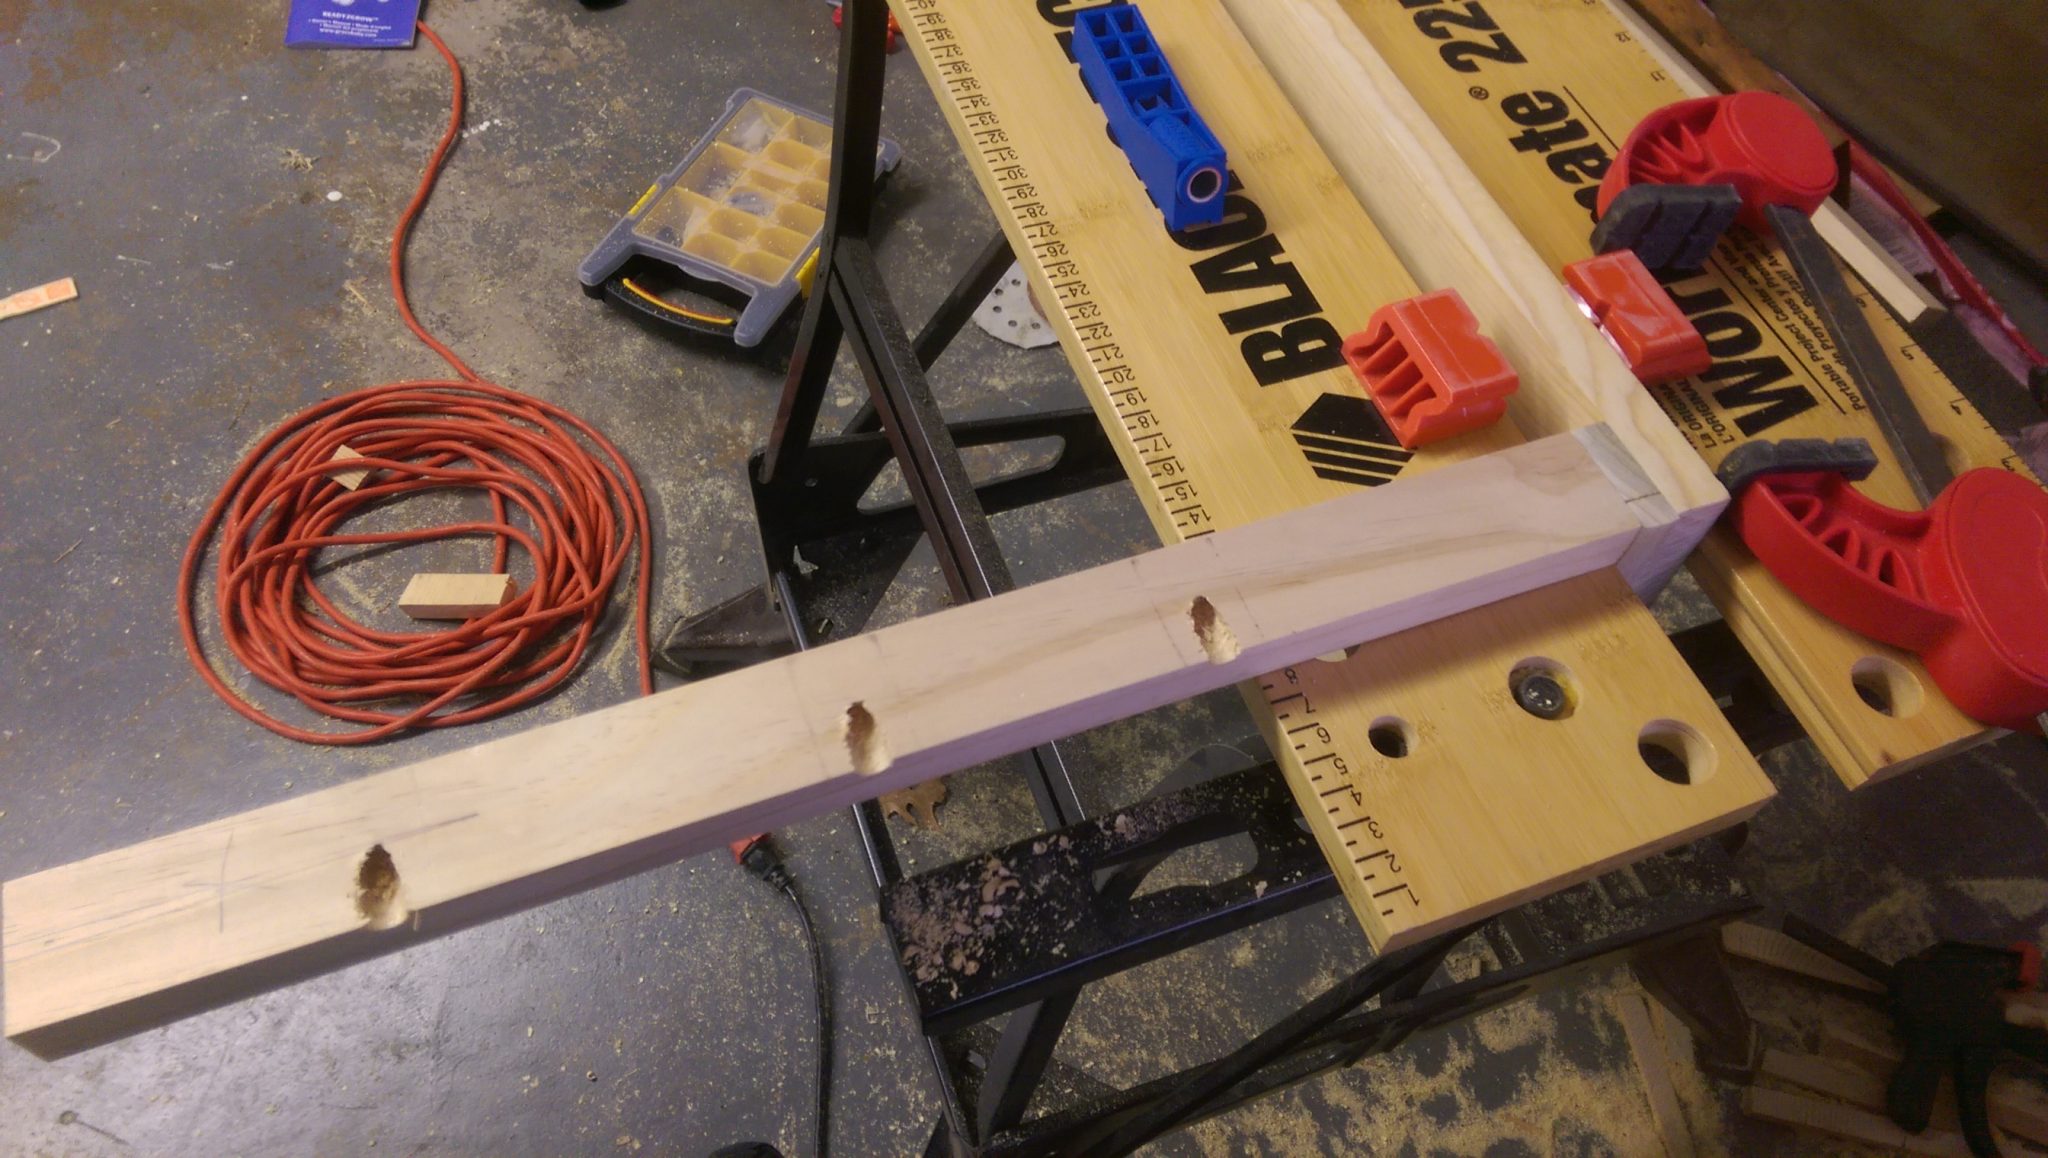
I also had planned for some small shelf supports for the top and shelves to sit on. What I purchased for this was some 1/2″x1-1/2″ poplar. During assembly I realized the supports could also be used to pull the sides straight. I decided on an 8 inch length for the support to try and straighten the sides a bit without having them come all the way to the front. I would go with a slightly different design if I had it to do over again which will discuss later. The process I used to prepare the shelf supports was:
- Cut 3/4″x2″ poplar board into 8 inch sections using pull saw
- Check if ends were square with carpenter square, surprisingly they were
- Sand the shelf supports on all sides
- Mark a center-line on the rails
- Mark for screws every 2 inches
- Clamp the support to the side in the proper location
- Pre-drill screw holes with 5/64″ bit
- Pre-drill screw hole with 1/4″ bit for make-shit countersink
- Put the glue on the side
- Screw down the supports
- Wipe excess glue
- Apply clamps to hold sides straight
- Wipe excess glue again
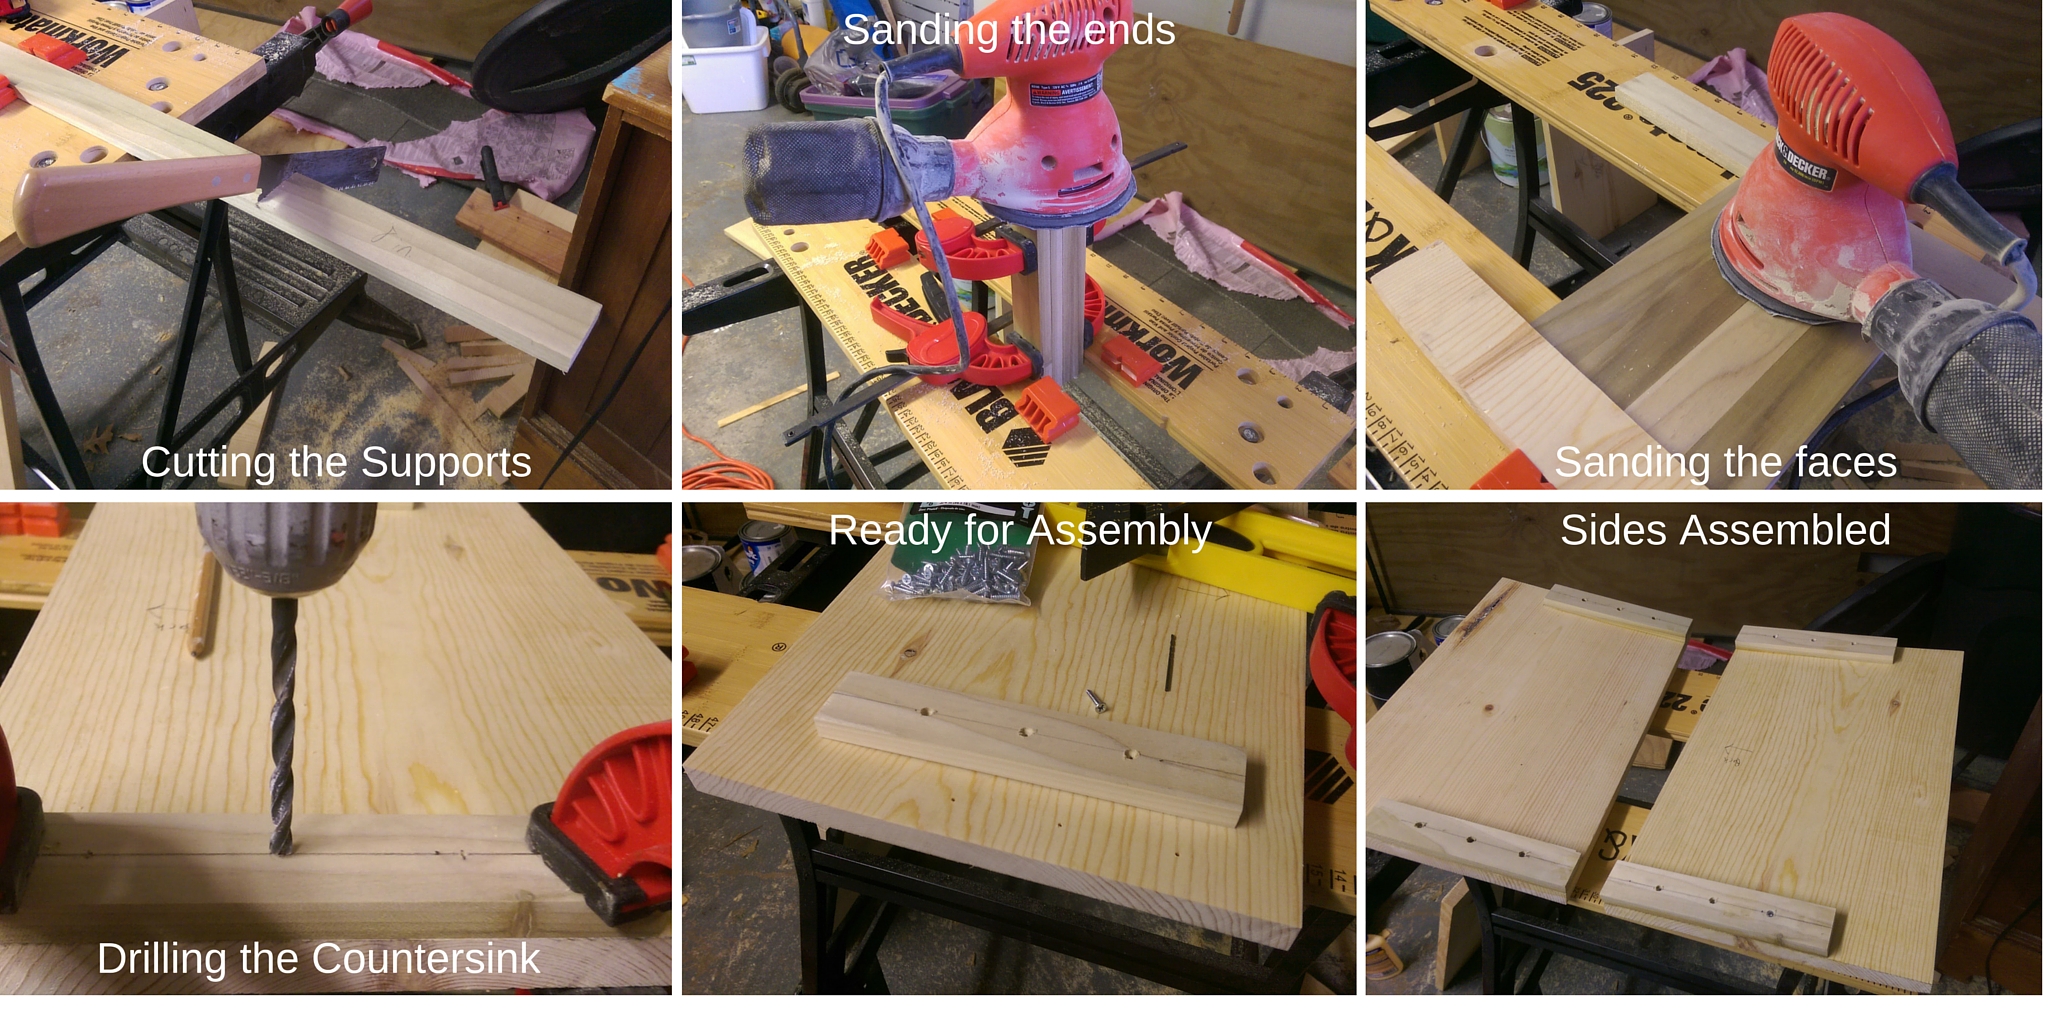
Shelf Support Steps
Modifying the design, again
Now it was time to try and put the nightstand together and I realized that my plan was incomplete. I had thought that maybe I could use a combination of glue, metal brackets, and screws along with the shelf supports and wind up with something halfway sturdy, but I didn’t have any good way to clamp it or hold it square while I did it. That was when inspiration struck. I had seen plenty projects on This Old House that used pocket screws. I did some research and found the least expensive jig that would let me do what I wanted which was the Kreg Jig Mini at Home Depot. You can read about my impressions of the Kreg Jig in my previous post: New Tool – Kreg Jig Mini. Basically, if you want to build furniture without well equipped shop and fancy woodworking joints, pocket screws are your best bet.
With the thought of using the pocket hole jig and pocket screws, I updated the design to the following. Since this is ultimately what I wound up building the drawing is marked AS BUILT.
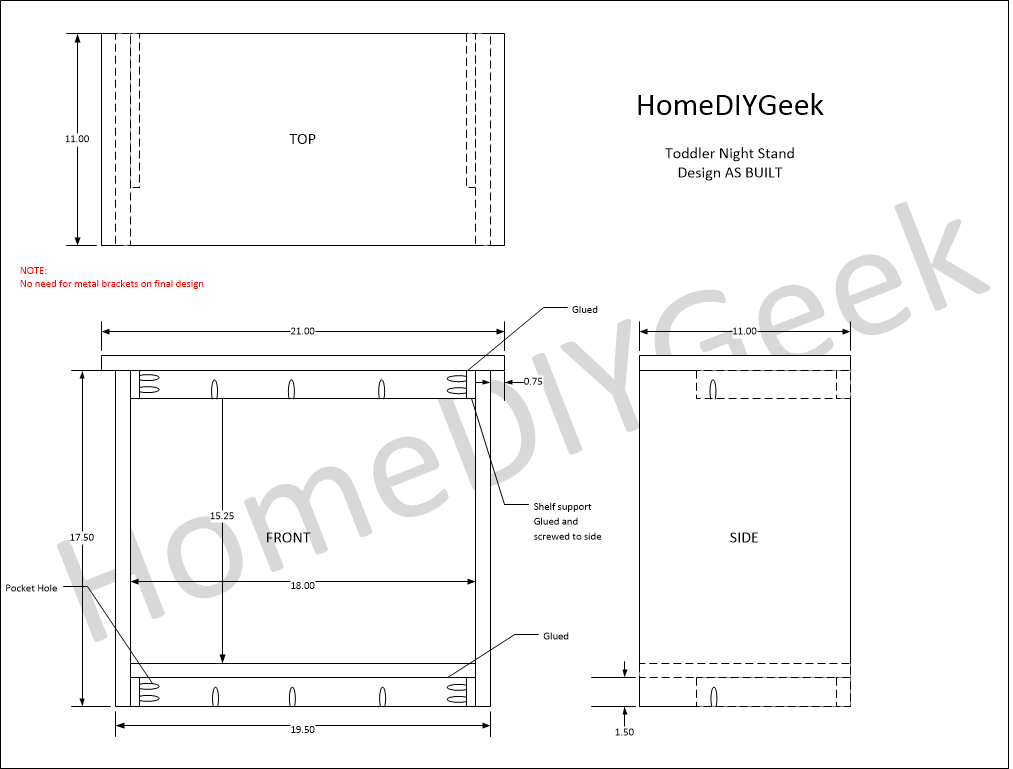
Toddler Bed Night Stand As Built Diagram
You can see that I added supports that run front to back in order for the shelves to having something to rest on in the rear. The supports are made of 1″x2″ pine. This is really what I should have used for the shelf supports on the sides instead of the narrower poplar. The use of pocket screws and the increased gluing surface mad the night stand plenty sturdy without needing the metal brackets I had bought originally.
Filling and Initial Sanding
The cheap boards I bought had some knots and sap holes that needed to be filled in. I had some wood filler on hand that I had used with some success on other projects, though I have never tried to stain it. I applied the wood filler to all knots and any holds with a putty knife. Wood filler should be applied so that it stands proud of the wood so that it can be sanded flat and smooth.
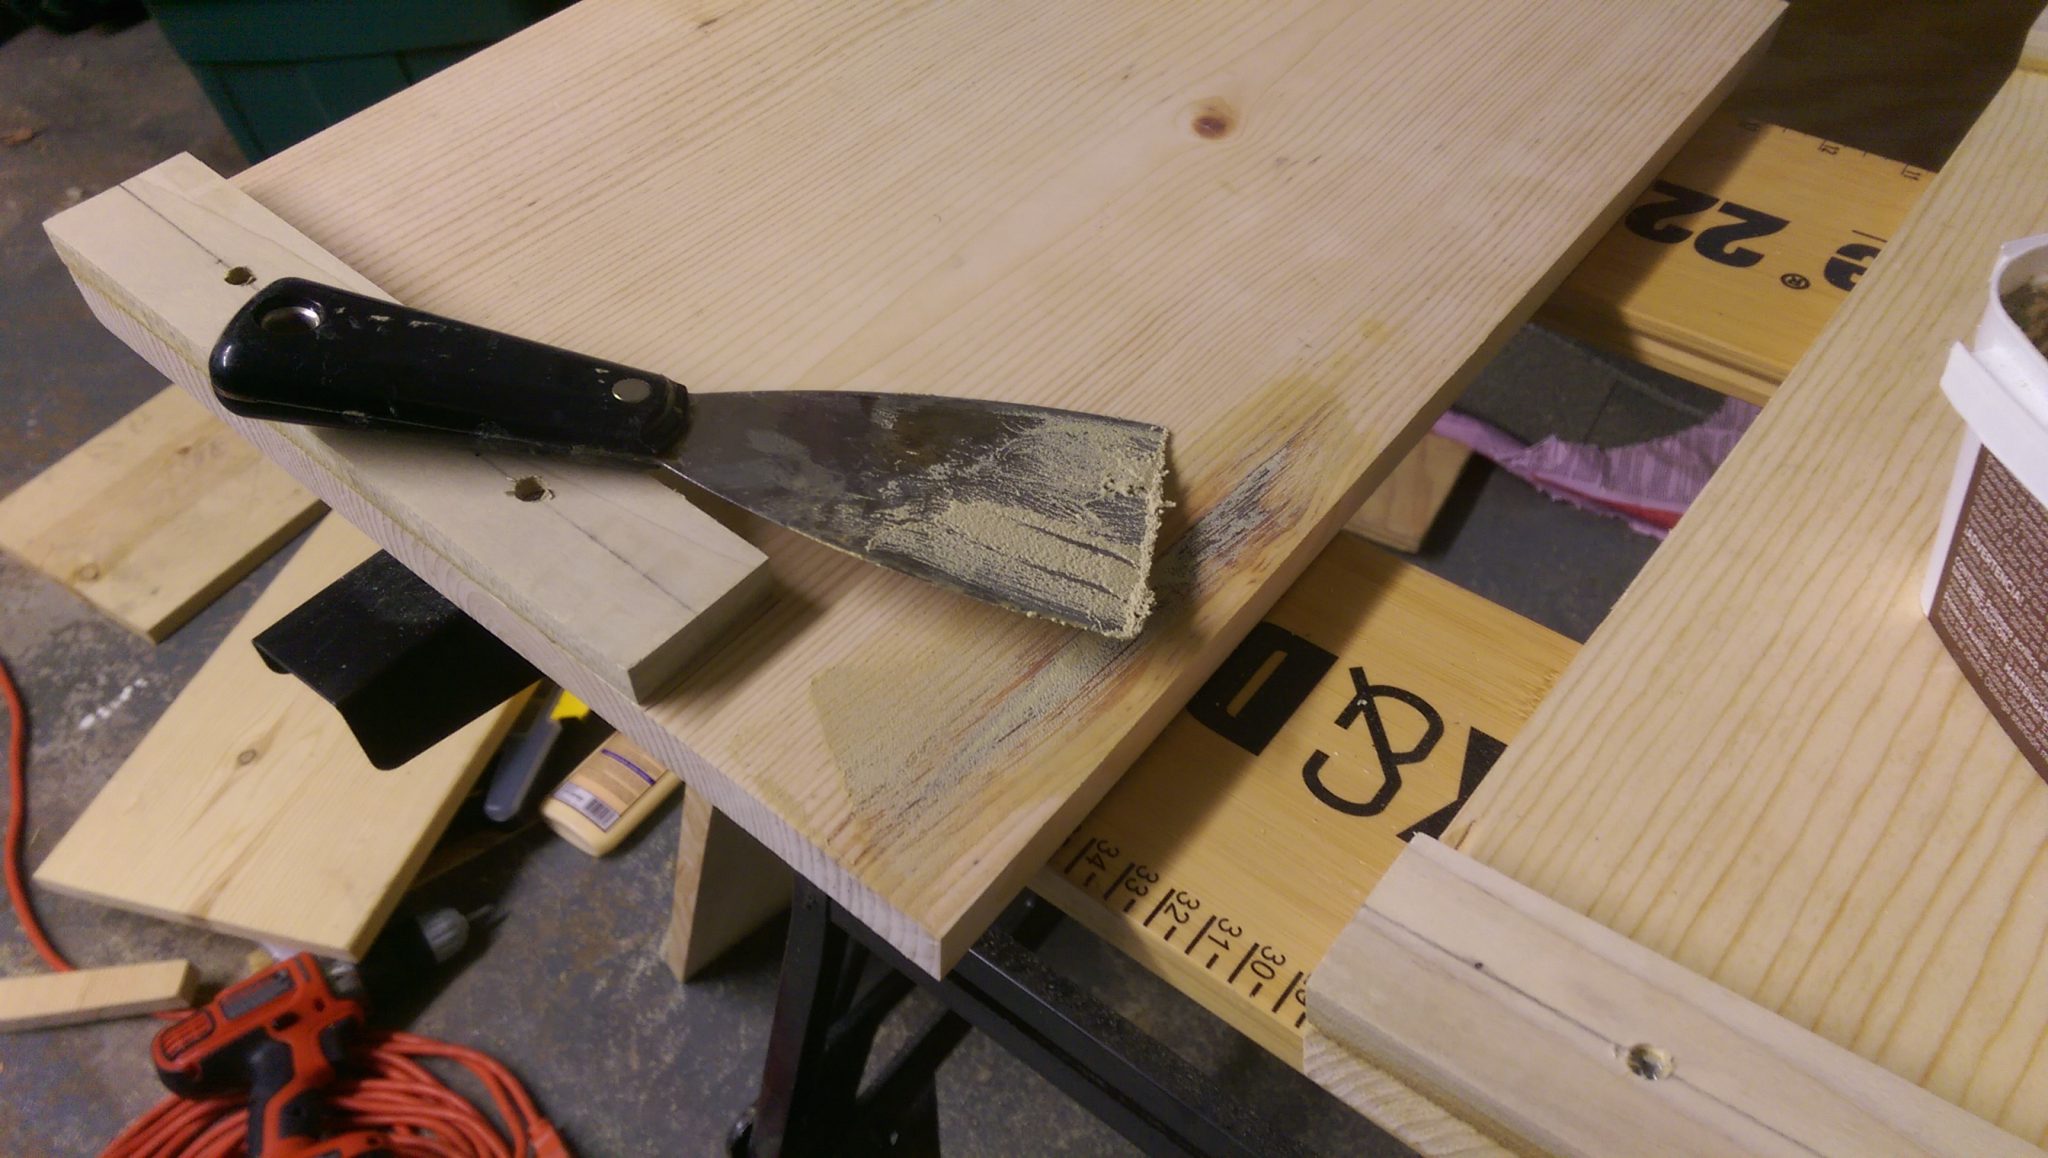
Applying Wood Filler with Putty Knife
Here you can see the top with several spots where I had to apply the filler. I know it will stain a different color than the wood, but I hope that since its in natural holes and knots that it will actually look attractive in the finished product.

Wood Filler Applied to Top
I let everything dry for a day, then came back and sanded with 120 grit paper on an orbital sander. The goal was to get it flat and only have the wood filler present in the actual holes, not smeared across the wood.

Sanding the Wood Filler
Assembly
I have to admit that I made up the assembly as I went along. The night stand is basically held together with pocket screws and wood glue. I had already screwed the side supports in to the sides. The next step was to screw in the bottom shelf support that tied the sides together. I did this with pocket screws and the Kreg mini pocket hole jig. You can see how to use the jig here: Kreg Jig Mini Review.
First, I screwed the two sides together with the bottom-rear shelf support using pocket screws. I used two screws per side and held the pieces steady with a combination of the workmate and clamps. You can see how I marked a center-line on the support in order to drill two evenly spaced pockets with the mini jig.
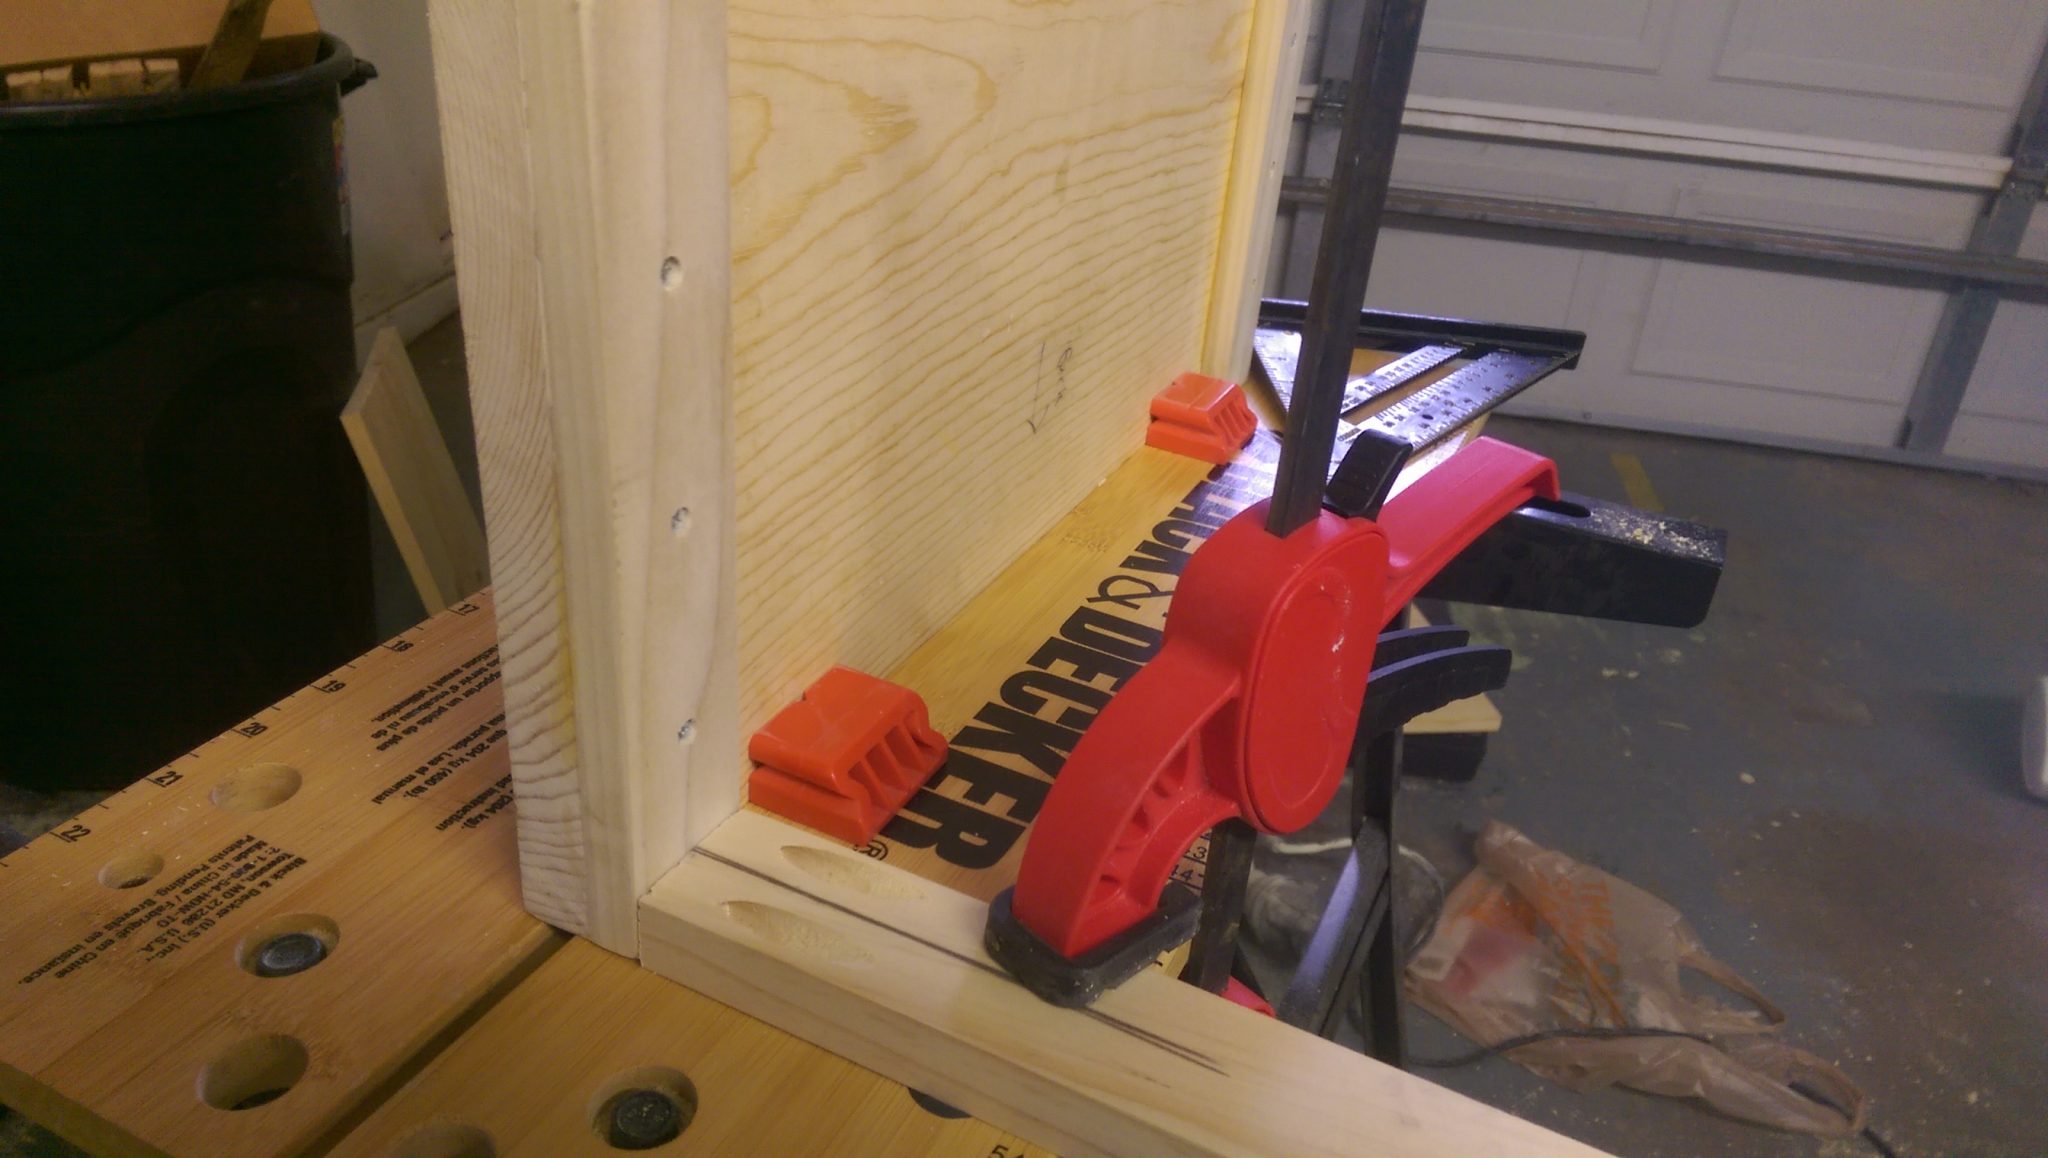
Screwing Side to Bottom Shelf Support
Pocket Hole Joining Example 1
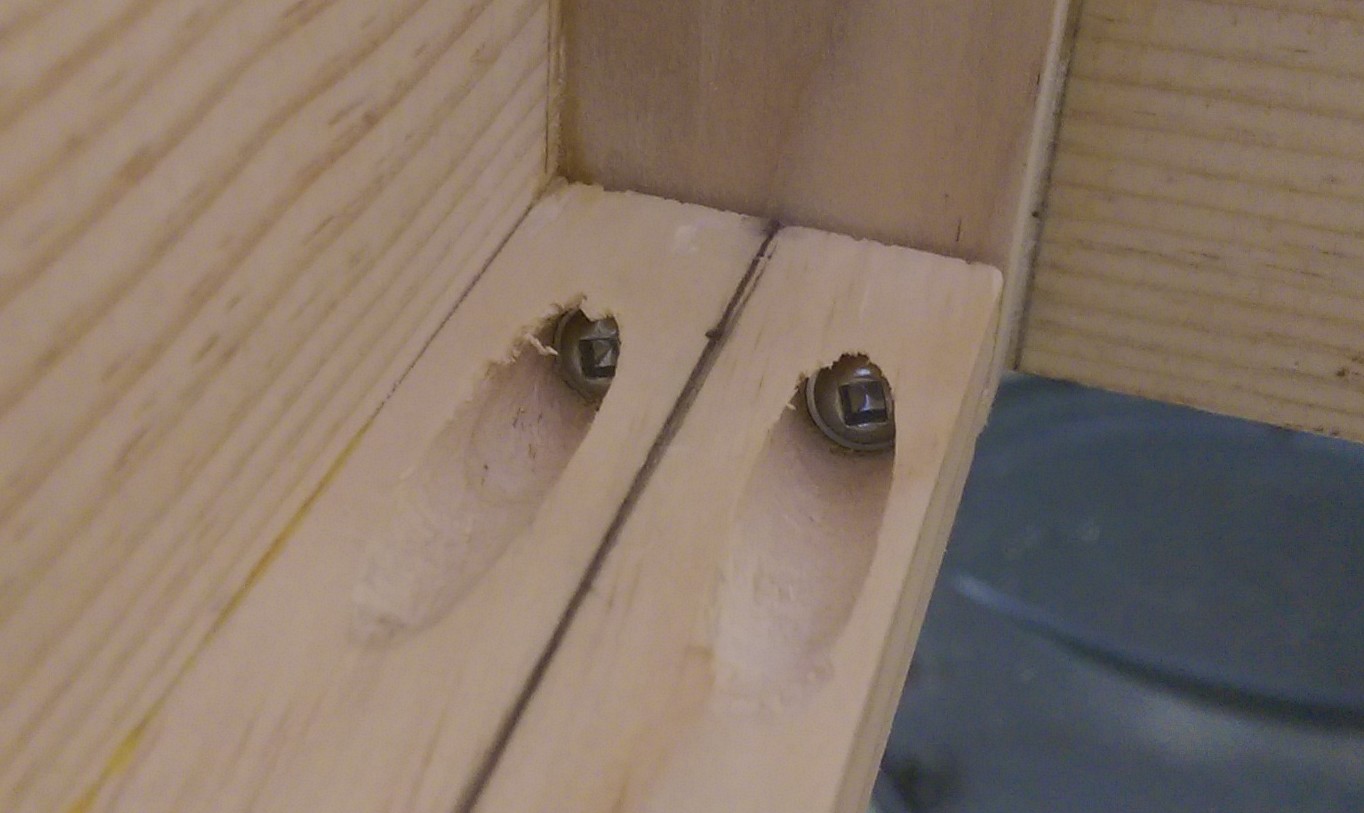
I realized I would like to screw the bottom shelf down to the supports, so I made pocket holds on the bottom support before moving to the next step. This was pretty easy to pull off with the mini jig, but should have been done before I put it together.
Pocket Holes on Bottom Shelf Support
After the sides were attached to the bottom support, I put down a line of glue on top of the supports. It turns out this step is a bit dangerous because you really don’t want glue on any surface you plan to stain.
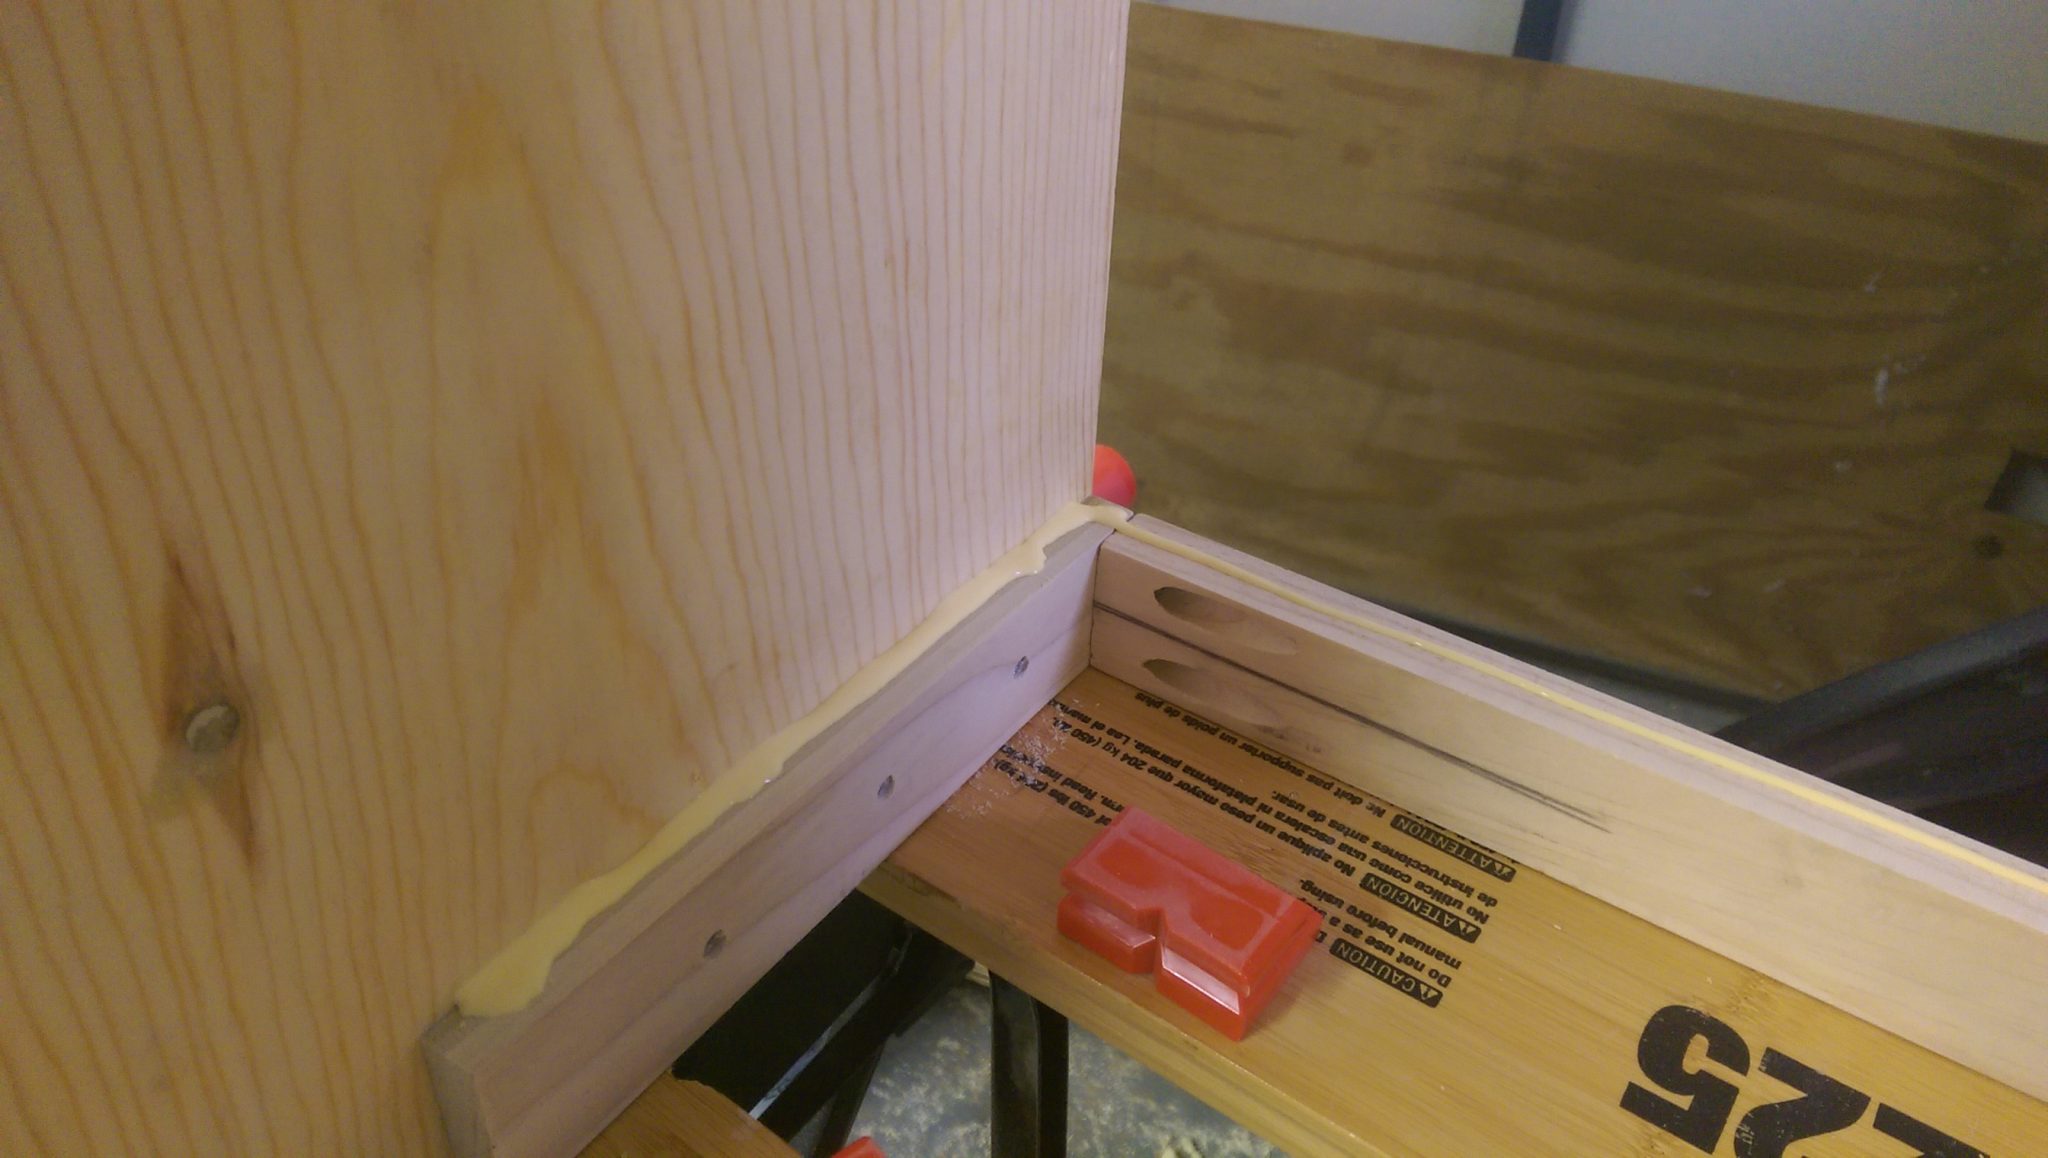
Gluing Bottom Shelf
I then laid in the bottom shelf. For good measure, the bottom shelf was also attached with pocket screws from the side shelf supports, and a screw countersunk in the side to pull it tight.
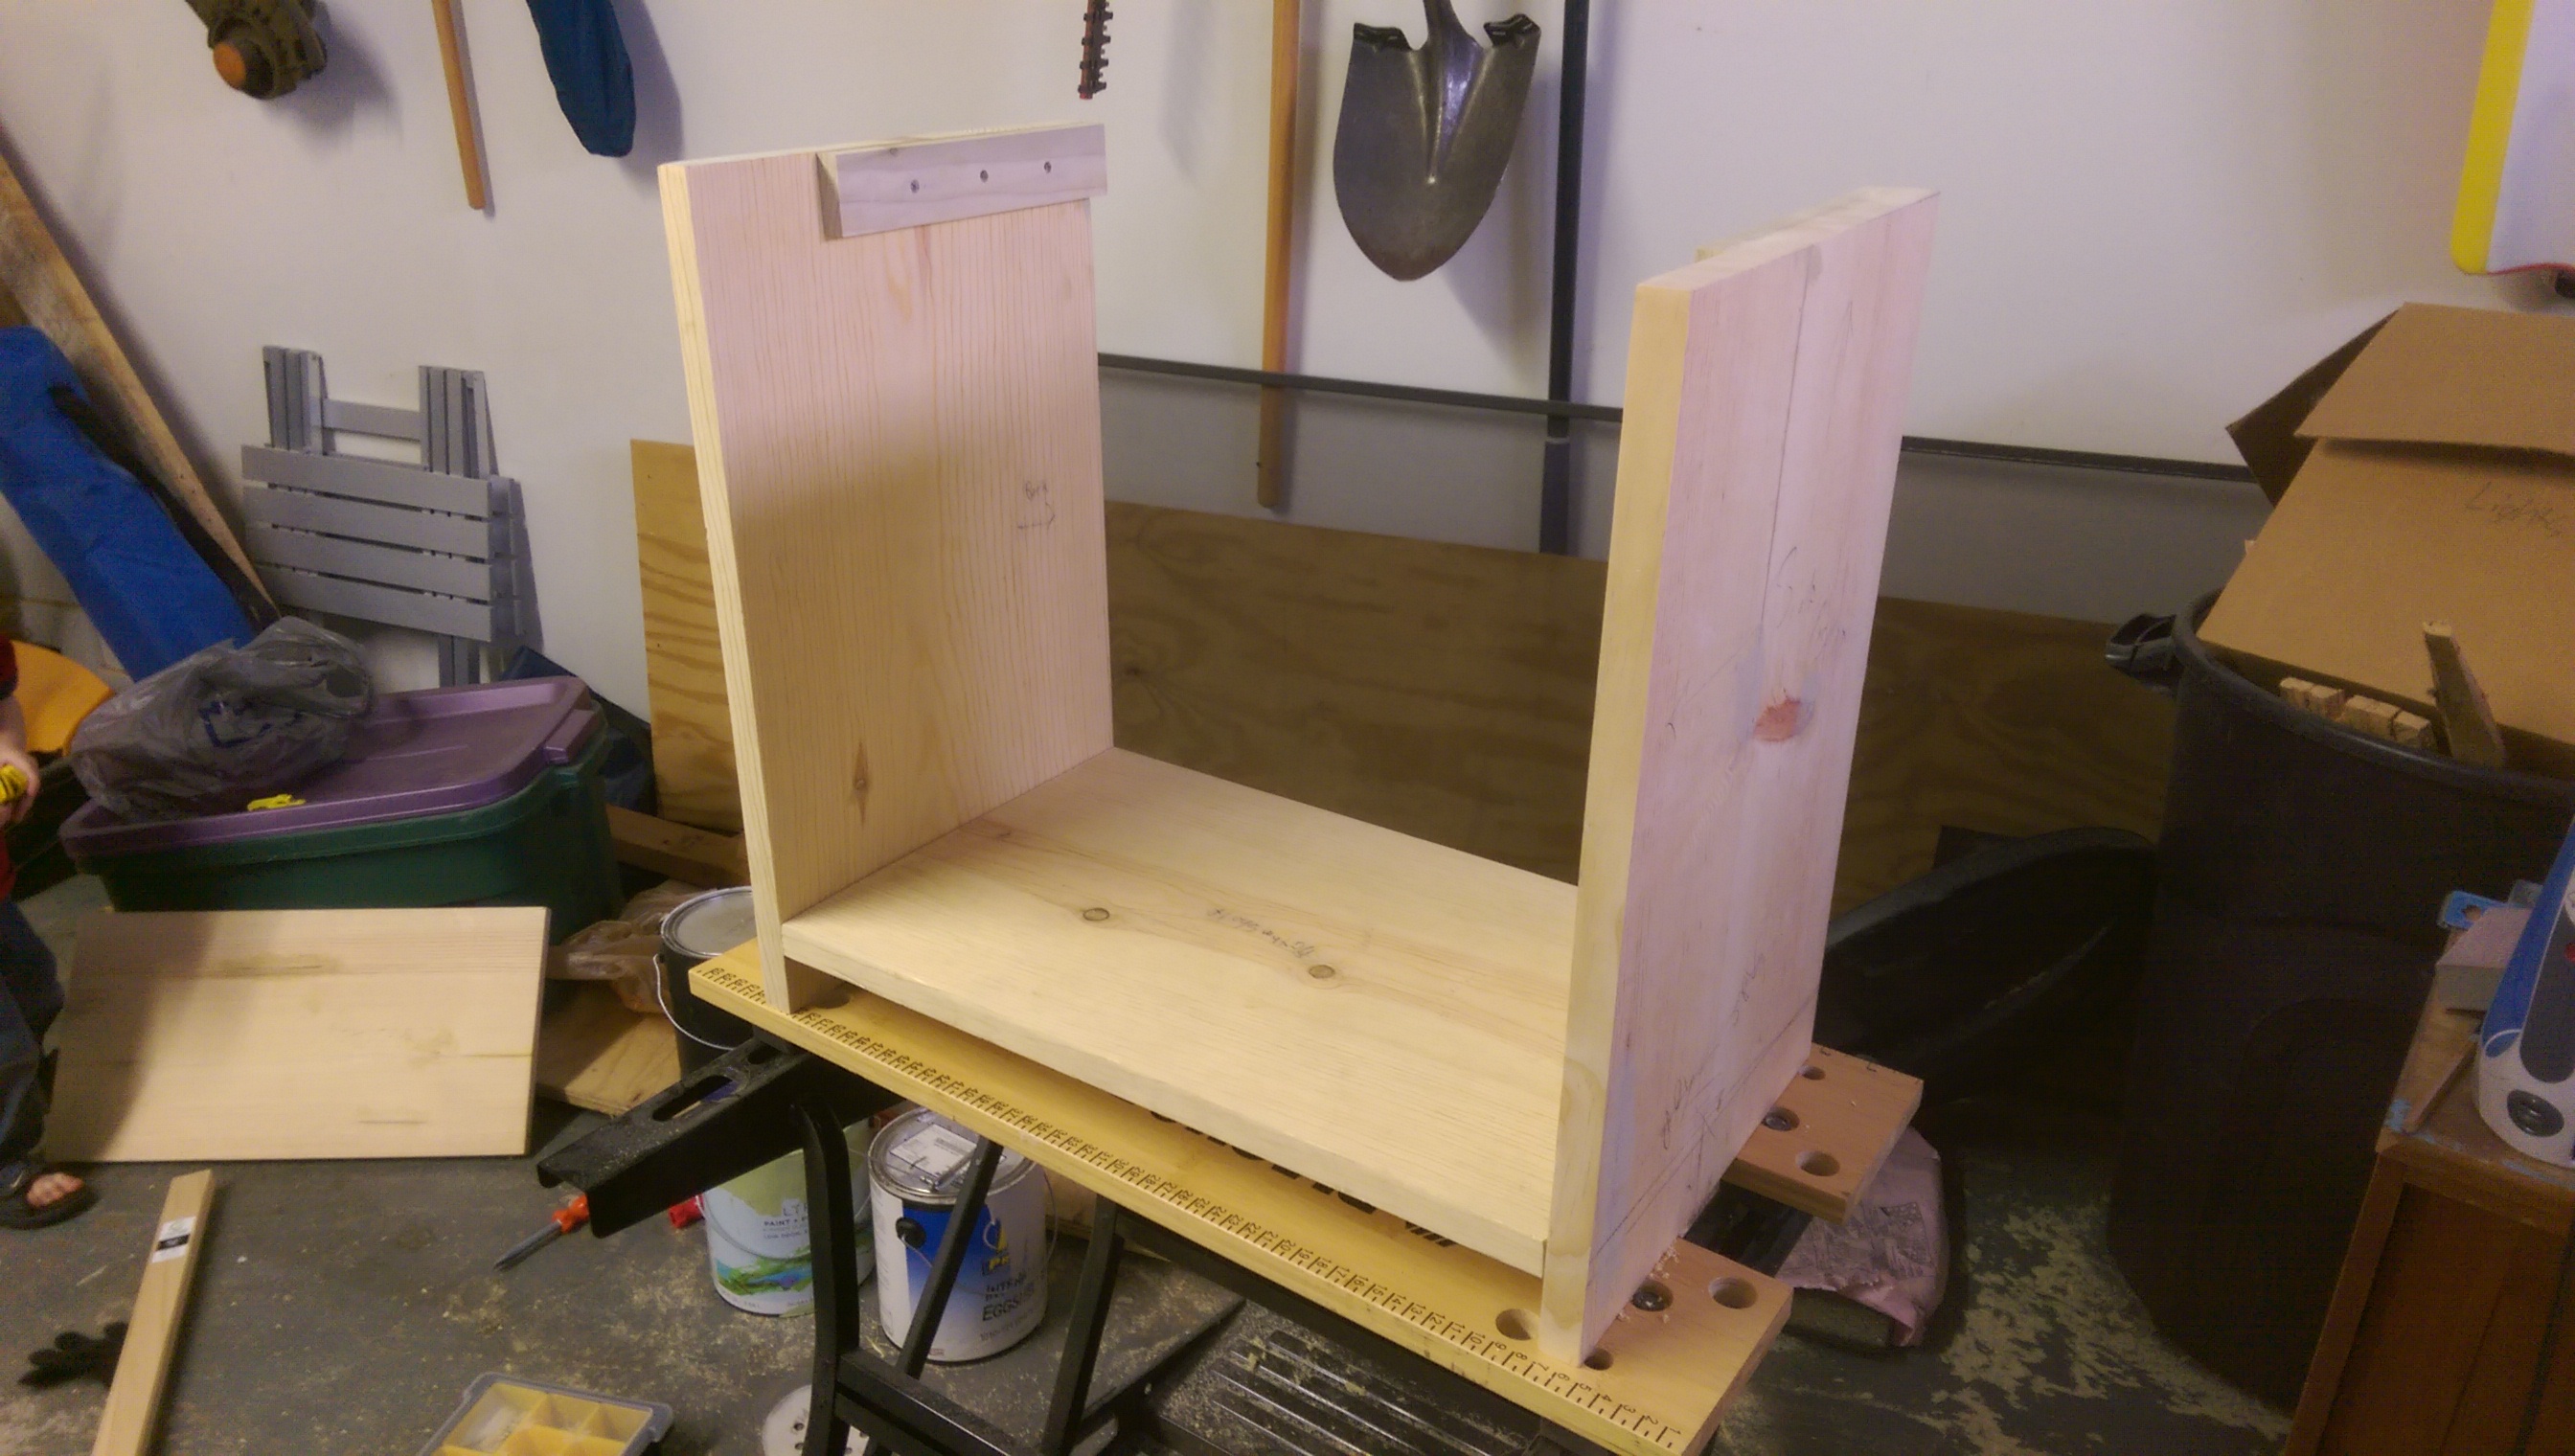
Bottom Shelf Installed
The top support and shelf were installed in a pretty much identical fashion. Amazing, after it was all said and done the box was pretty square, and the shelf was pretty level. Talk about some luck.
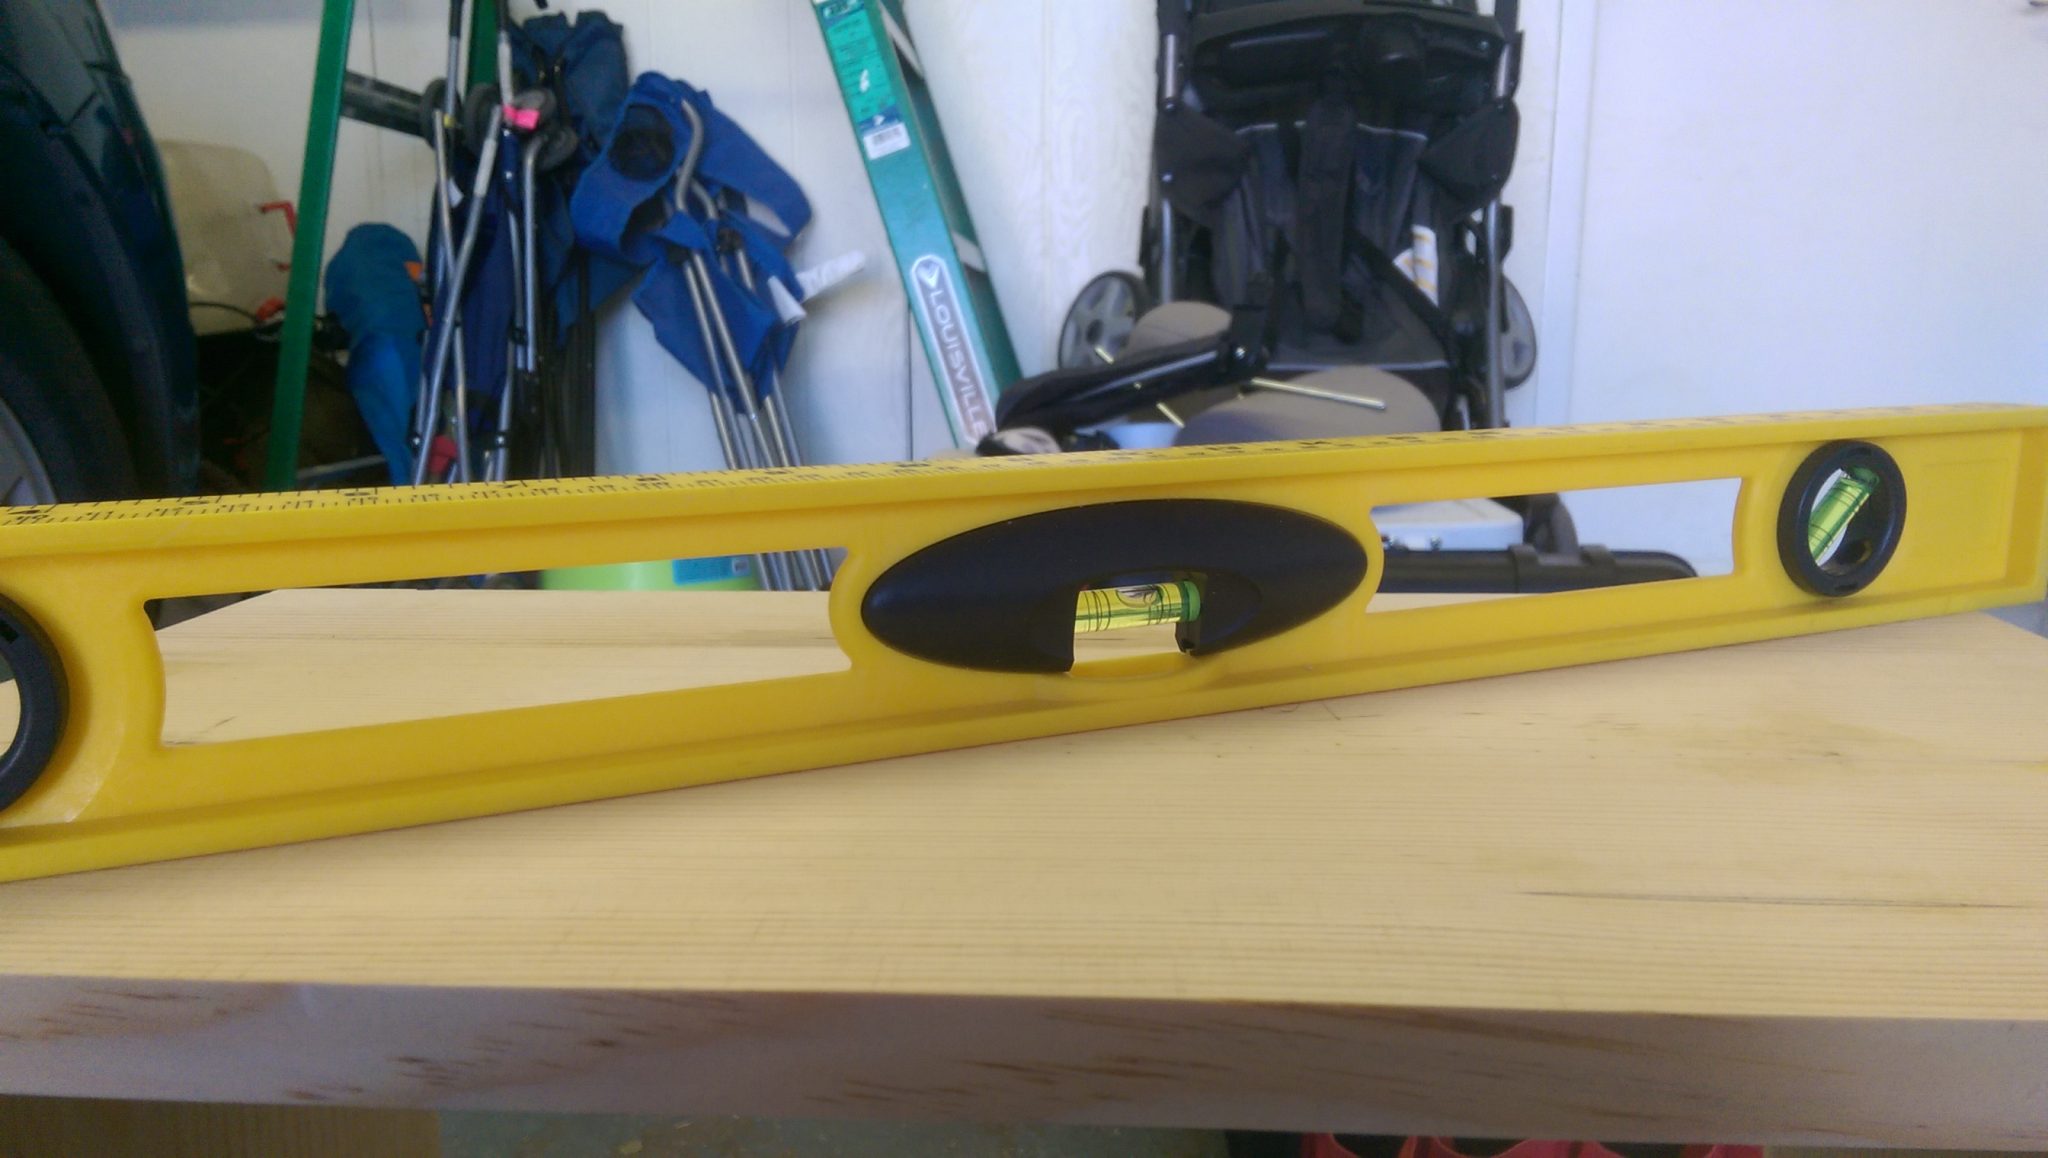
Top Shelf Level
Conclusion
I am overall satisfied with the night stand. I made many mistakes along the way, mostly stemming from having no idea what I was doing and making it up as I went along.I was originally going to have this post include the steps for staining and finishing, but I am actually going to make that a separate post. If you were making a similar piece, you could paint it to add a splash of color in your kids room, or stain it like I am planning to match the dark finished furniture in the room.
The total time to assemble it was probably about 5 hours, but I am a total amateur at this. A better equipped shop could probably do it in well under two. Here are some shots of the assembled piece. Some pictures were taken after I started staining, which I have not yet finished due to some issues I ran into with the glue. You will want to be very careful not to put too much glue on any joints if you are planning on staining. I spend another hour cleaning out glue from joints where stain just wouldn’t stick.
Assembled Toddler Night Stand
Assembled Toddler Night Stand