
Finished Reclaimed Wood Tealight Candle Centerpiece
Summary
Create a Tealight Candle holder from reclaimed pallet wood. This is a a simple project that features a small amount of wood work and a good opportunity to practice finishing techniques. The end product is a nice centerpiece for a long table or fireplace mantle.
Background
In recent years I had the good fortune of finally convincing my family that trying to buy gifts for each and every family member was driving everyone crazy. Instead we switched to the practice of drawing names and each person being responsible for a single gift. On top of that, handmade gifts were encouraged which is great for the thrifty and crafty alike.
This year I found myself a bit shorter on time than usual. With two young kids and several other irons in the fire I was looking for a project that would let me do a bit of wood working wile not requiring a large materials purchase or time commitment. Two hours of Pinteresting later and I settled upon this candle holder concept. I can’t say I did anything too clever for this one other than being too cheap to buy a Forstner bit and making do with a spade bit and some homemade wood filler.
line
Description
Supplier
Unit Cost
Units
Ext. Cost
1
Approx 2"x4" Pallet Board
Scrap
$0
2
$0
2
Minwax Dark Walnut Stain
Walmart
$6.38
1
$6.38
3
Minxax Wipe On Poly - Oil Based
Home Depot
$13.25
1
$13.25
4
Various Grit Sand Disks
Total
$19.63
Note that you only need a small quantity of the Stain and Poly which I had leftover from previous projects.
line
Description
New?
Link (If applicable)
1
Black and Decker Drill
2
1.5" Spade Bit
Yes
Lowes
3
Black and Decker Orbital Sander
4
Lint Free Cloths (Used T-Shirts)
My main rule with a DIY gift is to never make just one. If you are going through the trouble of making one, you should probably make two or three in parallel . I have found that repeating each step multiple times along the way allows me to try out different technique, color and finish options as I go yielding at least one that turns out the way I imagined.
Selecting the Wood
The wood I had laying around was from a good sized shipping pallet that my storage building was shipped on. I liked it because it was rough with saw marks and uneven staining. My goal was to maintain as much of the character of the saw marks as I could, but I ultimately failed to do that to my satisfaction.
First I selected a piece of the pallet board to cut off. Through random chance I accidentally cut off a piece that was exactly two feet. This wound up working out great for spacing the candles as you’ll see later. I then cut off a second piece. I don’t have a picture of it in the raw form, but you can see it has a nice live looking edge which I thought would be pretty cool.
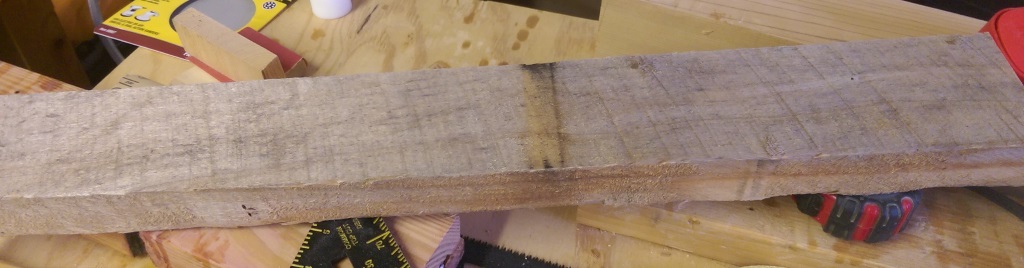
Reclaimed Board
(A Little) Wood Work
Next I sanded the board smooth on all sides with 100 grit sanding disks. My goal with the top which had the saw marks was to smooth the surface a bit, but still leave the marks visible. I then decided to fill in any nail holes with wood filler. Rather than use a store bought filler I made my own from sawdust collected in the sander and wood glue. You can see the mixture in the following picture. I applied the filler liberally making sure to have some excess to sand off.
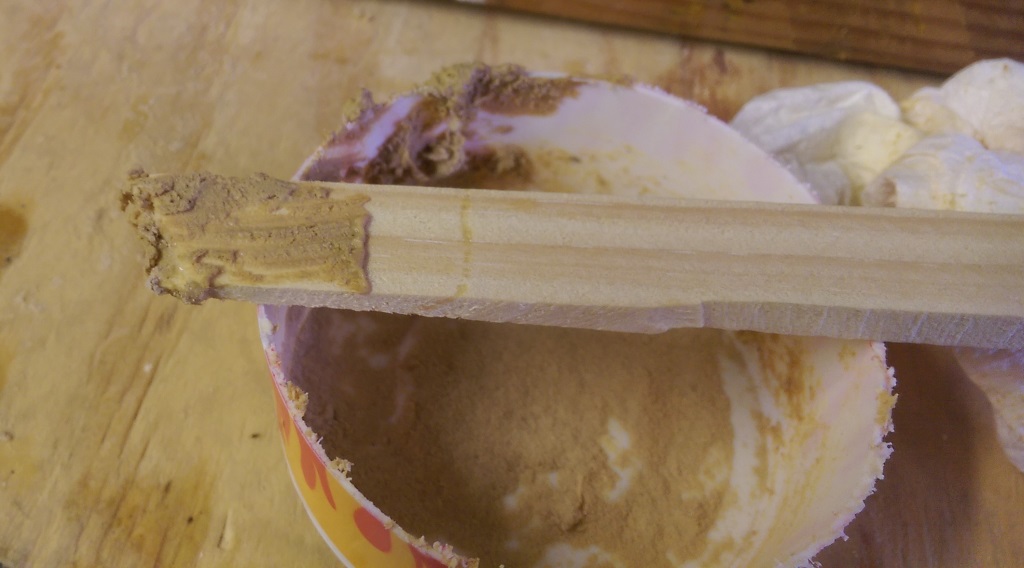
Homemade Wood Filler for Filling Nail Holes
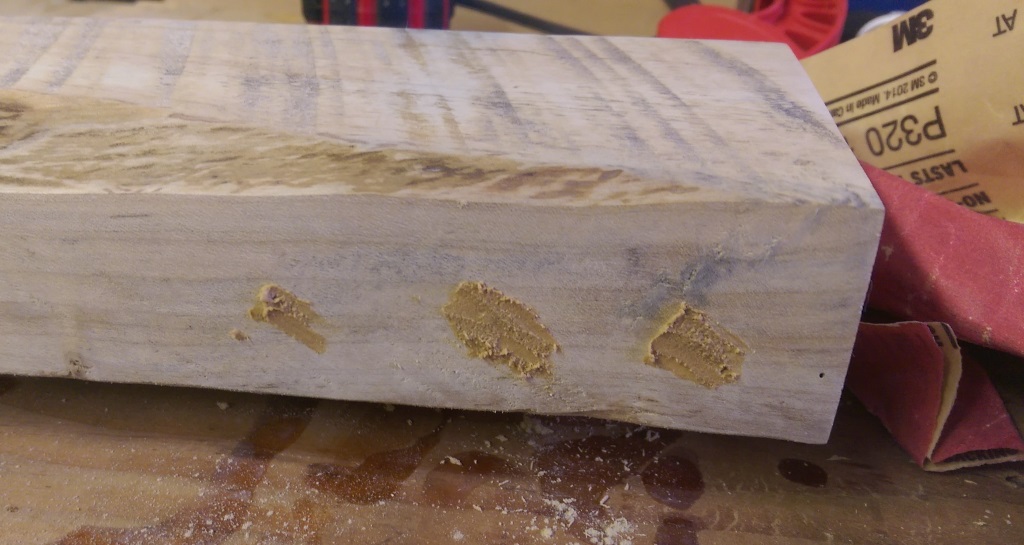
Nail Holes Filled with Homemade Wood Filler
After the filler dried I sanded down the excess and marked out the centers for my candles. Since this was a 24″ board, to place 5 candles across the top you just need to measure down the center and mark ever 4 inches. I then carefully took my hand drill and drilled down on each center until I reached the depth of a tealight candle. I didn’t measure out the depth and instead just checked with a candle as I went. This also helped me make the hole mostly level. The pallet board was one of the harder woods I have worked with and required a fair bit of effort to get through. For anyone with a drill press this would be trivial. If you use a hand drill just be warned that your battery may be out by the time you are done.
In order to clean up the look without my effort I then made a loose wood filler with some wood glue and the drill shavings which I stuffed into the hole created by the center of the spade bit as seen in the following picture.
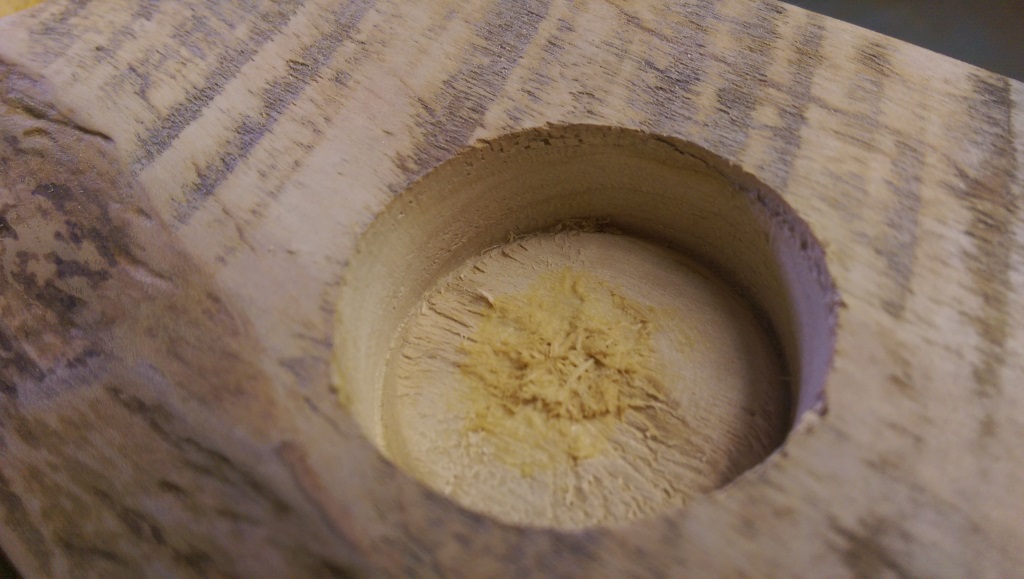
Homemade Wood Filler in Tealight Base Hole
Staining and Finishing
The first candle holder I decided to leave unstained and finish. The second one I stained with a dark walnut which you can see here. Nothing complicated, just follow the directions.
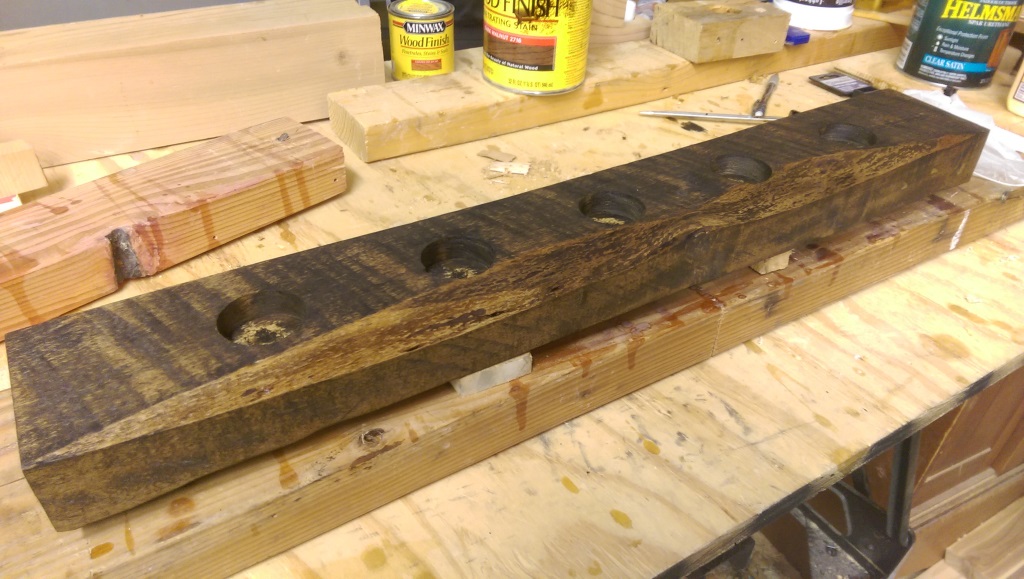
Reclaimed Wood Tealight Holder After Stain
Finishing was done with the same wipe on poly I used for my son’s night stand. I think I did three coats on the top, with just a light coat on the bottom.
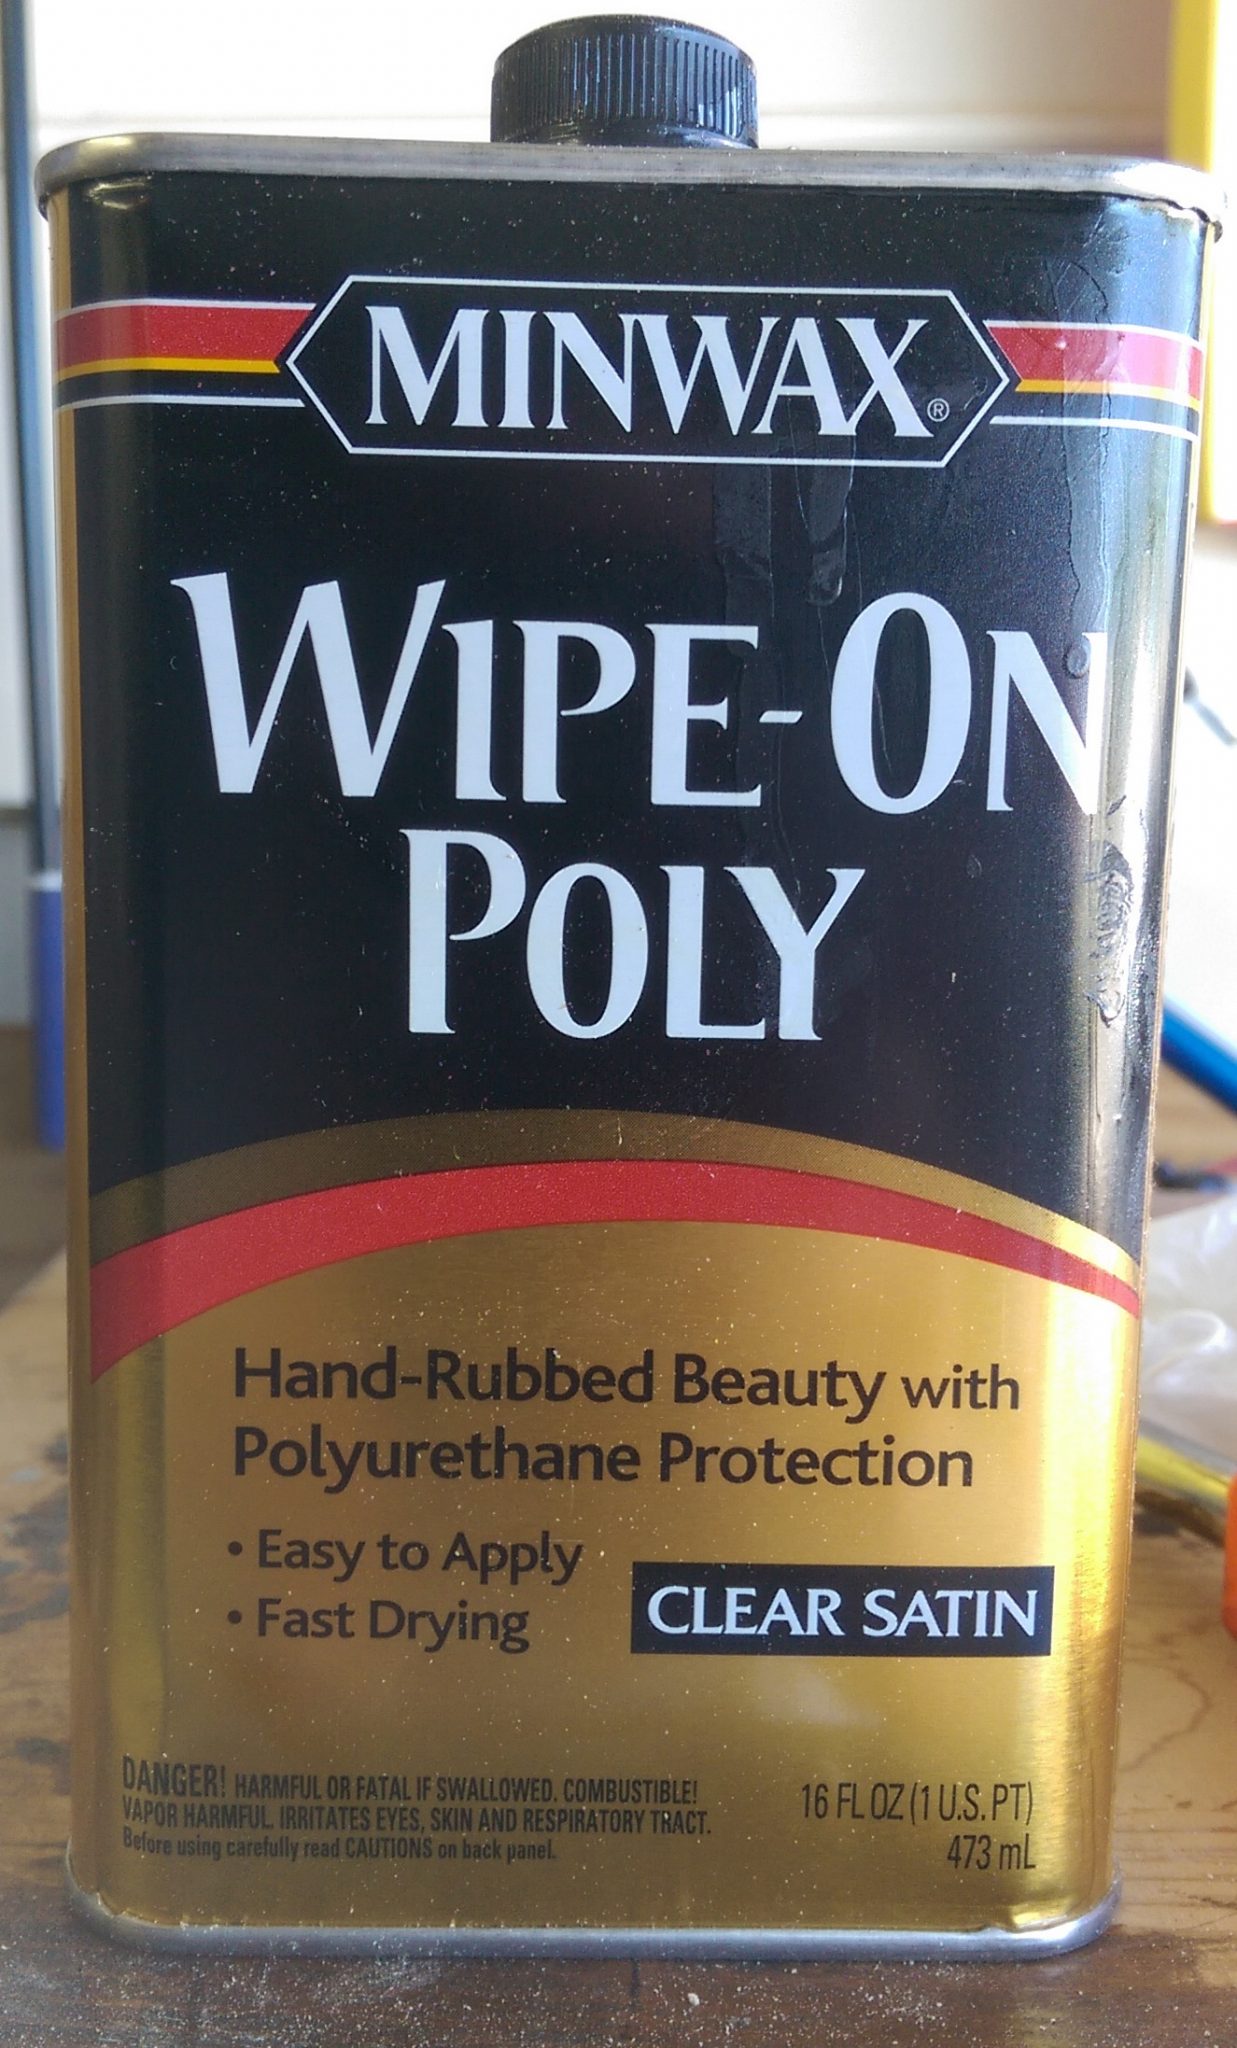
Minwax Wipe-On Poly Clear Satin (Oil Based)
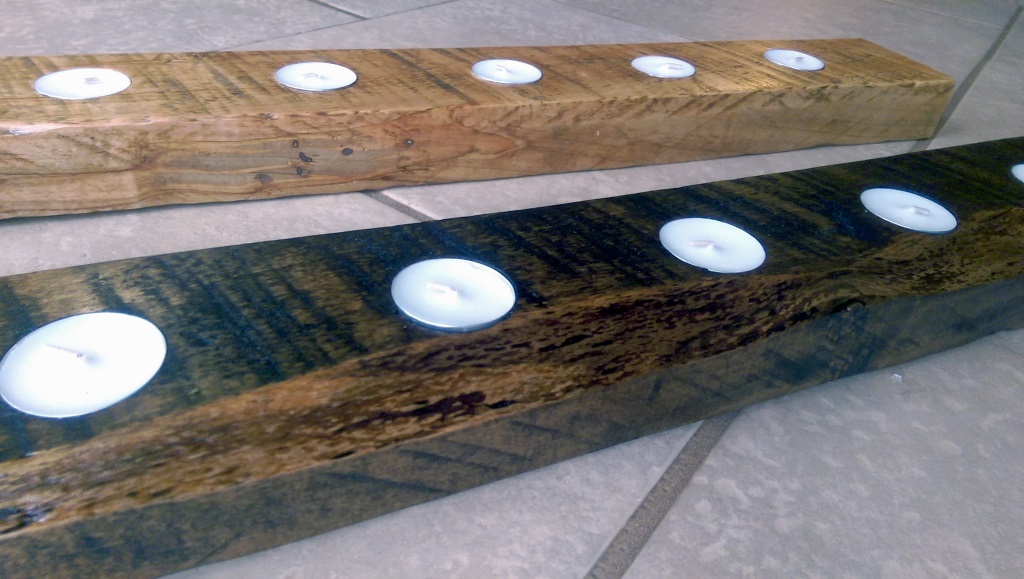
The final step I did after the stain dried was the insert the candles and cut out some small felt pieces which I hit glued to the bottom. That should keep the holders from scratching up anyone’s table if used as a centerpiece.
Conclusion
I have to admit that neither of the candle holders turned out like I originally intended. Maybe someone out there can recommend a way to finish rough wood that has a finished look as well as retaining more of the rustic appeal. I was frustrated that the poly dulled out so much of the interesting texture from the saw marks, but I wanted something to keep it from splintering. What I realized would be really cool after the fact was if I had taken and ripped each of them down the center, then joined them together to be half dark, half light. Oh well, there is always the next project.
Finished Product Candle Holders 1

Finished Reclaimed Wood Tealight Candle Centerpiece
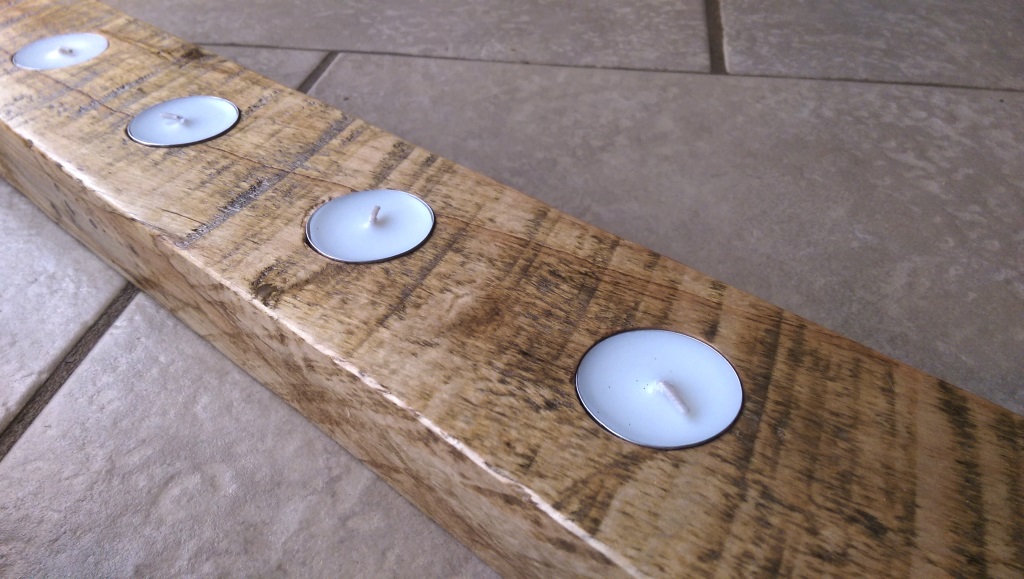
Finished Un-stained Candle Holder
Both look great, think I like the dark best.