
Summary
Troubleshooting and repairing a battery powered Worx string trimmer that suddenly stopped working.
Background
Back when we bought our house we knew we needed a string trimmer to edge the lawn and reach tight spots a mower will miss. After some research at the time we wound up going with the Worx 20V battery powered string trimmer (Affiliate Link). We have been pretty happy with it every since. A full charge will usually take care of the front or back yard, but not both. Also, the ability to flip it around and roll it on the wheel for edging is great. On top of that, its light, though after using it for 30 minutes you might forget it. The battery has held up well and we have had zero problems with it.
You can therefore imagine our surprise when my wife was finishing up the backyard and the thing just stopped. We didn’t hear a sputter or grinding or anything, it just wouldn’t turn on when the switch was clicked anymore. I was worried we would need to replace it which wouldn’t be the end of the world. However, since I knew it was a pretty simple electrical device I was hopeful I could repair it.
Tools and Materials
- Philips Screwdriver
- Soldering Iron
- Desoldering Pump (Solder Sucker)
- Solder
- Flux
- Heat Shrink Tubing
- Electrical Tape
Diagnosing the Issue
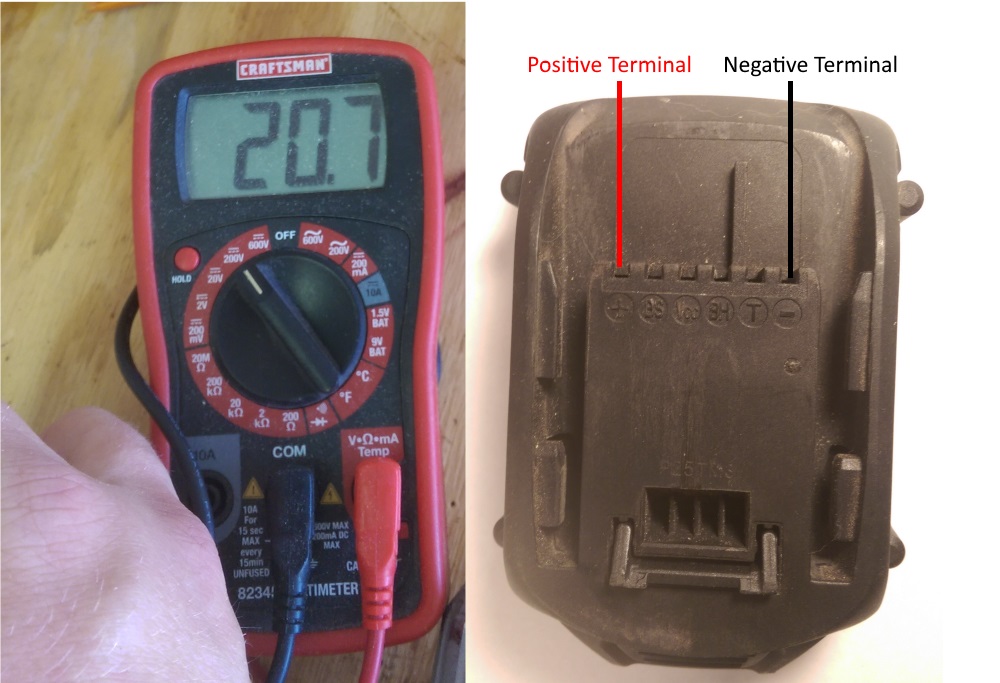
My troubleshooting heuristics usually flow from easiest potential issue to check to hardest issue to check, with some variances allowed for more likely problems. Since it required no disassembly, the obvious fist step was to use a multi-meter to check the battery voltage. The battery was very conveniently labeled, so it was easy for me to find the + and – terminals. I set my multi-meter range to 200V DC and found 20 volts between + and – just as I should. This meant the battery was not the problem.
Check Lithium Battery Voltage with Multimeter
Cautionary note
Battery operated tools run off of batteries that can supply a lot of current in a short amount of time. In electrical engineer speak we would call this property having a low internal resistance. You can also think of this as having a lot of power. For this reason, you do need to be careful when working with these sorts of batteries not to short them out. The possible issues from shorting these batteries include:
- Getting some metal really hot (would suck if this was your wedding ring)
- Welding some metal together (would really suck if this was your wedding ring)
- Causing batteries to explode or catch fire, which is scary with modern lithium ion batteries and really bad for your face, and eyes
All that to say that as long as you don’t provide a short between the positive (+) and negative (-) terminals you should be fine.
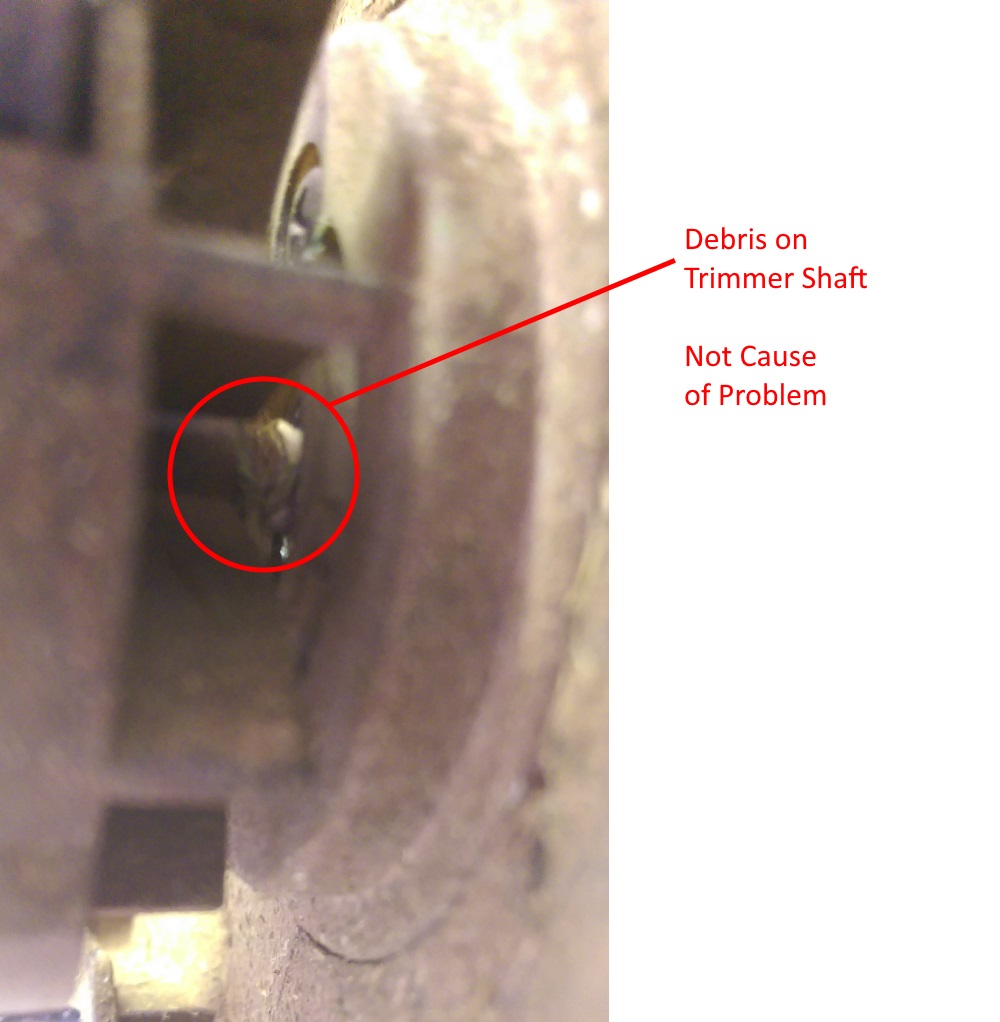
Just so you don’t think I am a genius, I did also explore an issue that turned out not to be the problem. I examined the trimmer closely and noticed a substantial amount of fibers wrapped around the shaft like hair and grass. I wondered if this large amount of material could be causing the shaft to stick. Therefore, I attempted to cut and pull this material loose with some tools my wife had around for clay sculpting. While I did get some of this material free, it didn’t seem to improve anything on the trimmer, so I went back to troubleshooting.
Debris on Battery Powered String Trimmer Shaft
Now I had a real conundrum though, if there was an electrical problem it was probably either near the handle and switches at the top, or near the electric motor at the bottom. I chose to start at the bottom near the motor for two reasons: I listened and felt both switches and heard good clicks and contacts, also, there seemed to be fewer screws in the bottom portion.
I was in too much of a hurry to fully document the disassembly for you. I began by removing the cover with the logo on it.
Removing the Cover with Logo
I don’t have pictures of the disassembly, but I think I basically did the following:
- Remove cover with Worx logo (Shown above)
- Remove the two screws underneath the cover
- Remove the screw in the middle of the rotating joint
- Remove the screw that held the guard together
- Remove the screw the held the guard on
- Try and fail to remove the metal bumper (I could not get that thing off)
After I got it apart I wound up with two pieces. The casing which holds the motor…
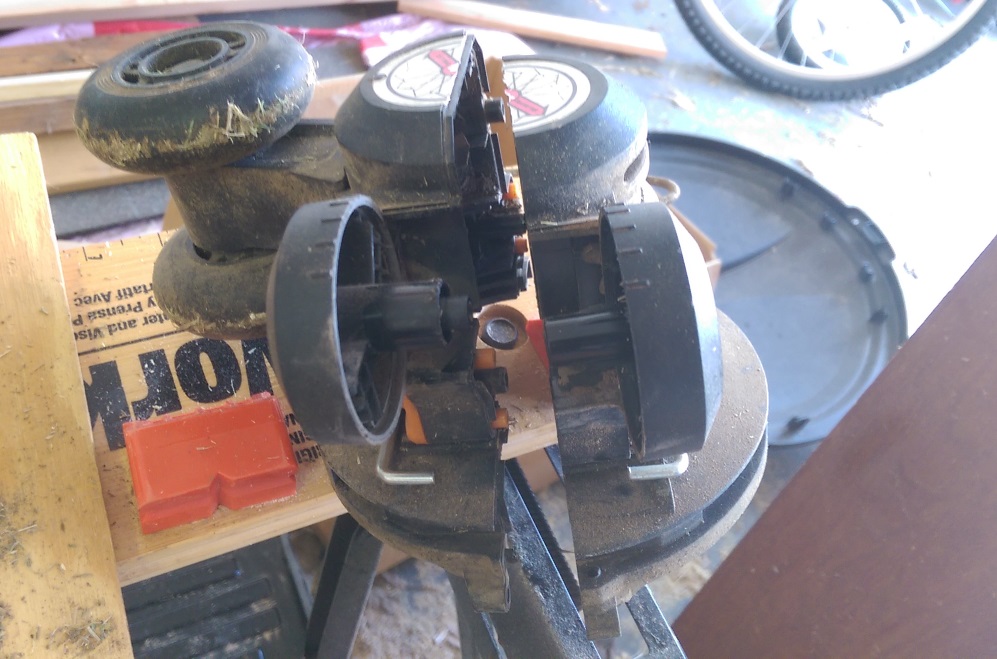
Casing with Motor Removed
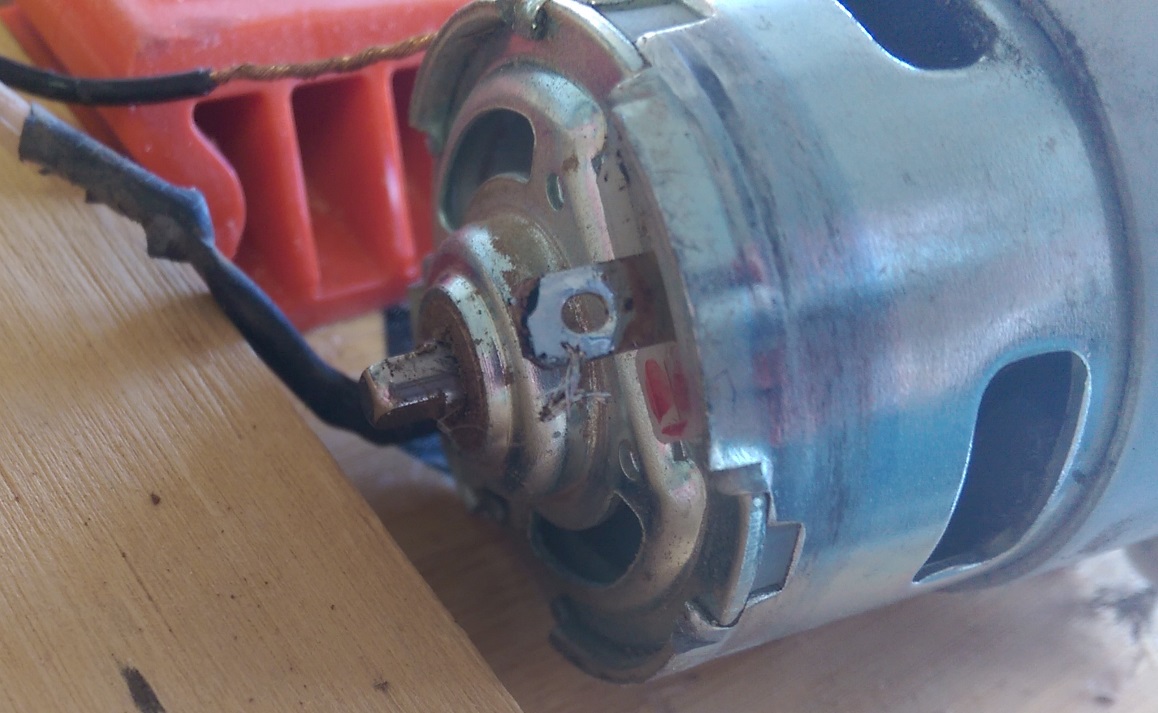
and of course, the handle and the actual motor as well as the wires that connect everything together. When I got to this step it was pretty obvious why the trimmer stopped working. As you can see from the photo, one of the wires that connects the motor had broken loose!
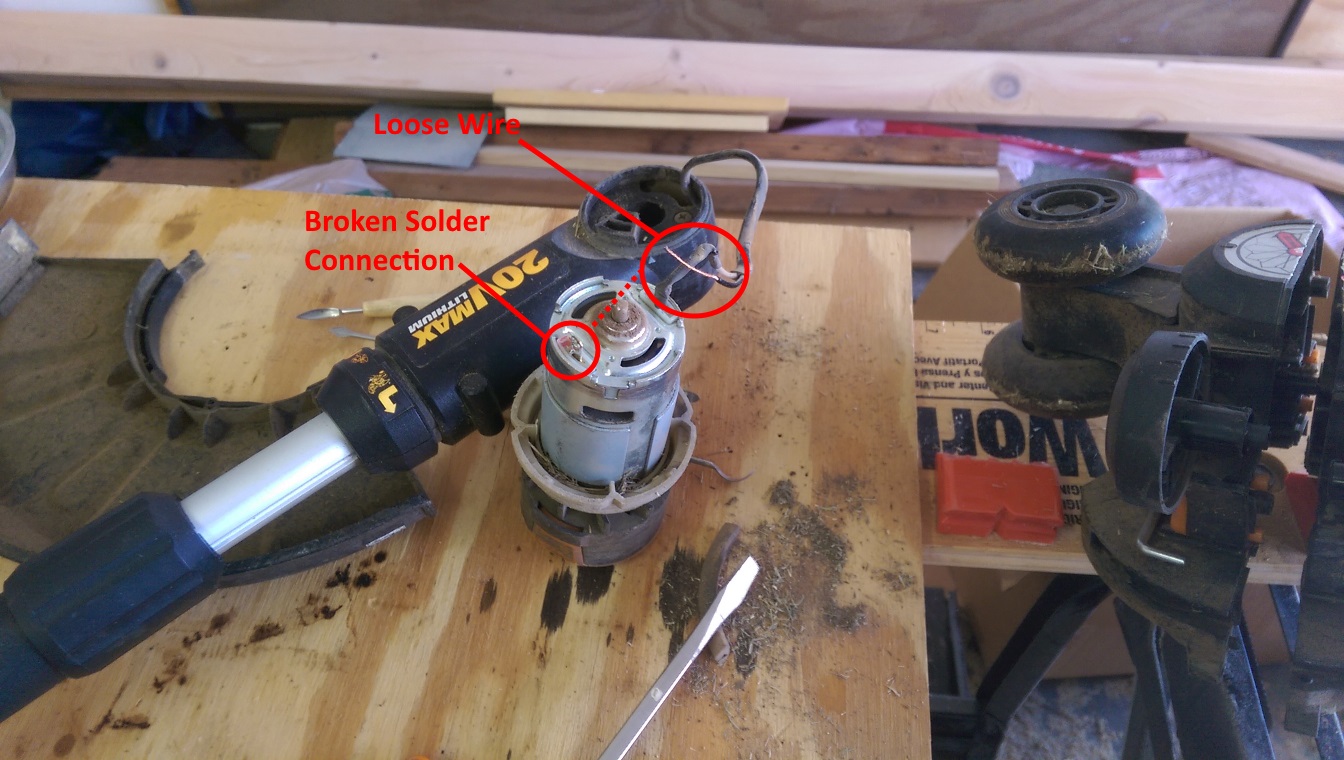
Broken Solder Connection to Motor
Finally, I knew what the problem was. I was very excited that this was the issue because fixing a broken solder connection is something I have done many times and already had the tools and materials for.
Fixing the Problem
Luckily for this engineer, the problem turned out to be a broken connection between the motor and the wires that run up the shaft. Re-soldering a wire is definitely in my wheelhouse while small engine repair for a gas model is not.
First, I setup my soldering workstation. For work like this you can use either a small electronics soldering iron, or something with a bit more juice. In this case, since my little Radioshack iron was just taking forever to heat up, I wound up using my larger soldering iron that I normally use for stain glass. (Note that both are in need of replacement at this point though, and are pretty much good for nothing). You can either buy a nice soldering station, or a holder, or you can do what I do and use some nails in scrap wood.
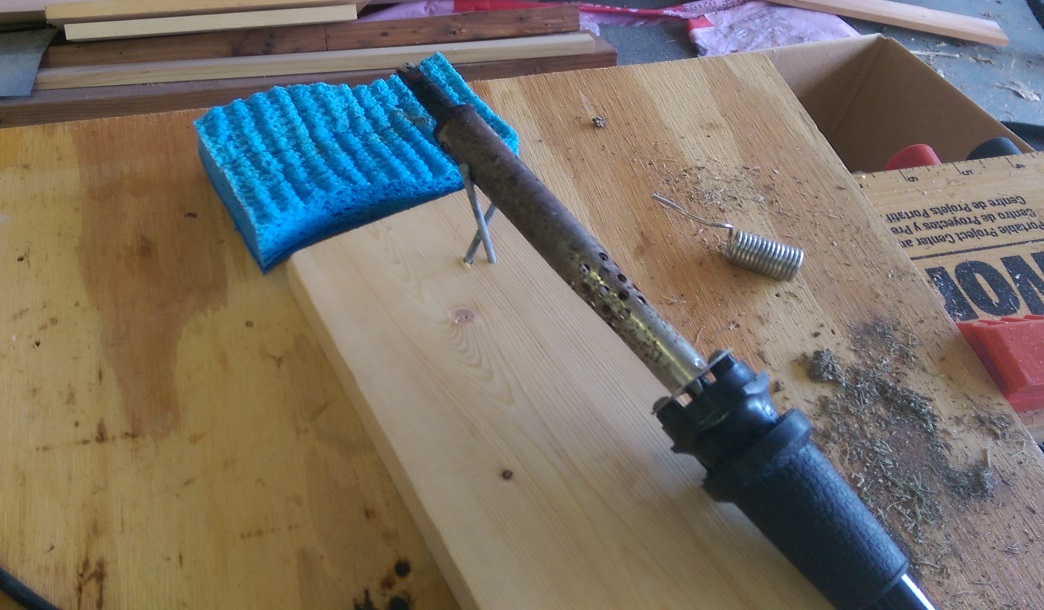
Home Made Soldering Station

Desoldering Pump
To remove the broken solder connection from the terminal on the motor, I used a desoldering pump, or “solder sucker” like this one at Amazon (Affiliate Link). If you do any amount of solder repair, you need one of these. The technique with a solder sucker is pretty obvious: push down the pump until it clicks in place, then use an iron to heat the solder to liquid, put the tip of the sucker as close as you can and hit the button to suck the solder into the pump. Then wash, rinse, repeat, until you get it clean enough to re-solder. Use a bit of flux to get the old solder to flow if needed. You can see the de-soldered motor terminal in the following photo.
Battery String Timmer Motor Ready for Soldering
To repair the connection I decided to duplicate the original assembly technique which was to leave a long exposed piece of wire but wrap it in heat shrink tubing. The downside to this is that the tubing may wear off and cause a short, but shortening the wire down to the insulation would be risky because the wire moves in the swivel head and if it breaks again you will need some slack to re-solder it again. I cut the tubing to length and slid it on the wire, then attached the wire to the terminal and prepared it for soldering as shown following.
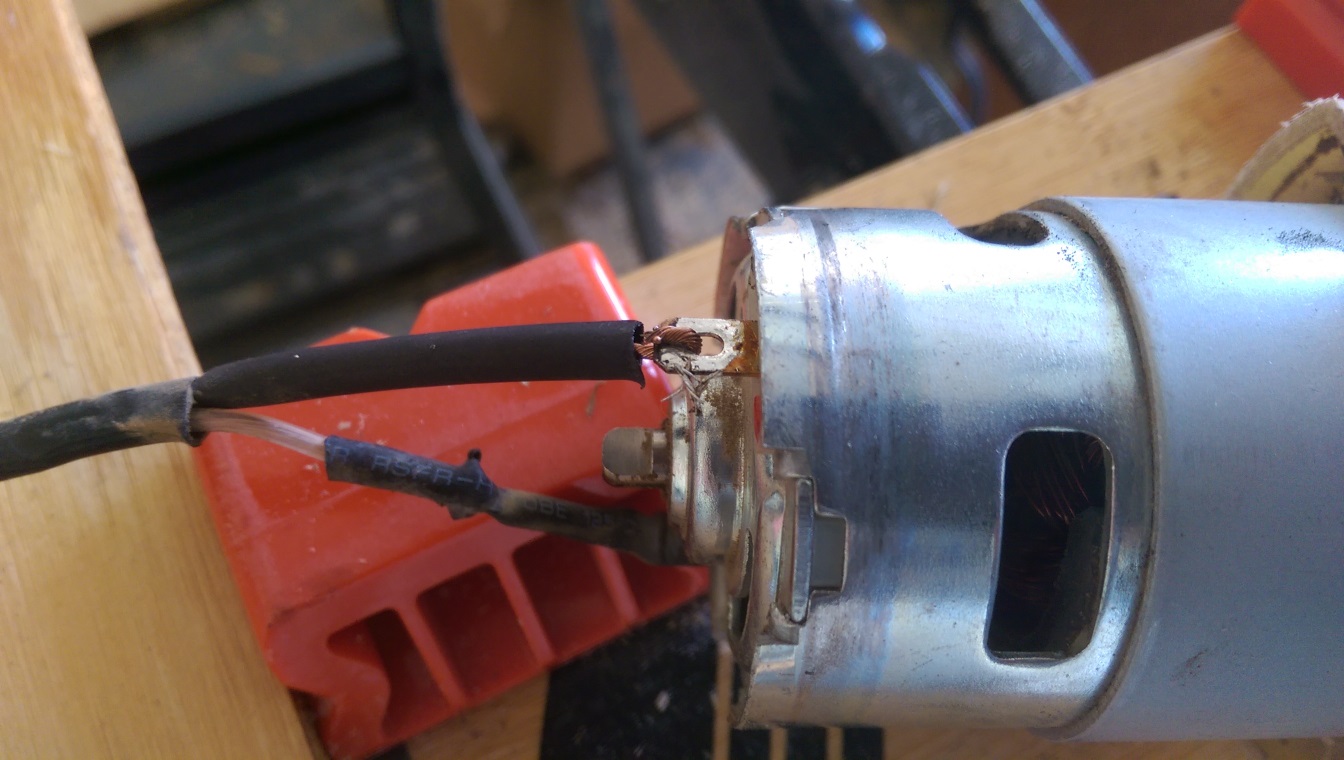
Battery String Trimmer Motor with Wire Attached for Soldering
Re-soldering is as simple as heating up the terminal and the wire and applying solder until its covered. I used a solder with a flux core, but you could also use a pure metal solder and supply your own flux.
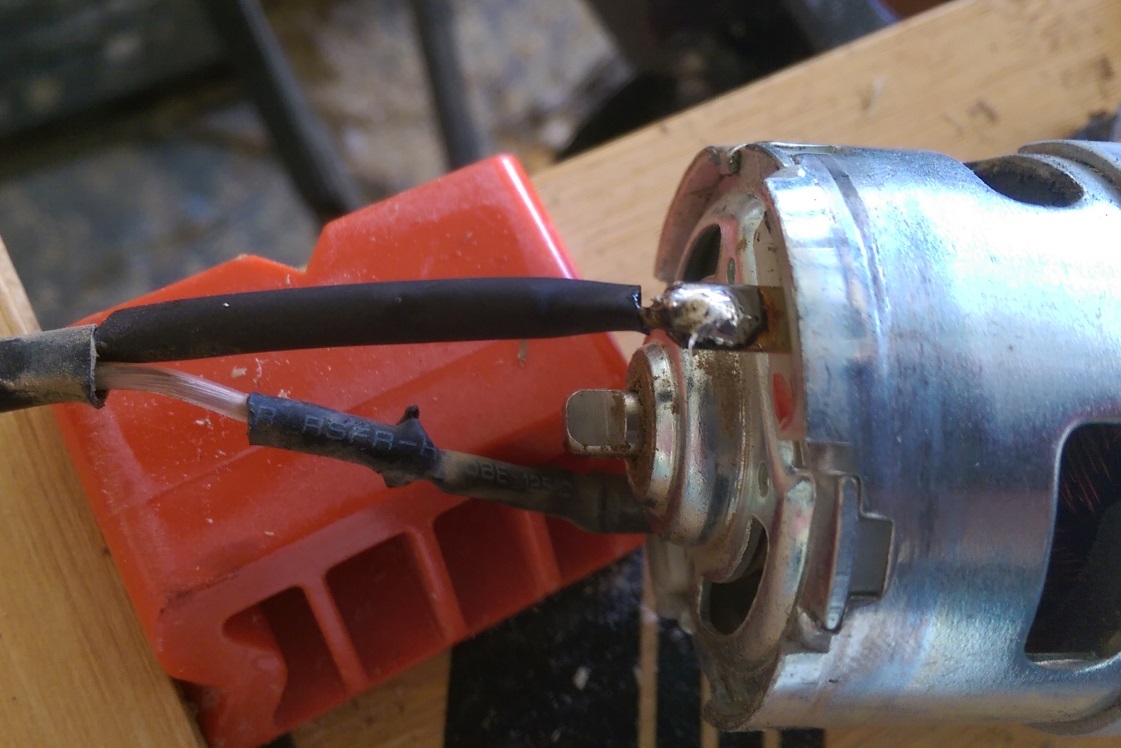
Battery String Trimmer Motor after Solder Repair
I then pushed the tubing down and used the soldering iron to shrink it around the terminal and wire. However, I was not happy with the results so I added some electrical tape to the repaired connection, as well as to the existing connection which was showing some wear. After putting the tape on it was time to put everything back together.

Battery String Trimmer Motor Terminals Repaired
Reassembly was pretty tough on this one. Since I had pretty much just forced it apart (and not removed that metal wire guard) the thing did not want to go back together. To make matters worse, you are trying to hide a wire in a swiveling joint, which is pretty hard. In the end I did get it, but even if you do a better job of disassembly I think a second pair of hands would help alot.
Conclusion
These Worx trimmers run around $100 USD so I was very happy to have been able to fix it in less than an hour.
My issue turned out to be a broken solder connection. In the case of a battery powered trimmer like this, there aren’t a whole lot of ways for it to break. Off the top of my head, the other potential issues you might check for would be:
- Failed or stuck switches in the handle
- Mechanical obstruction of the spinning shaft
- Failed or disconnected battery contacts
I should also give a shout out to Worx for the free trimmer spools for life deal they have with these things. I owned this one for 3 years and just learned about this now. All in all a good tool, but nothing lasts forever.

Battery String Trimmer Repaired and Ready for Action
Update
It turns out there was one more twist to this story. Shortly after this repair the trimmer failed again. I disassembled it again and found that the wire had been broken again. Further investigation revealed that the root cause of this was the motor’s shaft had rotated against and almost instantly broke the wire feeding the motor. To correct this I had to splice on an extension to the wire. If you do the same make sure and find a thick wire to handle the current.
The actual root cause turned out to be that the motor was able to twist itself inside the housing because the white piece of plastic that the motor spins in was not held tightly in the housing. If you perform this repair, try and find some way, such as a little glue or silicone to hold that piece tight when you reassemble. Also make sure that the motors contacts are positioned so that the wires are held away from the motor, and even use some tape if needed to hold them up.
Excellent article. I had the same problem and followed your article. Now it’s fixed. Thanks.
I have had 18 volt trimmer for many years and have just started really using it. Mine did not die but it did slow down and I noticed there was debris wrapped around the chamber shaft like you. I have tried cleaning it out but still notice some left and I can’t find a way to remove the chamber so I could thoroughly clean it out. Can you help me with this. I have searched all over for some video that would demonstrate how to remove it. There is only one screw without a head holding it on and I don’t have a socket small enough to grab it. Please help. Your information was very helpful in case I run into this after I clean it out.
Same issue with mine after 4 years. Used your troubleshooting and methods and fixed it in an afternoon. Really well done! Thank you.
If at all possible, Never take the handle apart. The internal parts are not user friendly. one accidental bump and spring loaded parts go everywhere. I took the handle apart first because I had a hot spot in the handle,It got really hot whenever I put a third battery on. The wiring down to the motor should have been the next heavier gauge. One tip that I learned as a 40 year electronics tech, when using a solder sucker, trim out a depression in the tip that fits your soldering iron. The increase in suction is amazing, and the reaction of the solder sucker doesn’t drive the soldering iron tip into the circuit board, which can cut circuit traces
I reviewed your instructions, your update is what happen to my unit. So, I untangled the wires and wrapped additional electrical tape around the wires then put silicone around the white plastic portion. Just tested it and it’s working fine! Wish I had seen this before throwing out my 1st one.
Let me first say – you are a genius & thank you! I, like you, hate throwing electronic equipment in the landfill. So whenever a piece of equipment fail, I always try to fix it. Many times it is a loose wire and a soldering gun is my best friend. In this particular case, my Worx trimmer which I love, failed very similar to yours. The only difference is that the entire metal tab on the motor broke off (the wire was still attached to the broken tab). I took your advice and added a wire extension. I noticed that where the tab broke off the motor, there is a narrow gap on top the on motor terminal; big enough to insert the end of wire extension in. Rather than trying to put a broken tab back on a motor, I just solder the wire directly onton to terminal gap. I tested it out after I carefully put the parts back together. And voila! The Worx trimmer works again. Thanks for the post again.
Switch is messed up. Not getting a steady contact.
Great and detailed, fix, in my case the wire was mot cut nor had it come off the motor leads but they we’re all crimped and smashed, I straightened all the wires made sure they were all sound, ‘re taped them, ‘re routed them so they would not get crimped again during re-assembly.
many thanks to you for this very helpful post.
My WG165 needs a new motor where can I buy one?
my mg175.1 motor broke were I can buy another help
Thanks, the hidden screws were driving me nuts. Now to get the freakin handle back together.
Excellent article. Very clearly explained.
What and where is the rotating joint? how do you remove the screw the screw from it?
Where can I buy this part – Guard Set WOR-50024096
Thanks for the info. however, my problem is the switch in the handle. I heard a click and the trimmer no longer would start. Is this something I can repair myself? If so, how??? Hope to hear from you!!
I just took mine apart, bearing & bushing were dry, now 1 battery last the whole yard when 2 batteries never finished weeding/edging the yard. simple to fix but won’t last like my 30 yr old electric homelite weedeater
This was an incredibly helpful post, both in the article and comments. Ran into the issue of my Worx 20V trimmer intermittently stalling out. I assumed a loose connection somewhere, so I took the head apart (as described here) and did various continuity checks, but everything proved to be electrically fine. I was also very careful around the handle (thanks for the warnings in the comments) and it was enough to pry it slightly open to test the switch, but the switch was fine too. Now, I was really scratching my head. So I started to look around for other causes and noticed that a little inner plastic piece of the trigger was worn/cracked. After a studying it, I realized that that particular piece was actually supposed to make contact with the switch to depress it to start the trimmer, but it looked like it might not always be holding it down tight enough (due to the damage).
So a modern approach to fix this would likely call for 3D printing a new trigger piece. But the primitive fix: I grabbed a couple wood chips from the yard and filed them down to fit snuggly inside the hollow openings in the trigger, setting them so the tops of the wood chips were slightly higher than the worn/cracked plastic. After reinstalling the trigger, the trimmer “worx” better than new, as its easier to squeeze and probably won’t fail here again. Thanks everyone the troubleshooting assist.
Thanks for you post. Your description of disassembly was spot on. Unlike you, my soldering skills are 10 times worse and my metal tab was broken flush with motor. After three fails, I read that this tab is actually part of the motor brush. I therefore drilled a small pilot hole next to the metal through the plastic and inserted a small metal screw. I cut the tab at the end of the broken wire, stripped off about an inch of insulation, added a piece of shrink tubing for later, wrapped the exposed wire around the screw, tighten down securely, heat shrank the tubing and reassembled the trimmer. It worx good as new. Hope this will helps someone else.
My spool seat got cracked and broke off. Cord tangles and breaks within seconds. Ive gone through an entire spool in just a few mins trying to get it to work.. Its truly frustrating as i cant figure out why it would even effect it. Ive tried to put the spool in both ways.. I cannot find a spool seat to repair it at the worx site. Is this repairable or am i just SOL?