
Exterior Outlet on Brick Home
Installing a new exterior outlet on a brick house. A GFCI outlet is installed inside a watertight enclosure and tied to inside wiring.
Introduction
I recently purchased an electric smoker that I use on my back porch. However, my house predates the part of the electric code that required a plug in the front and the back of the house. I added a plug in the front years ago the first time I put up Christmas lights, but I had never put on on the back. Since I use an electric hedge trimmer there was more than one good reason to finally add one.
Retrofitting an outdoor outlet is a bit more work than an indoor outlet, especially if you live in a brick house like I do. I have seen plenty of guides online with straightforward techniques to add a plug on siding exteriors, but never found a good guide for a brick exterior. Therefore, this process has been pieced together from the internet plus my own experience doing this once before. If anyone has any major issues with this technique let me know because I have done it twice now.
Tools and Materials

Exterior Outlet Tools and Materials
For such a small project you need quite a few tools and materials to finish the job.
Tools
- Drill (with enough horsepower to drill a brick)
- Masonry bit that matches the size of your masonry screws
- Small level
- Flathead screwdriver
- Phillips screwdriver
- Drywall saw
- Box cutter
Materials
- GFCI Outlet, outdoor rated
- Weatherproof exterior 1-gang outlet box
- Exterior outlet box cover
- Masonry screws/anchors (3/16″ x 1-1/4″ or 1/4″ x 1-1/4″ will work for brick)
- 12/2 Romex with enough length to reach the interior box you are pulling power from
- Wiring nuts
Choosing a location for the Exterior Outlet
The main consideration when choosing a location for the exterior outlet is to find a place where will be able to tap into the existing interior wiring. You need to find inside switch or outlet you can tap into for the power feed to the exterior outlet. The outlet also needs to be in a location that will be useful to you for your outdoor activities.
The safest thing to tap into will be an indoor outlet because its guaranteed to have a hot and neutral present. If you are going into a switch like I did you will need to make sure that its not wired as a “switch leg” or “switch loop.” You can read about the basic idea here: http://www.renovation-headquarters.com/switch-loop.html. The reason a switch leg won’t work is that you wouldn’t have both a hot and neutral wire to feed the outlet.
The location I settled on was beside my back door underneath the porch light. This would allow me to tap into the existing wiring that feeds the porch light and light switch. The location also allows me to easily access the outlet from my patio furniture.
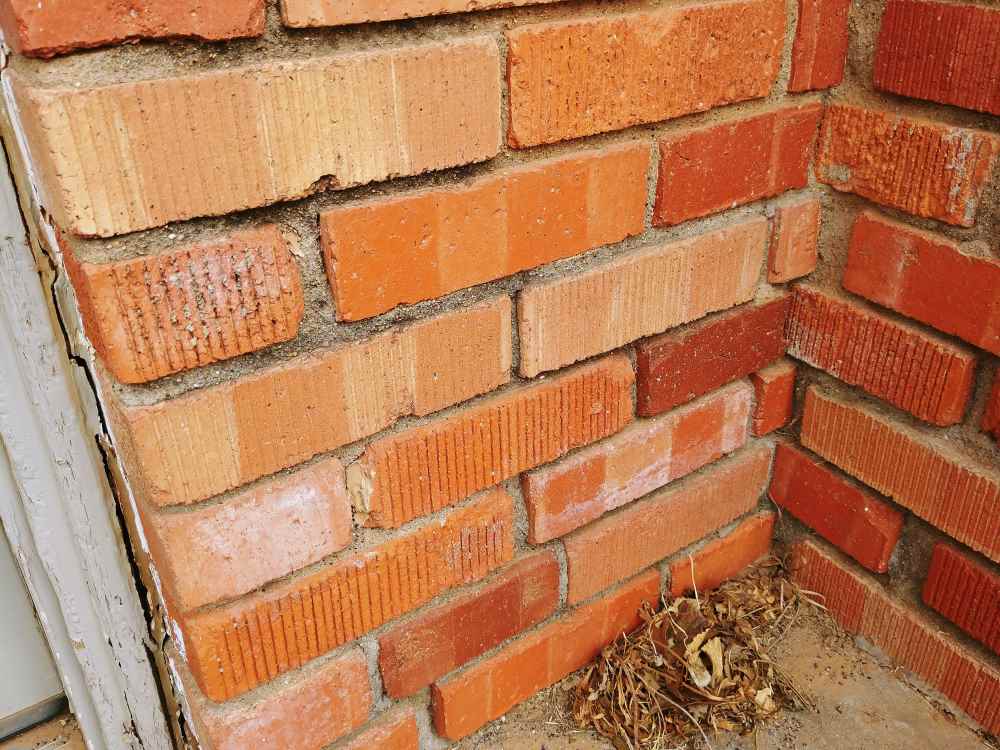
Location of Exterior Outlet
Next you need to find a suitable height and figure out how you are going to mount the outlet box to the brick. The NEC doesn’t appear to specify a minimum height for the outlet, but does specify a maximum height for the two required outlets at a residence at around 6 feet. I would recommend mounting at least a foot off the ground and possibly higher if you live in a place where snow accumulates. I also think its best if you can find somewhere that doesn’t generally take on too much water. Under a roof overhang is ideal.
Installing the Outlet Box
The easiest way to add an outlet on the exterior is to use an outdoor rated enclosure that mounts to the existing surface rather than trying to insert it into the wall like you would an interior outlet. This keeps your wall penetration size to a minimum which is very important with brick. In new construction, a mason might choose to just stick the box directly in the run of bricks.
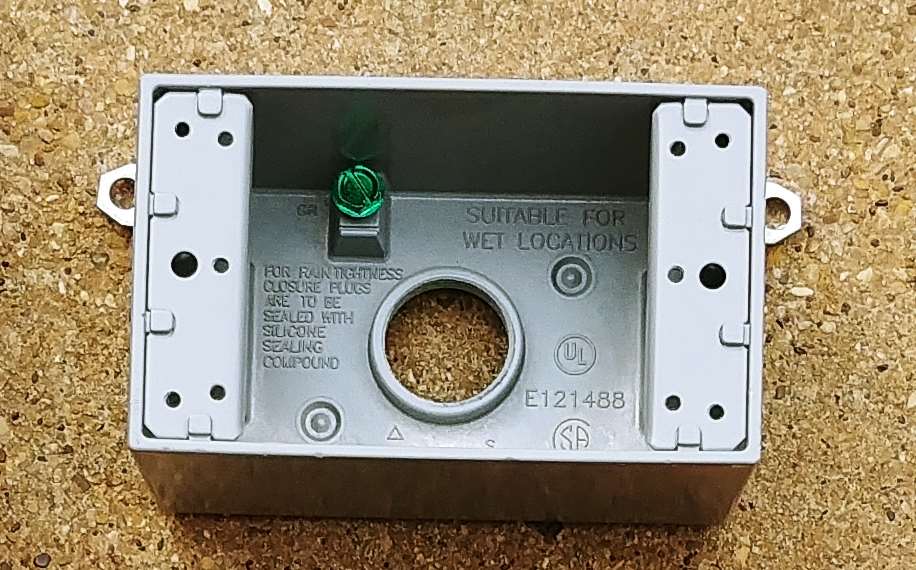
Exterior Outlet Box Closeup
Mounting to siding can be done with exterior wood screws, but mounting to brick requires stone/masonry screws. I was originally going to use some 3/16″ diameter anchors, but accidentally used the wrong drill bit and wound up using some larger 1/4″ diameter anchors that are actually overkill.
The trick I have found with mounting the box on brick is to make sure that the box anchors go into actual brick, while aiming the electrical cable for the mortar. The reason is that the mortar is not actually secure enough to hold the box, but is very easy to get all the way through for the cable entry. The following picture shows how I located the box and made sure it was level using a level. I marked the brick for drilling with a permanent marker.
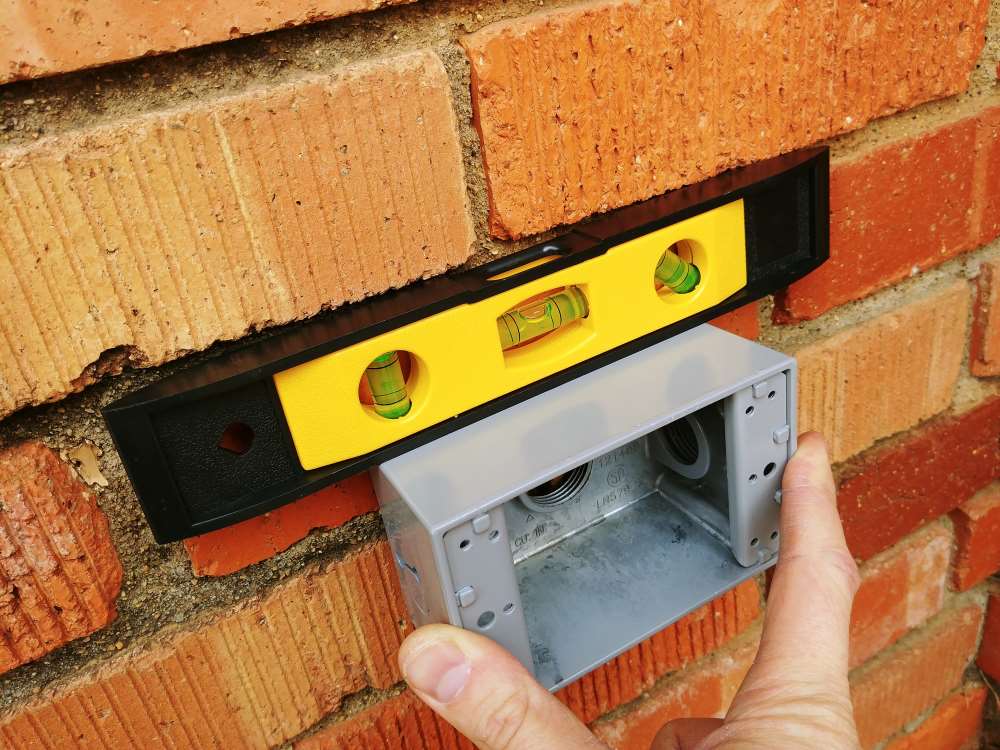
Locating the Box for Exterior Outlet
I first drilled out the cable entry for the Romex using a small drill bit. The mortar is so soft that its pretty easy to just manually enlarge the hole with a screwdriver or something pointy until you have the correct size. You can clearly see in the following picture what I mean by mounting the box on the brick while drilling the cable entrance through the mortar. Before you move one make sure and test fit that the electrical cable does fit through the mortar.

Drilling Holes for Exterior Outlet
Drilling the brick is much harder than the mortar. Being slow keeps you from going too deep. It is important to remember to pull the drill out every so often as you go in order to clear the hole of stone dust. You can compare the drill bit depth to your anchors to make sure you hit the correct depth. Unlike wood you do need to go all the way to prevent the anchor from splitting the brick when it goes all the way in.
After everything is drilled out all that is left is to install the outlet box. If you are paranoid you can put a dab of silicone before you drive in the screws to prevent water from seeping into the brick.
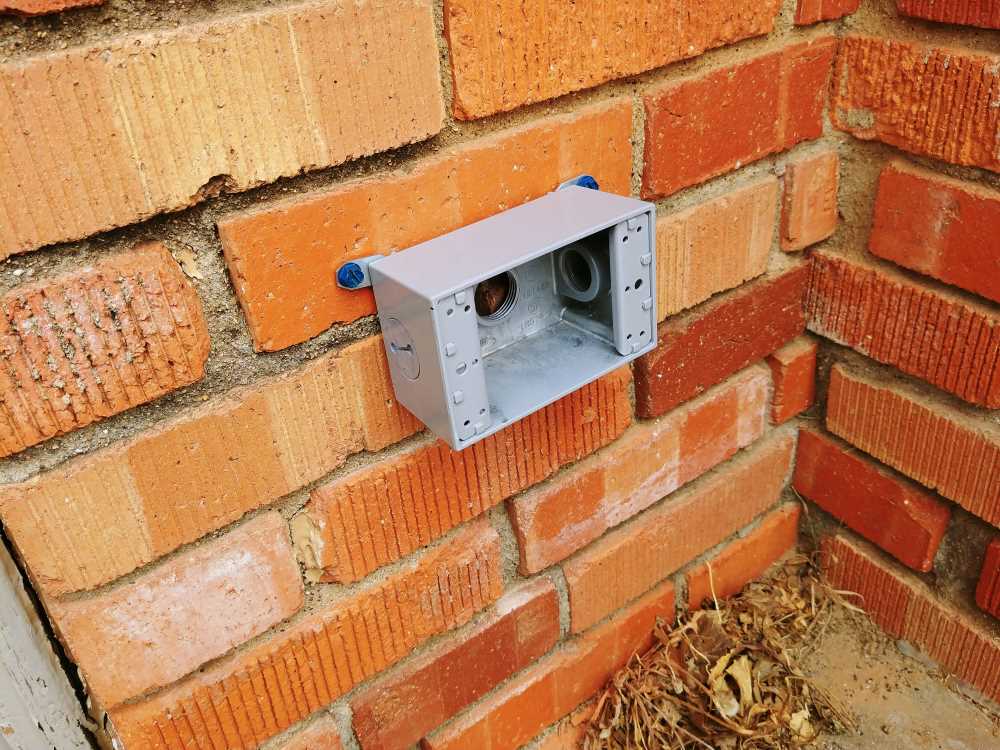
Exterior Outlet: Box Installed on Brick
Installing the Cable
The electrical feed for my new outlet is coming from a switch box for the back porch. This is only possible because the switch is not installed as a “switch leg” or “switch loop” as I mentioned before. I could not think of a way to get the power feed to the new outlet without cutting a hole in the exterior wall in this case. Therefore, I had to cut a hole in the wall using the following steps:
- Mark a square opening with a box of some kind
- Using a box cutter, trace over the pencil marks. This step minimizes damage to the surrounding paint and drywall.
- Cut out the square with a drywall saw. Make sure and catch the square so it doesn’t fall in the wall
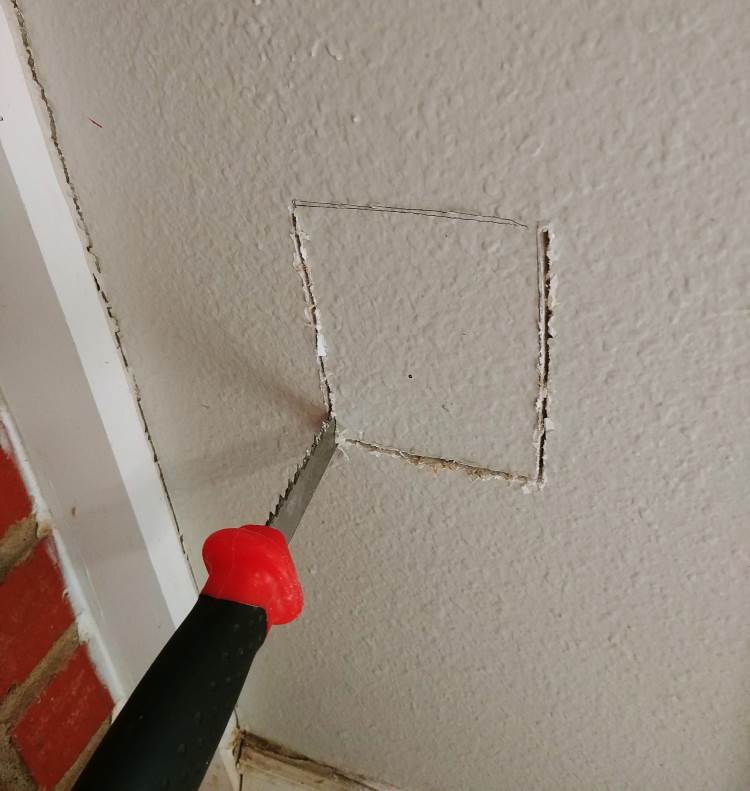
Exterior Outlet: Cutting Drywall for Cable Installation
With the hole cut, I was able to see that I hadn’t fully penetrated the drywall from my exterior drilling. That was easy to fix by using the drywall saw from the outside. (Don’t do this with a nice saw! It is a bad idea to use the blade on mortar and brick…)
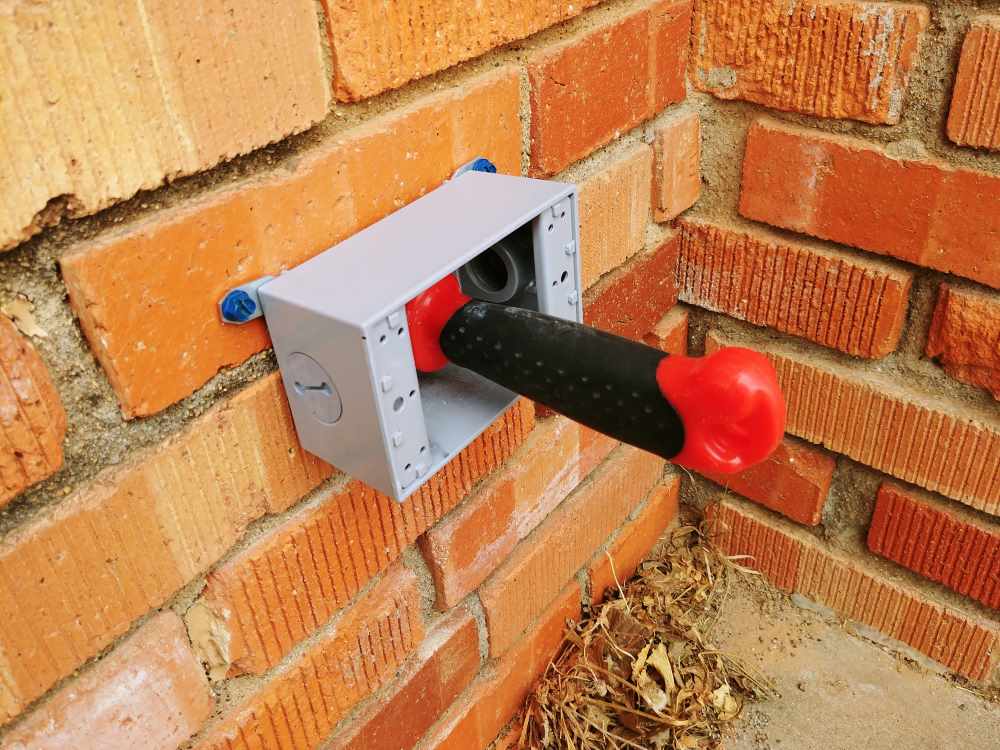
Exterior Outlet: Finishing Hole with Drywall Saw
With the hole finished I was able to fish the cable through the existing box opening, through the wall, and push it outside. If you can’t get the cable secured in the existing old box, you might need to replace the box with a new one. The process will be very similar to what I did in this post, but using only a single gang box. Just for having more wiring space it might be worth switching out the old box. I was able to carefully re-use the old box and even got the cable secured in the existing cable clamp.
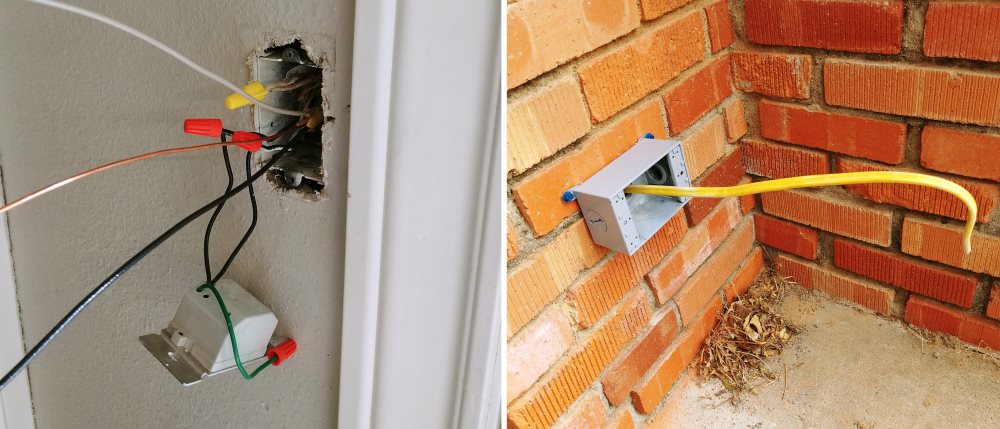
Exterior Outlet: Cable Installed
Installing the Outlet
I will let you find another reference for the electrical wiring in the switch box. Some of the details will depend on when your house was built and decisions made in the past.
Always remember to shut off the correct breaker and use a non-contact voltage detector to make sure that there are no live wires in the box when you do your wiring. Also make sure to check local codes for all work.
An important consideration when wiring to a switch box is to make sure you connect to the hot side of the switch wiring rather than the switched side, otherwise you will wind up with a switched outlet. The following picture shows my new outlet before I tied the ground wires together and screwed it in place.
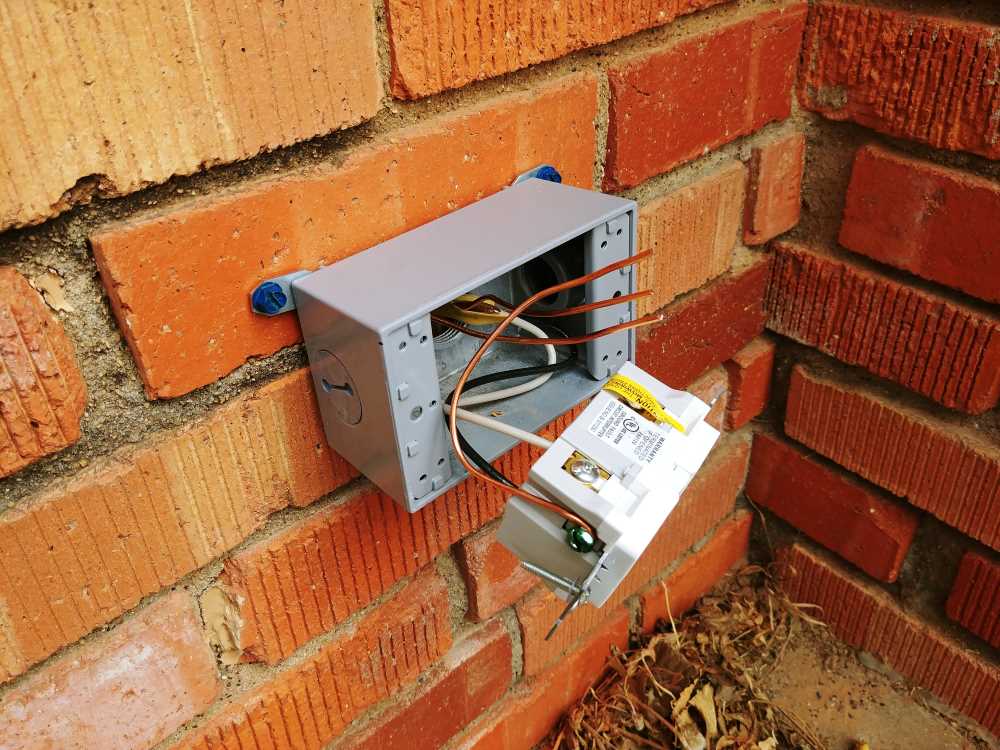
Exterior Outlet Being Wired
Conclusion
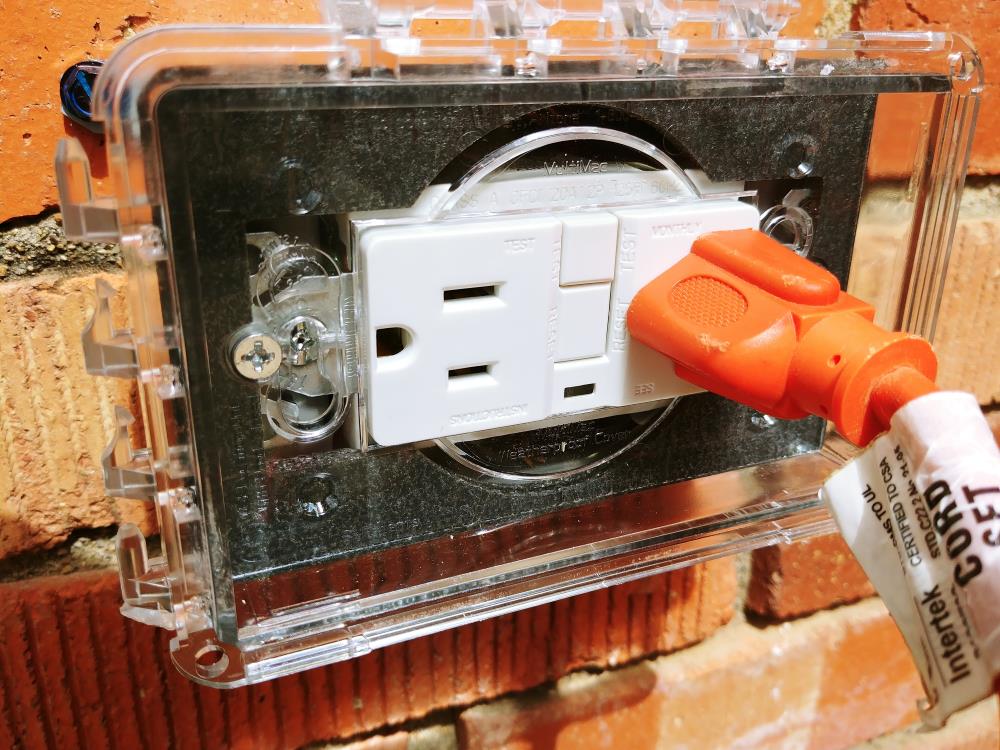
You can see in the finished product that the cover has a gasket to seal it to the box. The outlet cover I used kind of sucks. I much prefer this outlet cover and plan to switch it out later.
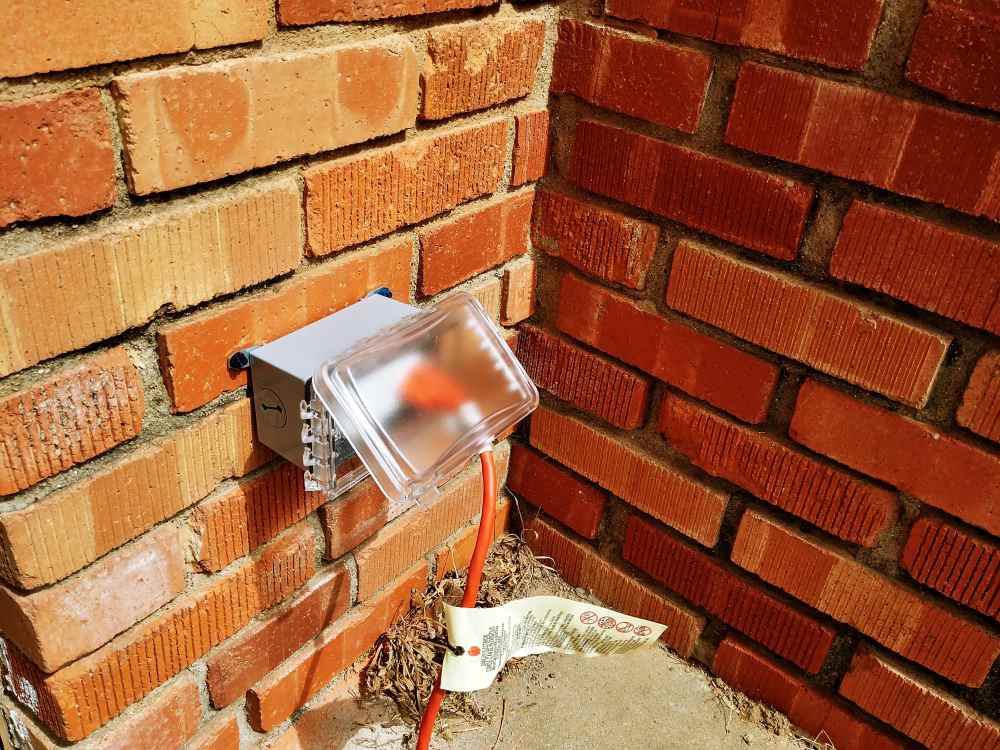
Exterior Outlet on Brick Completed
Other final steps that I would recommend include caulking the top and sides of the box with silicone. The silicone will prevent water from getting behind the box but leave the bottom open in case some water needs to get out. Also, you might need to caulk the closure plugs on the side to actually be considered water tight. Oh, you will also need to patch the drywall. I am pretty amateur at that myself, but great guides do exist online.
Well put togather
Nice job.
Caulking around an installed box is messy, involves a lot of caulk, and is not always 100% reliable. It might be better, imho, to make a hole in the wall that will just fit an adapter (or segment of conduit if using pvc) then attach said adapter/section to rear of box. When installing this assembly, liberally caulk around this “male attachment”, slide it in the hole in the brick wall, and secure the box to the wall. The caulk is hidden behind the box, and rather than serve as a superficial patch, it is securely sandwiched between the components, creating a more durable seal.