
Summary
I designed a track for HEXBUG nanos to run in as part of a gift for a Christmas party gift exchange. The track was designed in sketchup and printed on a LULZBOT TAZ printer at a local hobby store.
Concept
Since a store had opened offering 3D printing services I knew I wanted to undertake a 3D print project. My son has fallen in love with these little HEXBUG nanos but the track he has is pretty limited so I thought it would be cool to build a custom track. I ended up using this prototype print in a gift exchange but do plan to make him an even better one soon with all of the lessons I learned from making the track shown in this post.
The primary design constraints for this project were size and printing cost. For the size I was targeting a specific LULZbot 3d printer with a maximum printing footprint of about 10 inches square. The cost constraints were two fold. First, since this was being printed on a store’s printer I was going to be charged for print time and material cost so I needed to minimize both. Also, the track was going to be my entry into a yearly Christmas gift exchange so I need to keep the cost down low enough to be a reasonable entry in the exchange. There is no hard limit, but I was shooting for $20.
Design Process
The track was modeled in the free version of Sketchup. I used the Sketchup STL Export plug here to do the export to STL format.
This blog post is not a good format for teaching anyone how to do 3D modeling or drafting. I have experience from doing 3D modeling for fun as a teenager as well as a high school level drafting class to draw upon. 3D modeling can be pretty intimidating, but I think with programs like Sketchup or Microsoft’s 3D builder that it is more approachable than ever. YouTube will definitely be your friend for help with Sketchup.
My first design is shown in the following picture. It’s 10 inches square which is close to the maximum size supported by the large LULZBOT TAZ printers. I didn’t make any special effort to be smart about it and got back a price quote of over $50 to print it. This sent me straight back to the drawing board.
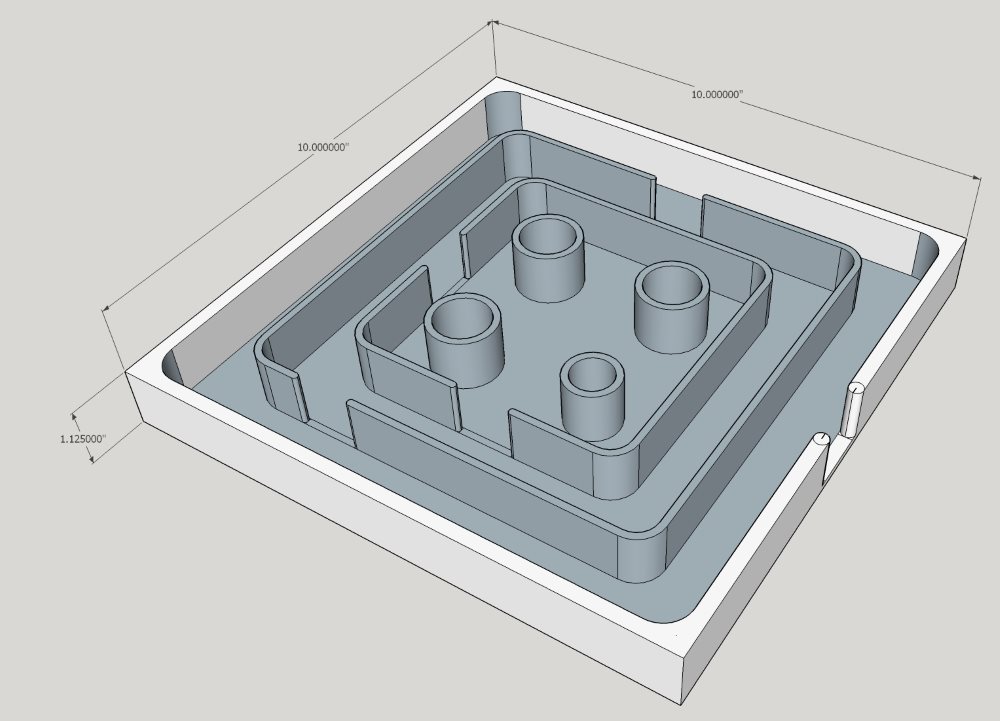
Hex Bug Track Design V1
After some research and discussion I decided that the primary issue with the original design was wall thickness and height. Online information is a bit conflicting about this, but in general it sounds like 2mm to 3mm walls are fine in most cases. I shortened the wall height to cut back on material cost and print time. One key design feature of all of the designs is curved inside walls so that the bugs can turn without getting stuck in corners. I simply eyeballed the radius and it turned out to work great.I took everything I figured out and learned and put it into the following version 2 design. The price quote for this print was still over $30.
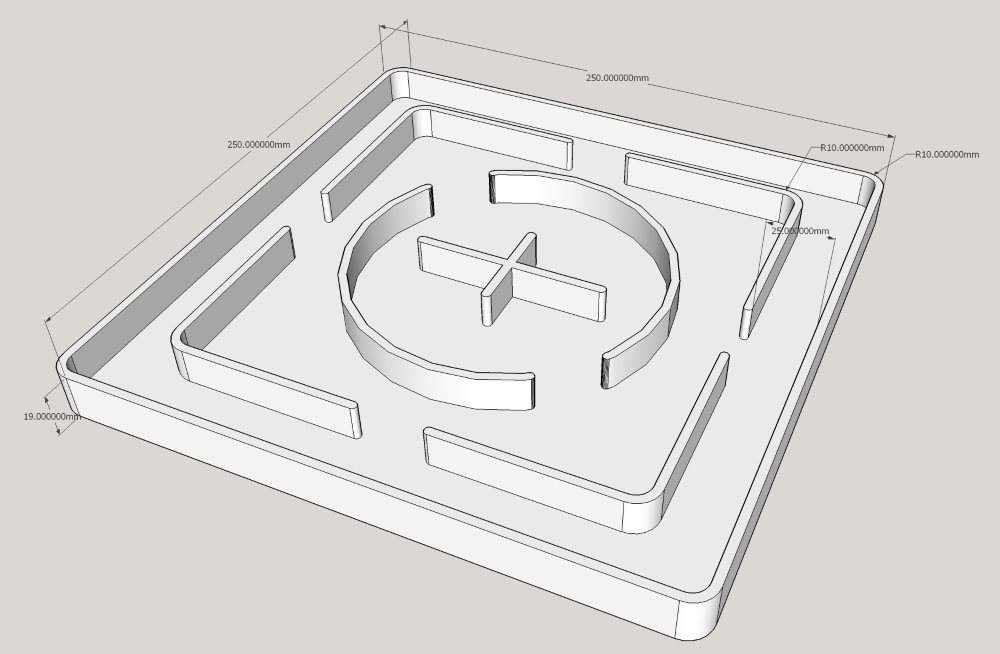
Hex Bug Track Design V2
Since the idea was to use this track for a gift exchange the $30 cost was a problem. That got me to thinking about what I could do to cut material further. What I realized was that I didn’t need solid walls and that in fact it would probably be cooler without them. I chose to try two different tactics to cut materials from the walls. The first was to slat several of the walls. The second idea was to just cut out circles to reduce the wall material. Not knowing which idea was best I actually used both of them in the design as an experiment. The final version which went to print includes both of these tactics and can be seen in the following diagram.
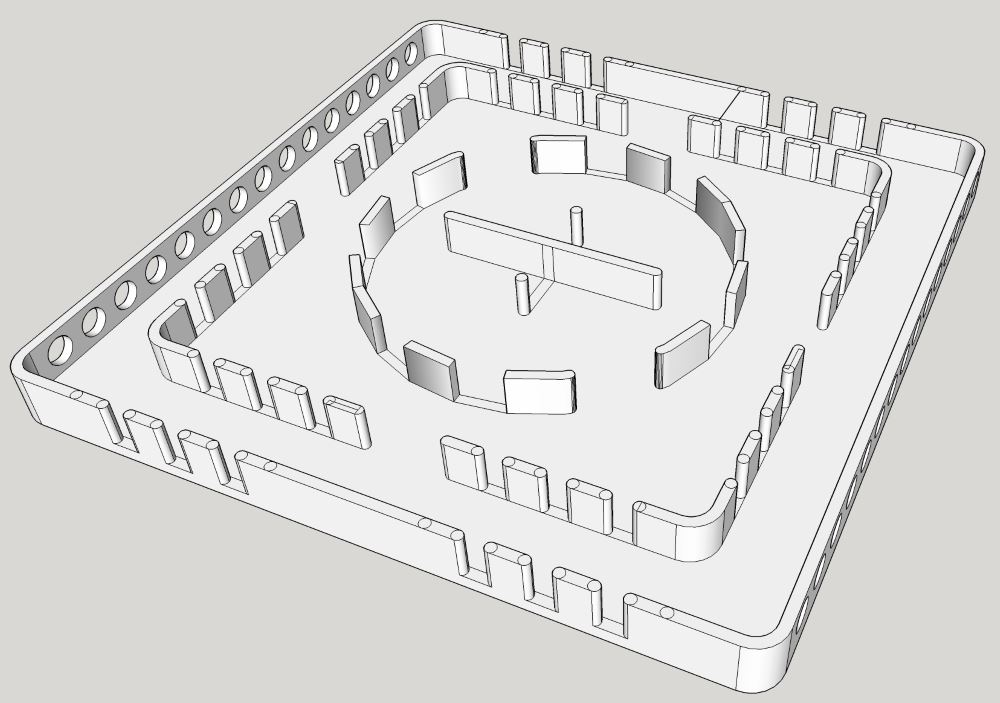
Hex Bug Track Design Final Print
The final design files can be downloaded here http://homediygeek.com/static/homediygeek_com_hex_bug_track_final.skp and here http://homediygeek.com/static/homediygeek_com_hex_bug_track_final.stl. This work is licensed under a Creative Commons Attribution-NonCommercial 4.0 International License.
3D Printing
The track was printed on a LULZBOT TAZ at Wired Hobbies in Lubbock, TX. Since I just emailed in the file and picked up the finished print a few days later I didn’t get a cool time-lapse video or anything like that. Please note that the track was printed with some sort of express or fast print setting (time is money) which is why its not a great example of what the printer is capable of. The bugs don’t seem to mind that its not perfect though. The total print cost worked out to $23.35 including sales tax.
Here are some pictures of the finished track.
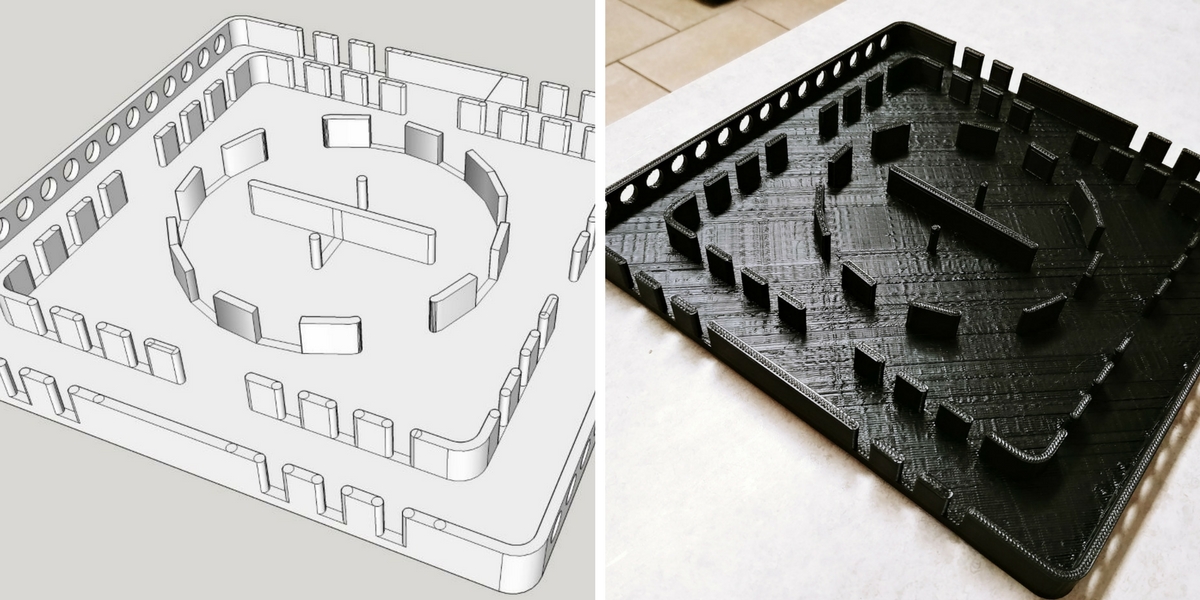
Hex Bug Track Design Versus Print
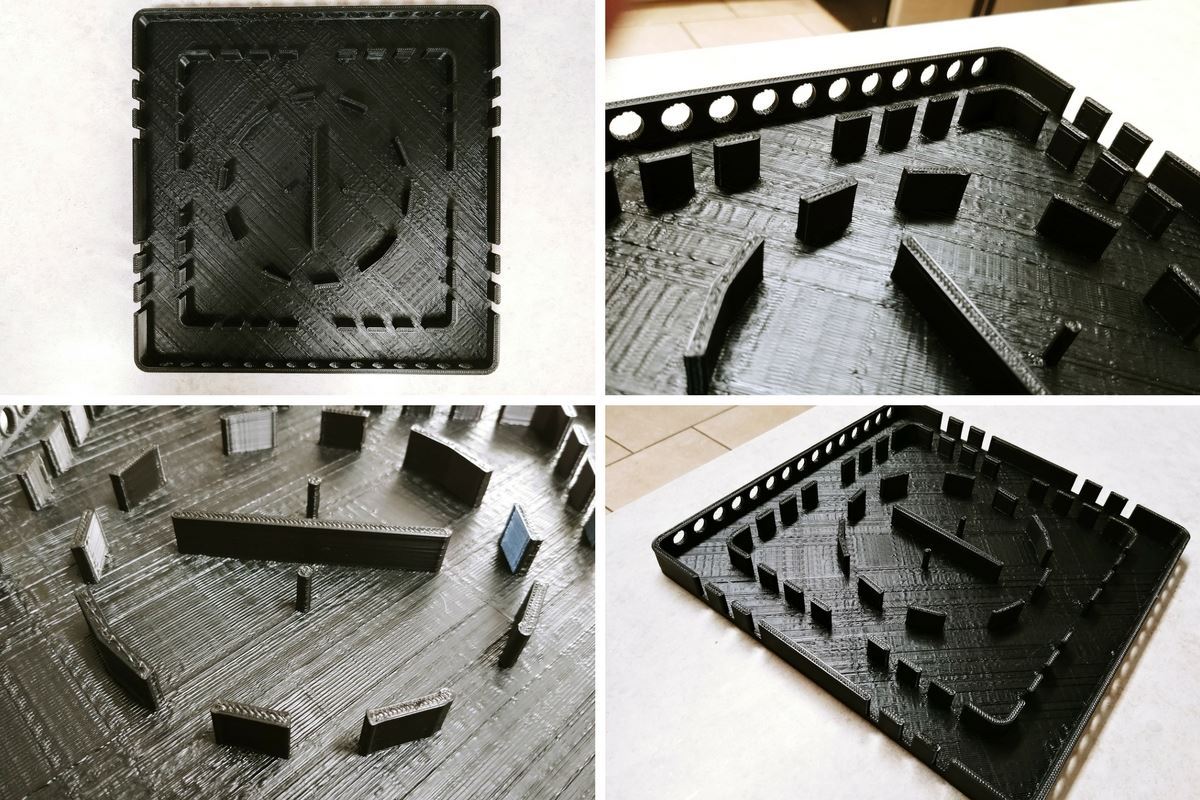
Hex Bug Track Print Details
Conclusion
While it ultimately cost more than I hoped I learned an incredible amount about the 3D printing process and capabilities. It actually works pretty well too, though it depends on the personality of the HEXBUGs you put in it.
pretty cool